WOCU-Monitoring Installation Guide
The purpose of this guide is to provide the necessary instructions for the correct installation of WOCU-Monitoring, through a few simple indications.
Requirements
WOCU-Monitoring can be installed on the following operating systems:
RedHat 9
RedHat 8
Debian 10 (deprecated in upcoming releases)
Debian 11
Debian 12
The minimum requirements to deploy the AIO (All-in-one) version of WOCU-Monitoring are detailed below.
Minimun |
Recomended |
||||
|---|---|---|---|---|---|
CPU (cores) |
Memory (GB) |
HD (GB) |
CPU (cores) |
Memory (GB) |
HD (GB) |
8 |
16 |
600 |
32 |
32 |
600 |
The maximum capacity for an AIO instance is 5,000 monitored devices with an average of 5 services per device. In environments with more than 25,000 services, WOCU-Monitoring must be deployed in a distributed architecture. The following table details the requirements for each of the modules.
Module |
CPU (cores) |
Memory (GB) |
HD (GB) |
|---|---|---|---|
Console |
16 |
32 |
120 |
Engine |
16 |
16 |
120 |
Indexer |
16 |
32 |
80 |
Metrics |
16 |
32 |
600 |
Logger |
16 |
32 |
600 |
Satellite |
16 |
32 |
120 |
Each Engine supports 25,000 services, and the number of Engines will be increased to meet the monitoring environment’s needs.
Disk usage depends largely on the number of events generated by the tool, which in turn depends on the stability and availability of the monitored platform. It will also vary according to the retention times used to store these events. Therefore, it is difficult to make a real calculation of the disk space that will be used. As a general rule of thumb, such an installation with a retention of 3 months may require 128 GB, although 256 GB is recommended.
Gconf can be deployed in both architectures, but it requires an additional server with the following hardware requirements.
CPU (cores) |
Memory (GB) |
HD (GB) |
|---|---|---|
4 |
4 |
100 |
To monitor the base system on which WOCU-Monitoring is installed, the WOCU Health monitoring pack is available, which is useful for optimising hardware resources
Note
The deployment addressed in this document is an AIO (All-in-one) installation.
Download installation package
Enterprise Version
The Enterprise version of WOCU-Monitoring is also available for download from the packages.wocu-monitoring.com repository, but in an authenticated form, so you will have to request credentials from the contact page.
Installation of the Enterprise version
WOCU-Monitoring can be installed with deb repositories (Debian/Ubuntu) or rpm repositories (RedHat).
Debian
There are two tracks:
Installation with packages
It will be necessary to go to the directory where the package is saved, and then execute the following command:
apt install -f ./[NOMBRE_DEL_PAQUETE].deb -y
Installation from repository
The first thing is to set up authentication for the WOCU-Monitoring package repository.
Note
Remember to request your customer credentials from the
contact <https://www.wocu-monitoring.com/contact/>`_ page and replace the ``<YOURCUSTOMERLOGIN>and<YOURCUSTOMERPASSWORD>variables with the values provided.All commands must be run on a console as root or with administrator privileges.
bash -c ' cat >>  /etc/apt/auth.conf <<EOF
machine download.wocu-monitoring.com
login <YOURCUSTOMERLOGIN>
password <YOURCUSTOMERPASSWORD>
EOF'
The repository is served by HTTPS, so if you do not have support for encrypted repositories, you must install the necessary
aptsupport:apt update apt install apt-transport-https wget
Next, you must add the package repository to the
sources.listfile on the machine and get the public key for it:Debian 11
echo "deb [arch=amd64] https://download.wocu-monitoring.com/repository/wocu-apt-internal-deb11 bullseye main" > /etc/apt/sources.list.d/wocu-monitoring.list
wget -O - https://files.wocu-monitoring.com/wocu-monitoring.gpg.key | apt-key add -
Debian 10
echo "deb [arch=amd64] https://download.wocu-monitoring.com/repository/wocu-apt-internal-deb10 buster main" > /etc/apt/sources.list.d/wocu-monitoring.list
wget -O - https://files.wocu-monitoring.com/wocu-monitoring.gpg.key | apt-key add -
Finally, the update of the local repository is required, together with the installation of the AIO package of WOCU-Monitoring:
apt update
apt install wocu
RedHat
There are two tracks:
Installation with packages
It will be necessary to go to the directory where the package is saved, and then execute the following command:
dnf install -y ./[NOMBRE_DEL_PAQUETE].rpm
Installation from repository
The first thing is to set up authentication for the WOCU-Monitoring package repository.
Note
Remember to request your customer credentials from the
contact <https://www.wocu-monitoring.com/contact/>`_ page and replace the ``<YOURCUSTOMERLOGIN>and<YOURCUSTOMERPASSWORD>variables with the values provided.All commands must be run on a console as root or with administrator privileges.
bash -c ' cat >>  /etc/yum.repos.d/wocu-monitoring.repo <<EOF
[wocu-monitoring]
name=Wocu-Monitoring
baseurl=https://[YOURCUSTOMERLOGIN]:[YOURCUSTOMERPASSWORD]@https://download.wocu-monitoring.com/repository/redhat8/
enabled=1
gpgcheck=1
gpgkey=https://files.wocu-monitoring.com/wocu-monitoring.gpg.key
EOF'
After adding the new repository, update the repository metadata to ensure that your package manager recognizes the new repository:
dnf makecache
Next, you must add the package repository to the
sources.listfile on the machine and get the public key for it:echo "deb [arch=amd64] https://download.wocu-monitoring.com/repository/wocu-apt-internal-deb10 buster main" > /etc/apt/sources.list.d/wocu-monitoring.list wget -O - https://download.wocu-monitoring.com/files/wocu-monitoring.gpg.key | apt-key add -
Finally, the update of the local repository is required, together with the installation of the AIO package of WOCU-Monitoring:
dnf update
dnf install wocu
Installation of additional modules
Note
Only applicable to Debian environments.
Additional modules can be installed depending on the customer’s needs and requirements.
Snmp-mibs-downloader
If the monitoring you are going to perform with WOCU-Monitoring is mainly based on SNMP requests, it is recommended to install this package, which includes the proprietary MIBS of most technologies available in the market.
The package is not installed by default in distributions, as it is not an Open Source licensed package. To install it, add support for downloading packages from the non-free repository:
- Debian 11
echo "deb http://deb.debian.org/debian bullseye main contrib non-free" >> /etc/apt/sources.list
- Debian 10
echo "deb http://deb.debian.org/debian buster main contrib non-free" >> /etc/apt/sources.list
Immediately install the snmp-mibs-downloader package:
apt update && apt install -y snmp-mibs-downloader
Initial configuration
The initial configuration of WOCU-Monitoring starts from a single file located at:
editor /etc/wocu/wocu.yml
It is not necessary to modify this file, as the default values are intended to work out-of-the-box. You can check the file with the default values in the following path:
editor /etc/wocu/default.yml
Attention
When modification is necessary, never make the change to the /etc/wocu/default.yml file (it is overwritten between updates). Instead, modify the /etc/wocu/wocu.yml file, adding new values (if necessary).
Once the final configuration has been obtained, run the following command to update the system with the modified values. This process may take This process can take up to 5 minutes.
wocu-ctl configure
Note
Additionally, you can obtain information about the current state of your processes by executing (in another terminal) the following command:
tail -f /tmp/minion.salt.log
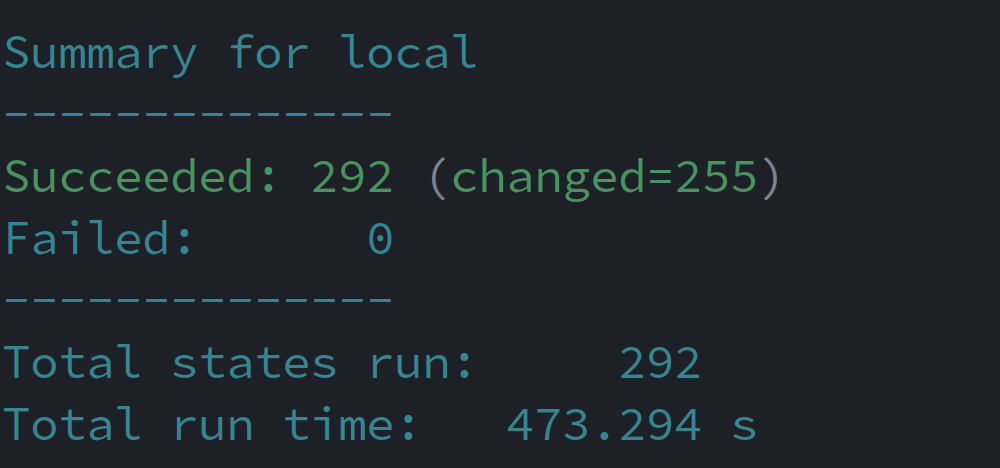
As an example, this would be a possible response from the status command:
Use the following command to launch WOCU-Monitoring processes:
wocu-ctl start
Next, check the status of the processes started through this command:
wocu-ctl status
Finally, it will be necessary to modify the /etc/hosts file by executingthe following command. Skip in case of upgrade.
echo -e "#WOCU \n<yourserverip> wocu\n" >> /etc/hosts
Access the WOCU-Monitoring interface at the following address from your browser:
https://<yourserverip>/aggregator
By default the login credentials are:
User: admin Pass: admin
Important
For security reasons, we recommend that you change the administrator on first access.
You can continue with the recommended First steps to access the web portal, finish configuring the tool and start monitoring your hosts.
Installation of the Free version
The following are the instructions necessary for the correct installation of the free version of WOCU-Monitoring. The deployment that is an AIO (All-in-one) type installation.
Requirements
WOCU-Monitoring can be installed on the following operating systems:
Debian 11
RedHat 8
Important
An internet connection is necessary to start the installation process.
The free license for WOCU-Monitoring supports up to 1500 hosts. The requirements for this type of deployment are 16 GB RAM and 4 CPU cores.
An installation of this type requires guilabel:256 GB for 6 months of retention.
Download installation package
The installation package for the free version of WOCU-Monitoring is available at:
https://www.wocu-monitoring.com/download-form/
Important
All commands must be run on a console as root or with administrator privileges.
Then execute the following command:
- Debian 11
apt install -f ./[NOMBRE_DEL_PAQUETE].deb -y
- RedHat 8
dnf install -y ./[NOMBRE_DEL_PAQUETE].rpm
Installation of additional modules
Note
Only applicable to Debian environments.
The monitoring via TRAPS SNMP, requires the installation of the MIBS, which can be found in an additional package, within the non-free repositories.
The package is not installed by default in distributions, as it is not an Open Source licensed package.
To install it, add support for downloading packages from the repository non-free:
- Debian 11
echo "deb http://deb.debian.org/debian bullseye main contrib non-free" >> /etc/apt/sources.list
- Debian 10
echo "deb http://deb.debian.org/debian buster main contrib non-free" >> /etc/apt/sources.list
Immediately install the snmp-mibs-downloader package:
apt update && apt install -y snmp-mibs-downloader
Initial configuration
After installing the package, the deployment process will be executed by using the the following command. This process may take up to about 5 minutes.
wocu-ctl configure
Note
Additionally, you can obtain information about the current state of your processes by executing (in another terminal) the following command:
tail -f /tmp/minion.salt.log
As an example, this would be a possible response from the status command:
Next, the /etc/hosts file must be modified by executing the following command:
echo -e "#WOCU \n<yourserverip> wocu\n" >> /etc/hosts
Use the following command to launch WOCU-Monitoring processes:
wocu-ctl start
Next, check the status of the processes started through this command:
wocu-ctl status && systemctl status mysql
The expected outcome would be the following:
chromium                                  RUNNING
elasticsearch                             RUNNING
grafana                                   RUNNING
influxdb                                  RUNNING
kibana                                    STOPPED
lmd                                       RUNNING
lmd-aggregator                            RUNNING
memcached                                 RUNNING
mongodb                                   RUNNING
nginx                                     RUNNING
npcd                                      RUNNING
php-fpm                                   RUNNING
rabbitmq                                  RUNNING
redis                                     RUNNING
rrdcached                                 RUNNING
shinken:shinken-arbiter                   RUNNING
shinken:shinken-broker                    RUNNING
shinken:shinken-poller                    RUNNING
shinken:shinken-reactionner               RUNNING
shinken:shinken-receiver                  RUNNING
shinken:shinken-scheduler                 RUNNING
snmptrapd                                 RUNNING
snmptt                                    RUNNING
td-agent                                  RUNNING
thruk                                     RUNNING
wocu-aggregator                           RUNNING
wocu-aggregator-workers:generic-worker    RUNNING
wocu-aggregator-workers:report-arbiter    RUNNING
wocu-aggregator-workers:report-notifier   RUNNING
wocu-aggregator-workers:report-runner     RUNNING
wocu-aggregator-workers:workers-beat      RUNNING
wocu-import-tool                          RUNNING
wocu-import-tool-celery-beat              RUNNING
wocu-import-tool-celery-flower            RUNNING
wocu-import-tool-celery-monitor           RUNNING
wocu-import-tool-celery-worker            RUNNING
wocu-snmptrap-consumer                    RUNNING
Attention
Kibana is always disabled by default.
Access the WOCU-Monitoring interface at the following address from your browser:
https://<yourserverip>/aggregator
By default the login credentials are:
User: admin
Pass: admin
Important
For security reasons, we recommend that you change the administrator on first access.
You can continue with the recommended First steps to access the web portal, finish configuring the tool and start monitoring your hosts.
Installation of licenses
Operations
To configure the license for WOCU-Monitoring from version 57 onwards, it will first be necessary to obtain a valid license by contacting the Sales Team.
The license must be included in the following components of WOCU-Monitoring:
Aggregator
Import-tool
Which means that the following components will require a license:
AIO
agrgegator
monitoring
monitoring-aio
monitoring-visor
To install the license, you will have a compressed file (.zip) containing two files:
wocu.license
wocu_key.pub
For the Aggregator component, the reference to these files are found in:
/etc/wocu/default.yml.wocu-aggregator: license_file_path: /etc/wocu/wocu.license license_public_key_file_path: /etc/wocu/wocu.license.key.pub
Next, it is necessary to copy the extracted files to the specified paths:
wocu.license: mover/copiar a
/etc/wocu/wocu.licensewocu_key.pub: mover/copiar a
/etc/wocu/wocu.license.key.pub
For the Import-Tool component, the reference for those files is located in:
/etc/wocu/default.yml.wocu-import-tool: license_file_path: /etc/wocu/wocu.license license_public_key_file_path: /etc/wocu/wocu.license.key.pub
Next, it is necessary to copy the extracted files to the specified paths:
wocu.license: mover/copiar a
/etc/wocu/wocu.licensewocu_key.pub: mover/copiar a
/etc/wocu/wocu.license.key.pub
Having completed the above, set up and restart the components:
AIO and Monitoring-AIO
wocu-ctl configure
wocu-ctl restart wocu-aggregator
wocu-ctl restart wocu-import-tool
aggregator and aggregator-api
wocu-ctl configure
wocu-ctl restart wocu-aggregator
monitoring and monitoring-visor
wocu-ctl configure
wocu-ctl restart wocu-import-tool