Scheduled Report Generation
WOCU allows the automation of the operation of the Reports, thanks to the possibility of scheduling their generation and launch at the user’s discretion.
This functionality speeds up the process of producing and processing reports, thanks to the wide flexibility in the scheduling of dates and periodicity, and in the reduction of waiting times for obtaining results, produced by the large amount of information that is extracted from different databases, added to the intense computational capacity to process such data.
Report scheduling is possible from:
1. Creation form
Within the form for creating a report, a button has been added next to the Create button, to schedule the report whose configuration is the one filled in the form. This button to schedule a report is labelled Schedule.
Clicking on this button will open a new form to schedule the report.

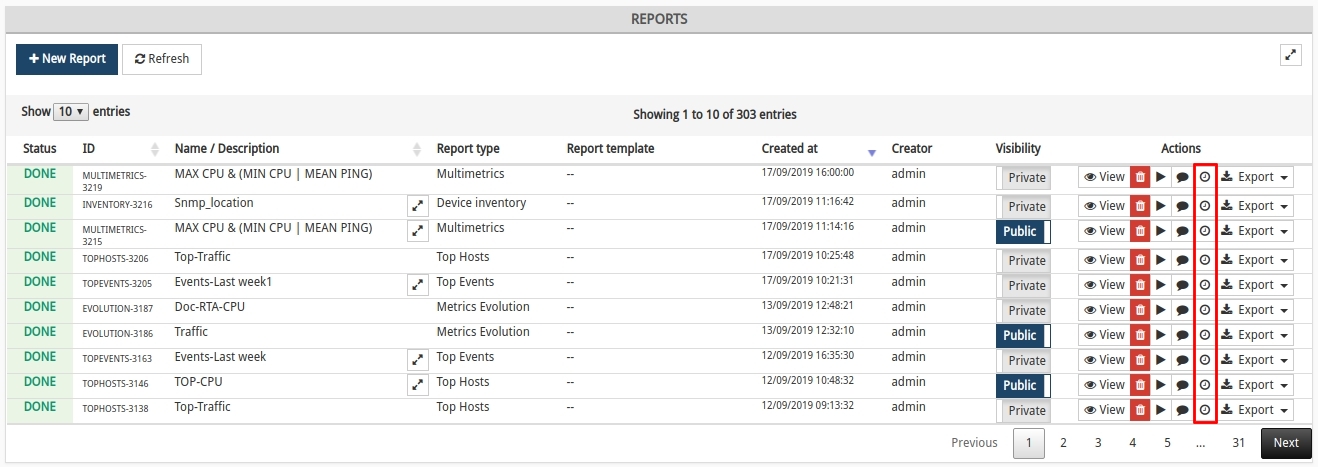
2. List of management and processing of reports
In the report overview actions, it is possible to schedule a given report, thanks to the option Shedule this report, identified by the clock icon. Clicking on this button will open a form to schedule the report.
Form for creating a Report schedule
The following options are available in the form for creating a report schedule:
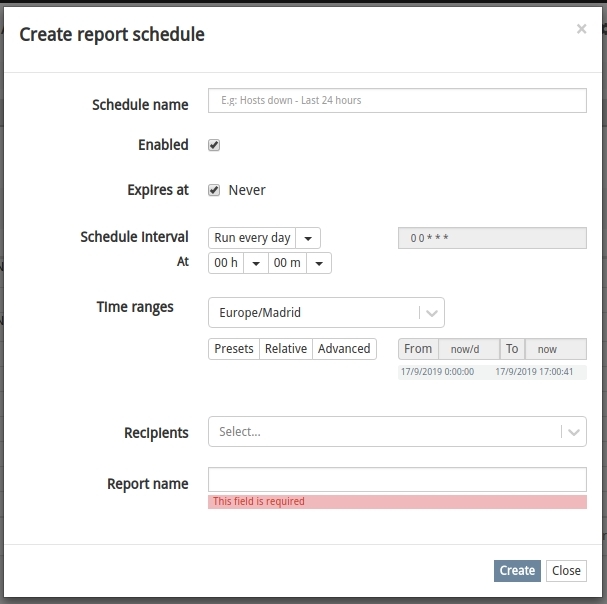
- SCHEDULE NAME
Mnemonic name assigned to the scheduling of a report.
- ENABLED
This option indicates whether report scheduling is active (box checked) or not (box unchecked). It allows at a certain point in time to leave the scheduling configured, without generating reports until this option is enabled again.
- EXPIRES AT
This option indicates whether the scheduling of a report has an expiry date.
If the Never checkbox is checked, this schedule will not expire and will be launched cyclically until it is reconfigured or permanently deleted. Otherwise, a field shall be displayed to define the date and time at which the report schedule will expire.
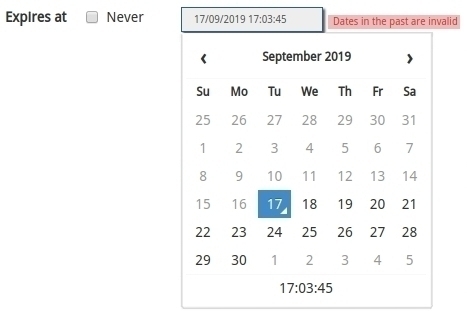
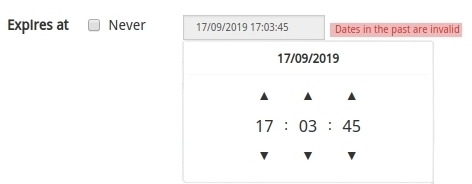
By clicking on the time under the monthly calendar, you can set a specific time for expiry. Use the arrows in the hour, minute and second boxes to set the desired time.
Important
Logically, it is not possible to choose a date later than the current date.
- SCHEDULE INTERVAL
In this section, the periodicity with which the report will be launched is established. To do this, there is a selector with multiple options that, depending on the one selected, will reveal configurations according to the option chosen.
1. Run every day: this option will relaunch the report daily. For its configuration it is necessary to indicate the hour and minute at which the report will be launched every day.

2. Run every week: this option will relaunch the report weekly. In its configuration a series of selectors are displayed:
Run at days: to define the day(s) of the launch week.
Starting at: to define the hour and minute.
Presets: predefined configuration selector for automatic report generation. Clicking on one of the available options will automatically set the corresponding configuration:
Working days: reports will be launched only on working days (Mo, Tu, We, Th, Fr).
Weekend: reports will be launched only on weekends (Sa, His).
Default: this option configures by default the launch of reports on Mondays (Mo) and at the time set by the user.
In this way it is possible to set which days of the week and at what exact time the report will be launched.

3. Run every month: this option will relaunch the report monthly. The following selectors are displayed in its configuration:
On day: to indicate the day of the month on which the report will be launched. The numbers 1 to 31 represent the days of the month.
At: to schedule the hour and minute at which the report will be launched on each set day of each month.

Attention
If 29, 30 or 31 days are selected, months with fewer days are excluded from the execution.
4. Run on cron schedule: finally, this option allows you to make a configuration as you would do in Crontab format, giving you all the flexibility that this tool offers for more explicit cases.

Important
To use this option you need to know the Crontab format tool.
Note
In each of the available programming intervals, a text field (not modifiable) is included, where the crontab configuration to be applied is indicated.

- TIME RANGES
This section indicates the range in which samples will be collected to compute the report. This provides greater flexibility when collecting data, allowing reports to be launched with information from days, weeks or months prior to the moment of running the report. In this way, as time progresses, the date ranges from which the report collects information will also advance.
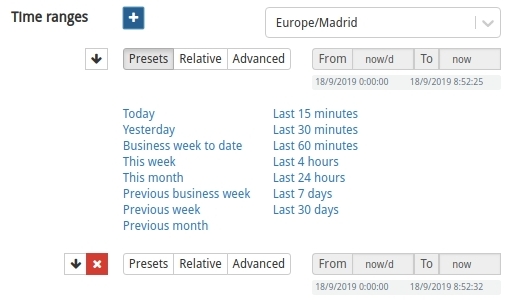
Each of the ranks has the options available:
Button +: to nest several date ranges related to the report launch.
Button ↓: to duplicate a given date range.
Button X: to delete a given date range.
Time zone selector: to be used to set the date range. This option is useful for operators who want to schedule reports in a time zone other than the one they are in.
Note
For the representation of date ranges the datetokens format is used, displayed from the from and to fields. This component is purely informative as it does not apply any changes.
For more information, please consult the following links:
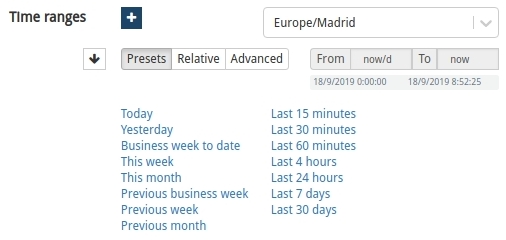
For the configuration of relative date ranges, one of the three available options shall be used:
1. Presets: offers several preconfigured range criteria. For example, the option Today, indicates that the report will be launched with the samples collected during the time period elapsed in today’s day, or This week will use the samples collected during the time period elapsed in the current week (from the start day of the week, to the current day and time). Simply select one of the criteria to activate this setting.
2. Relative: this criterion allows you to define a customised relative range for the collection of report information. It is more flexible than the Presets option, where the ranges are preset and cannot be modified.
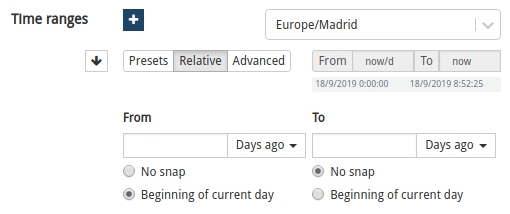
The time ranges can be set in minutes, hours, days, weeks and months back using the From: and To: selectors, and in the case of the latter, there is also the option Just now, which would take the samples from the from set, up to the very moment the report was launched.
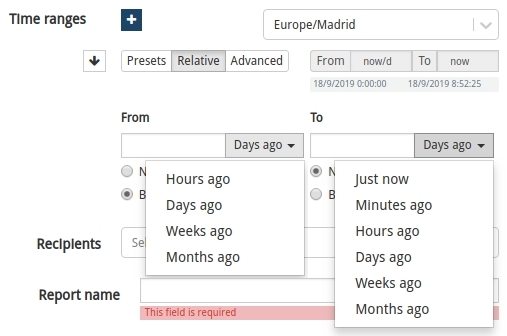
Within the selection of the ranges there are two further complementary settings for the limitation of results:
No snap: by activating this option the date that will be set will be the current date minus the determined time.
Example
At 15:00 h. on 12/02/2019, if the report is configured from one day ago (From: 1 days ago), to 5 minutes ago (To: 5 Minutes ago) from the current time, samples recorded from 15:00 h. on 11/02/2019 to 14:55 h. on 12/02/2019 will be collected.
Beginning of current (minute | hour | day | week | month): in this case the date to be set is the current date, minus the determined time truncated at the beginning of the selected magnitude.
Example
Being 15:00 h. on 12/02/2019, if the report is set from one day ago (From: 1 days ago), the date to be set will be 11/02/2019 00:00 h., which is the beginning of the previous day. If with the same current date and time, 12/02/2019 at 15:00 h. (Tuesday) is set from one week ago (From: 1 weeks ago), the date to be set will be 04/02/2019 00:00 (Monday), which is one week ago from the current date truncated to the start of the week (Monday).
3. Advanced: this criterion allows the definition of a date range for sample collection, using the format datetokens.
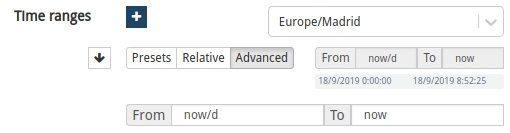
Note
For more information on datetokens see the following links:
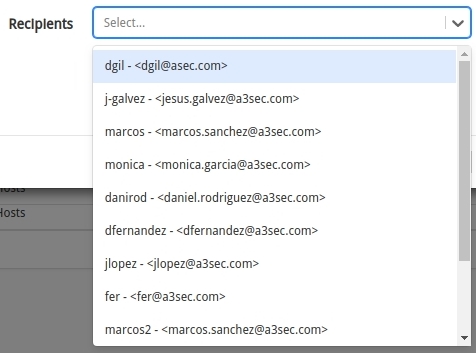
- RECIPIENTS
This option allows you to select zero, one or several recipients to whom an email will be sent when the report is finished.
Attention
Only users with permissions to view the realm in question will be available in the drop-down menu, with the exception of the Administrator, who will have the total list of users registered in the system, regardless of the viewing permissions or realm restrictions associated with them. More information can be found at: Realm display configuration.
Remember
By selecting more than one contact as recipient, the report will become public for the users of the Realm, regardless of whether the report was set to private in the initial configuration.
- REPORT NAME
Finally, this field allows you to set the identifying name of the next report to be generated. This is a mandatory field.

Once the configuration is complete, the report will be generated according to the parameters set by clicking on the blue Create button. Otherwise, use the Close option to go back without making any changes.

Crontab format
The format of this field is similar to the format of a UNIX crontab. It consists of five space-separated codes, where each of these codes specifies a specific unit of time: minutes, hours, days of the week, days of the month, months of the year. In each of these codes we will specify separately:
At what minutes we want the report to run (using the first code).
At what time we want the report to run (using the second code).
Which days of the week we want the report to run (using the third code).
Which days of the month we want the report to run (using the fourth code).
Which months of the year we want the report to run (using the fifth code).
Every minute, it checks whether a report should be run or not, based on whether we have allowed a report to run in the current minute, and at the same time in the current hour, and at the same time in the current day of the week, and at the same time in the current day of the month, and at the same time in the current month of the year.
To provide a simple approximation of these codes, some values that can be placed in each field are:
Asterisk (*): means that it can be executed every minute, or every hour, or every day of the week, or every day of the month, or every month of the year.
A numeral: means that it can be executed when the minute hand, hour, day of the week number, day of the month number or month of the year number matches the one we have told it:
As a minute hand we can specify a number between 0 and 59.
As the time of day we can specify a number between 0 and 23.
As a day of the week we can specify 0 for Sunday, 1 for Monday, and so on up to 6 for Saturday. In the case of the days of the week, it is legal to use the words mon, tue, wed, thu, fri, sat, sun, to refer to the days of the week in a more literal way.
As the day of the month we can specify a number between 1 and 31 (taking into account the fact that not all months will have 31 days).
As the month of the year we can specify a number between 1 and 12.
Examples
30 12 * 1 * means that the report can be run “every 1st day of every month, at 12:30, whatever day of the week it is“.
0 0 mon * * means that the report can be run “every Monday at midnight (00:00), every day of every month of the year“.
However, for each unit, we can also specify more than one possible option, if we separate them with commas.
Examples
0 0 mon,tue,wed,thu,fri * * means that the report will run every Monday, Tuesday, Wednesday, Thursday and Friday at midnight.
4,8,15,16,23,42 6 * * * * means that the report will run every day at 6:04, 6:08, 6:15, 6:16, 6:23 and 6:42.
In addition, the following shortcuts are accepted for declaring multiple values:
Two numbers separated by a hyphen: allow you to specify a date range. So we can use 10-15 as an alternative for 10,11,12,13,14,15.
Asterisk-bar-numeral: allows you to specify all values that are divisible by the numeral you specify. For example, */2 equals all possible values divisible by 2; */5 equals all possible values divisible by 5.
For example, programming 20-25 */5 * * * *, causes the report to run at minutes 20, 21, 22, 23, 24 and 25 at times 0, 5, 10, 15 and 20.
Important
After executing at 20:25, the next execution will be at 0:20, because 0 is the next number divisible by 5 after the 20th hour. In other words, the numeral does not mean that it is executed every N days, hours or minutes, only that it is executed in a unit of time divisible by the numeral provided.