Engine Config
En esta sección se centraliza la gestión a nivel global de determinadas acciones en WOCU-Monitoring. Permite habilitar o deshabilitar ciertos comportamientos que afectan al funcionamiento interno del sistema, según las necesidades del entorno gestionado.
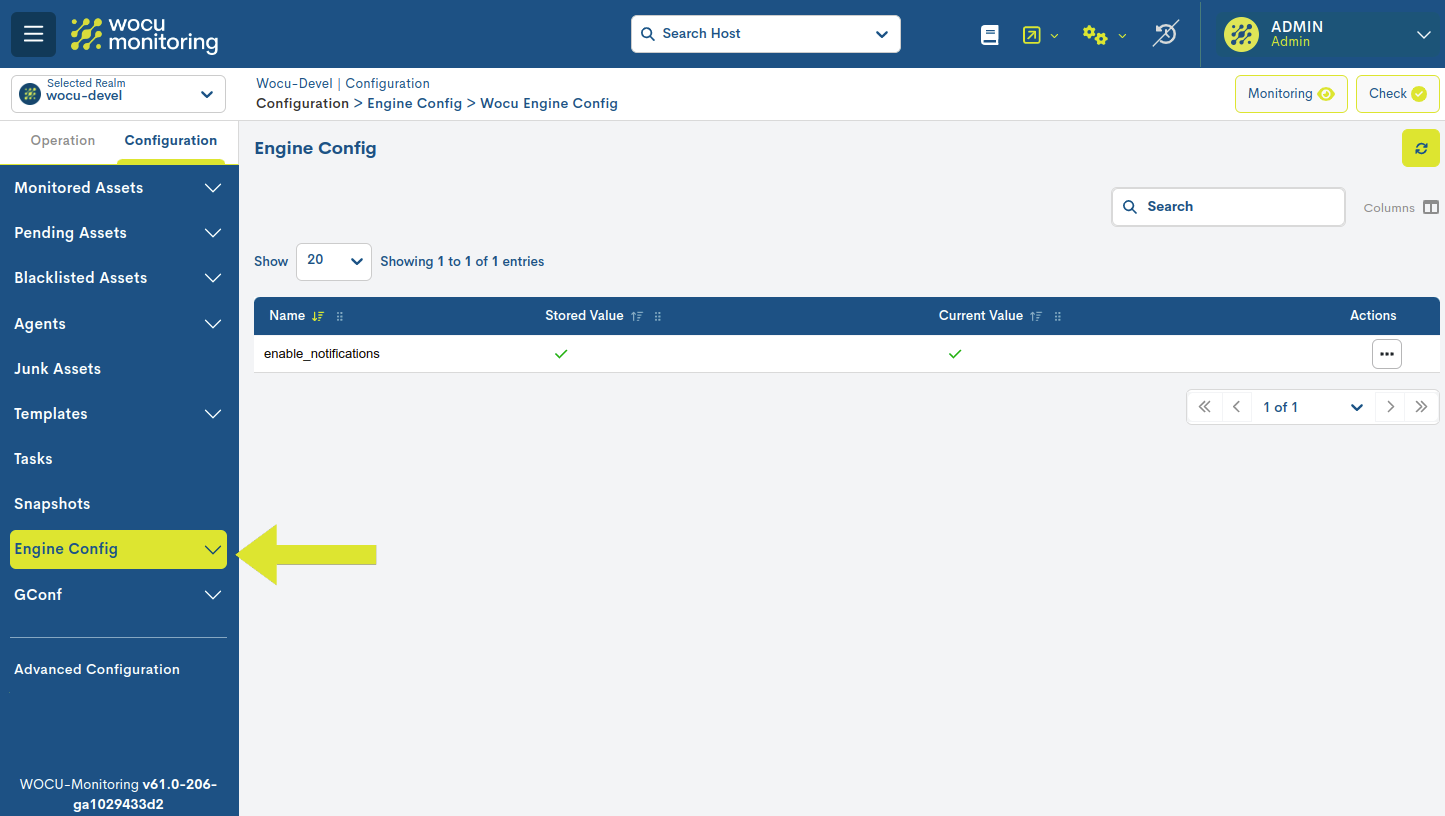
WOCU Engine Config
First instance of the global management ecosystem for certain actions in WOCU-Monitoring. Specifically, from this point it is possible to adjust the notification logic and/or system reload without needing to manually edit configurations or restart services via the console.
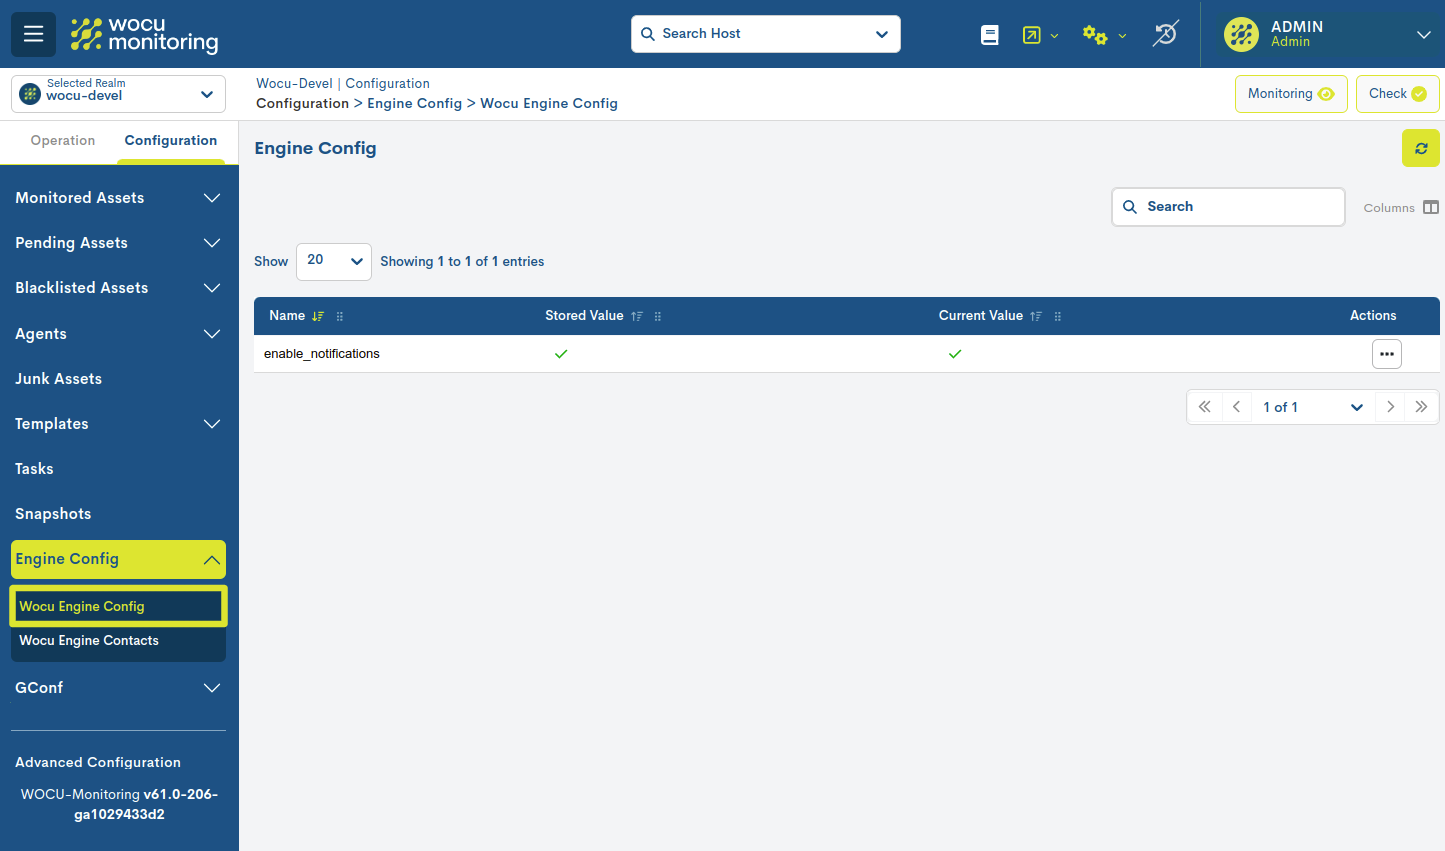
ction: Enable notification
As its name suggests, this action enables or disables all notifications and alerts related to the devices and services monitored and managed in WOCU Monitoring. This approach allows users to configure and control notifications according to their needs and preferences, which can be useful for avoiding unnecessary notifications or controlling the information they receive.
When this action is enabled, the system will issue notifications for relevant events such as:
State changes (OK, WARNING, CRITICAL, DOWN, etc.).
Service restorations.
Incidents in devices, services, or business processes.
The following information is provided for this action:

- ✓ Name
Name of the action related to enabling or disabling notifications: Enable notifications.
- ✓ Stored Value
This field indicates whether notifications are enabled or disabled depending on system or database configuration. A green tick indicates that notifications are active, while a red cross indicates they are disabled.
This field is updated immediately after the action is executed.
- ✓ Current Value
This field stores information about the real and current status of the action.If the system allows you to enable or disable notificationsdynamically, this value will reflect whether notifications are active orinactive at this time.
Therefore, Current Value reflects the current state and StoredValue reflects the configured state. It is helpful to distinguish between a temporary change (Current value) and the default behavior of thesystem (Stored value).
Finally, the possible actions to take regarding the “Enable notifications” action are:
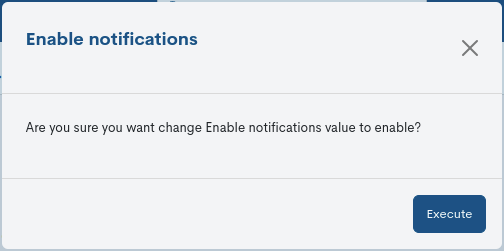
Enable notifications
This action triggers the sending of notifications, so the system regenerates and sends alerts through the configured channels(email, integrations, etc.), re-establishing communicationwith the contacts and the monitored infrastructure.

Disable notifications
This action disables and stops the sending of notifications, so the system continues to monitor and record events, but does not notify the user.

Schedule Command
This action allows you to schedule the activation or deactivation of system notifications within a defined time period.
Selecting this option displays a configuration window with the following fields:the following fields:
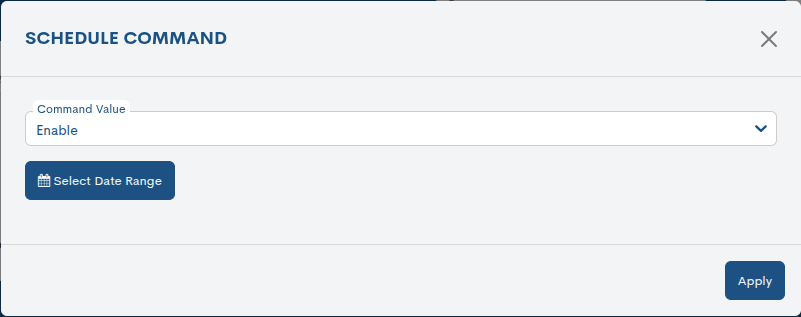
Command Value: allows you to define which action will be executed in a programmed manner:programmed way:
Enable: Schedules the automatic activation of notifications, causing the system to resend alerts when appropriate.
Disable: Schedule the automatic deactivation of notifications, preventing alerts from being sent during the configured period.
Date range: Allows you to define the time interval during which the scheduled action will be applied. That is, if Disable is selected and a date range is configured, notifications will remain disabled during that period. When the configured date range ends, the system will return to its normal behavior according to the defined schedule.
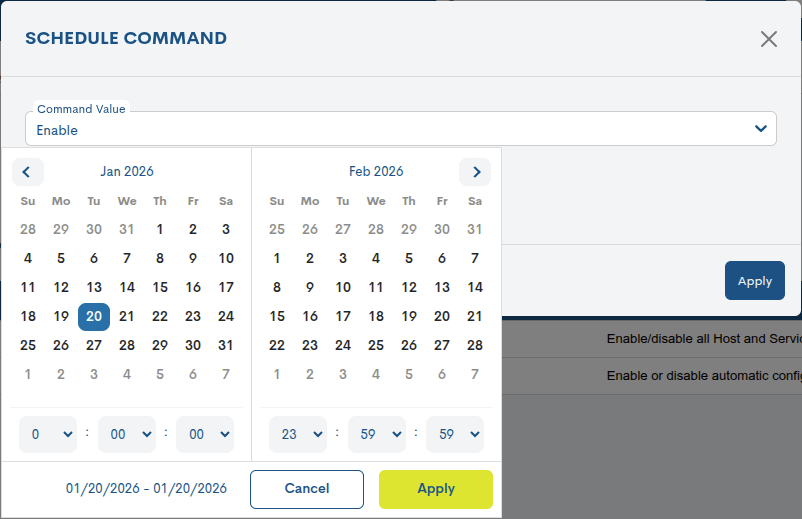
Finally, after clicking Apply, the system creates a scheduled task (cron job) that will automatically activate or deactivate the notifications within the specified period.
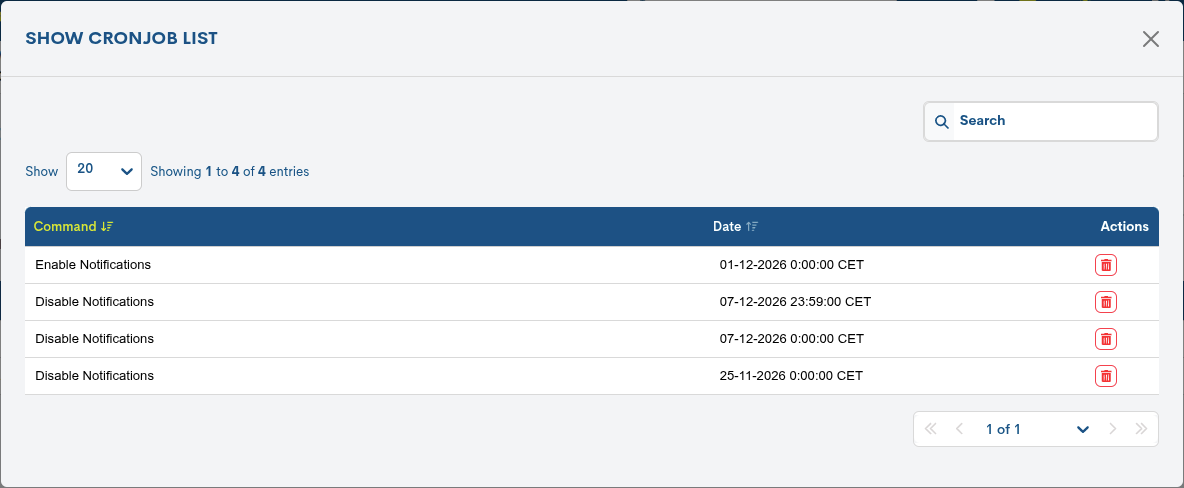
Show Cronjob List
Displays the history of scheduled tasks (cronjobs) related to notifications.notifications.
Displays the history of scheduled tasks (cronjobs) related to notifications.notifications.
Action: Auto reload
The global action Auto reload allows you to automate the execution of the action Check of WOCU-Monitoring, ensuring that the changes made to the system configuration are detected and applied without the need for manual intervention.
Specifically, the system checks for new modifications to the configuration (hosts, services, templates, business rules, etc.), validates and applies these changes, and finally updates the system so that the active configuration reflects the latest changes.
This functionality is especially useful for ensuring that all configuration changes are applied immediately and improving operational efficiency in the daily management of the system.
The following information is provided for this action:

- ✓ Name
Name of the action related to enabling or disabling the system automatic reload action: Auto reload.
- ✓ Stored Value
This field indicates whether automatic reloading is enabled or disabled, depending on the system or database settings. A green checkmark indicates that automatic reloading is active, while a red cross indicates that it is disabled.
This field is updated immediately after the action is executed.
- ✓ Current Value
This field stores information about the current status of the action. If the system allows automatic reloading to be enabled or disabled dynamically, this value will reflect whether it is currently active or inactive.
Therefore, Current Value reflects the current state and StoredValue reflects the configured state. It is helpful to distinguish between a temporary change (Current value) and the default behavior of thesystem (Stored value).
Finally, enabling/disabling the action is done from Actions:
Enable Auto Reload
To enable automatic system refresh, the user must confirm the action in the corresponding dialog box. By clicking “Apply,” the system activates the process of automatically detecting and applying configuration changes, ensuring that the platform remains up-to-date without manual intervention.

Disable Auto Reload
To disable automatic system reloading, the user must also confirm the action in the corresponding dialog box. By clicking Apply, the system deactivates this process, so the configuration changes are not applied automatically and it will be necessary to manually execute the action Check for the changes to take effect.

WOCU Engine Contacs
Section for storing and managing contacts associated with the global notification settings. From this space, it is possible to edit, delete, and create new contact profiles.
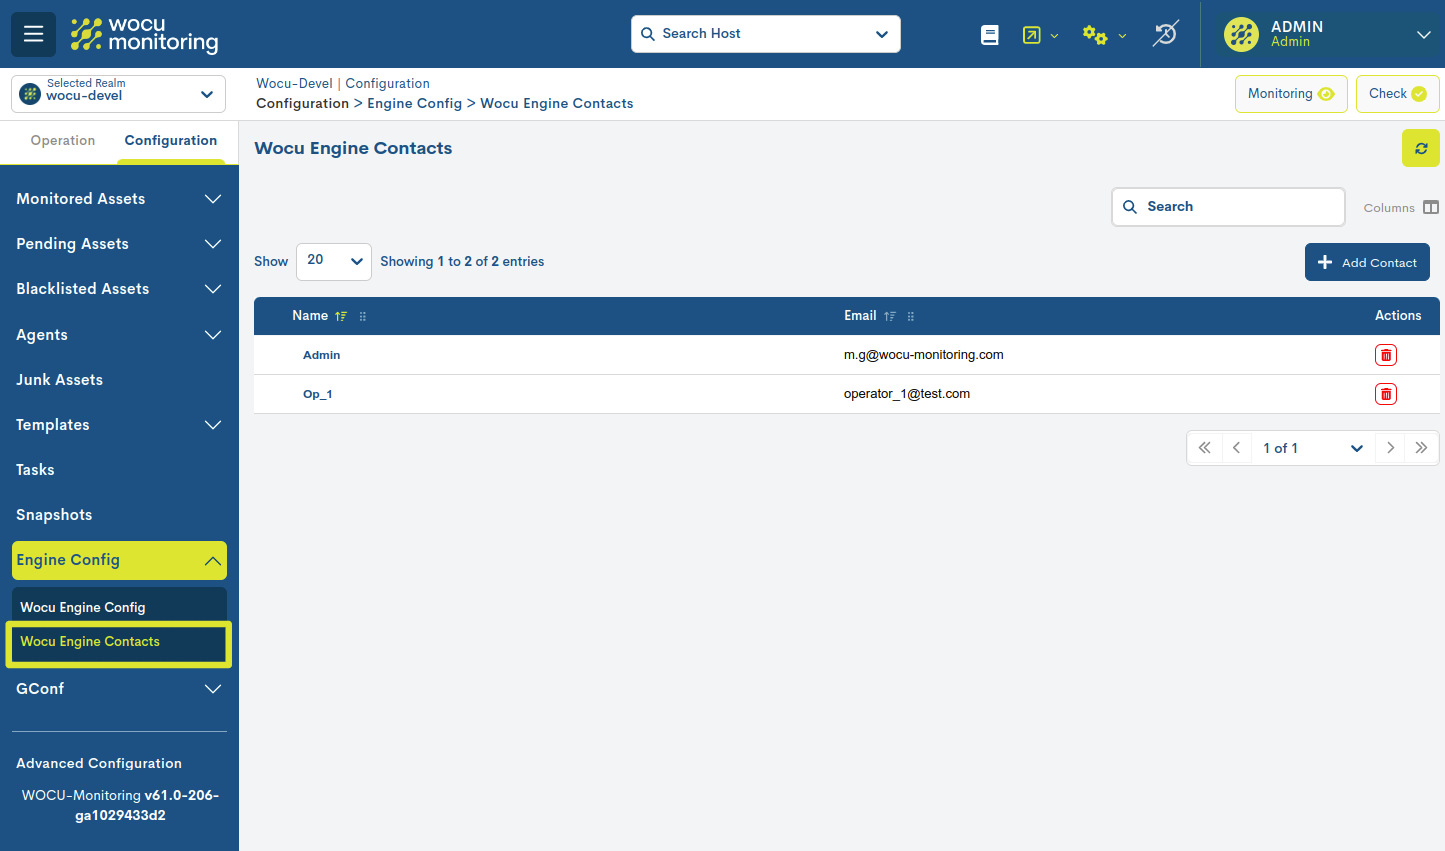
WOCU Engine Contacts list fields
The different fields/columns of the table are described below:
- ✓ Name
This field contains the identifier of the contact.
This field contains the email address of the contact, where notifications will be directed.
Detailed information of the contact profile
Clicking on the name of a specific item will bring up its corresponding detailed view with the configuration values of the various attributes of the contact registered in the system.

Below are the descriptions of the fields in the information window:

Contact: term identifier of the contact.
Email: email address of the contact, where notifications will be directed.
Editing the contact profile
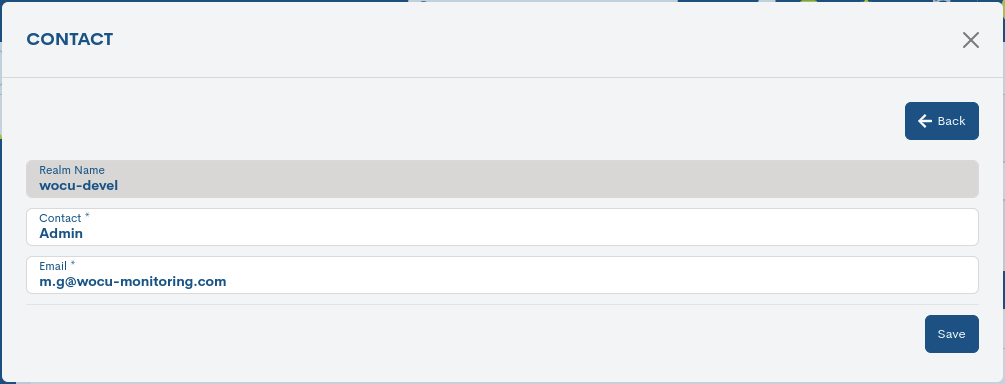
The system allows making changes to the contact’s configuration from the information modal itself. By clicking the Edit button, you can access the editable form that allows you to make changes to the various parameters and attributes of the contact.

Next, the following configuration form will be displayed:
Note
The fields to edit correspond to the attributes described in Detailed information of the contact profile.
After modifying the data in the corresponding fields, you will need to click the Save button to save this new configuration. If, on the contrary, you prefer to discard the changes made, you will need to click the Go back button, which will return you to the previous view without executing any changes.
Contact deletion
This action permanently deletes the contact from the global inventory.
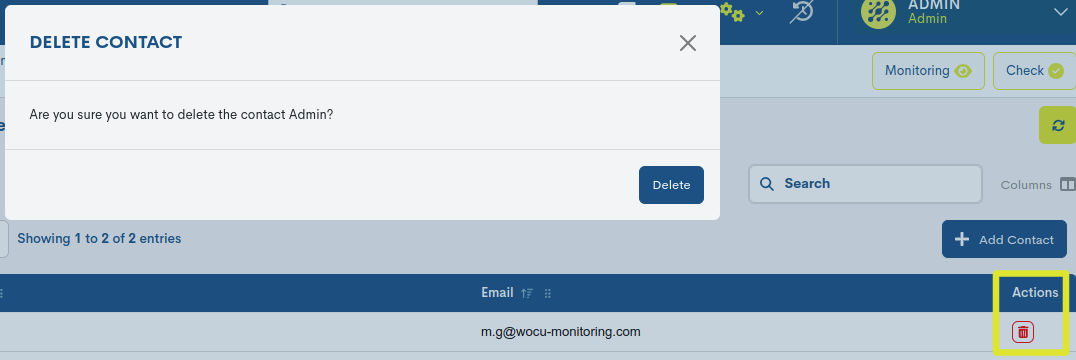
Confirmation of the action will be required to proceed with the removal of the contact.
Add Contact
WOCU-Monitoring offers users the possibility to manually add new contacts to the list, using the Add Contact button.

Note
The fields to edit correspond to the attributes described in Detailed information of the contact profile.