Apply changes: Check
Any configuration performed in the Importing and Configuring Assets Module requires the execution of the Check action to take effect. This action is an internal mechanism for validating and controlling configuration changes, designed as a security system to prevent the accidental application of modifications.
Before applying any changes, the Check function analyzes and validates the new configuration and shows the user a summary of the changes that will be made to the monitored infrastructure, allowing for prior review. Only after this verification and confirmation are the modifications actually applied to the system.
The Check action is executed by pressing the button with the tick located in the upper right corner of the screen:

WOCU-Monitoring has two options for this action:
Automatic check: Changes to the configuration are checked and applied automatically. User intervention will only be required if an error or inconsistency is detected in the configuration.
Manual Check: After making a change to the system, the user must press the Check button to verify the configuration and, if everythingis correct, apply the restart.
Automatic check
In WOCU-Monitoring, the automatic mode is available: Auto reload, which allows you to automate the execution of the action Check. Thanks to this functionality, changes made to the system configuration are detected and applied automatically, without the need for manual intervention.
To enable it, access the section Engine Config > WOCU Engine Config > Action: Auto reload.
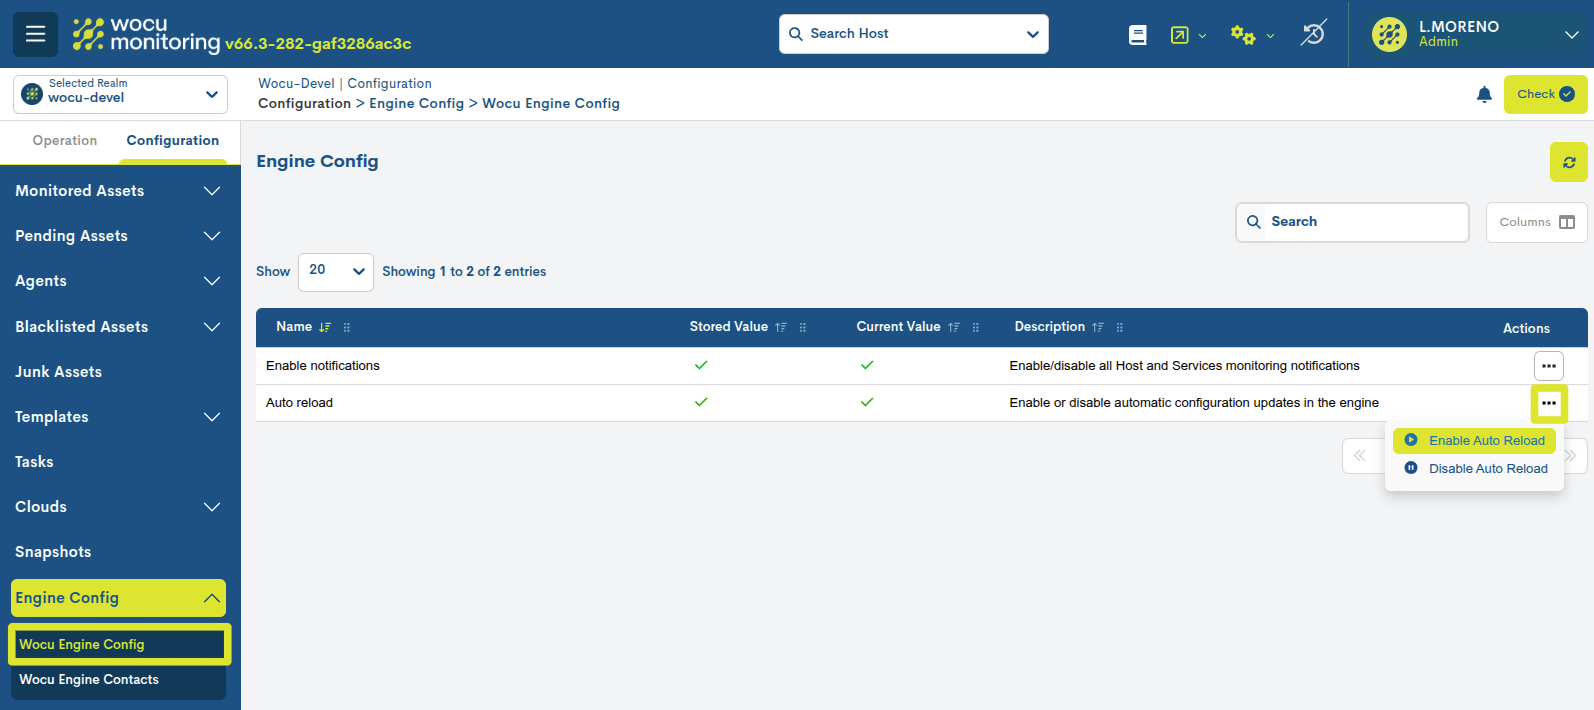
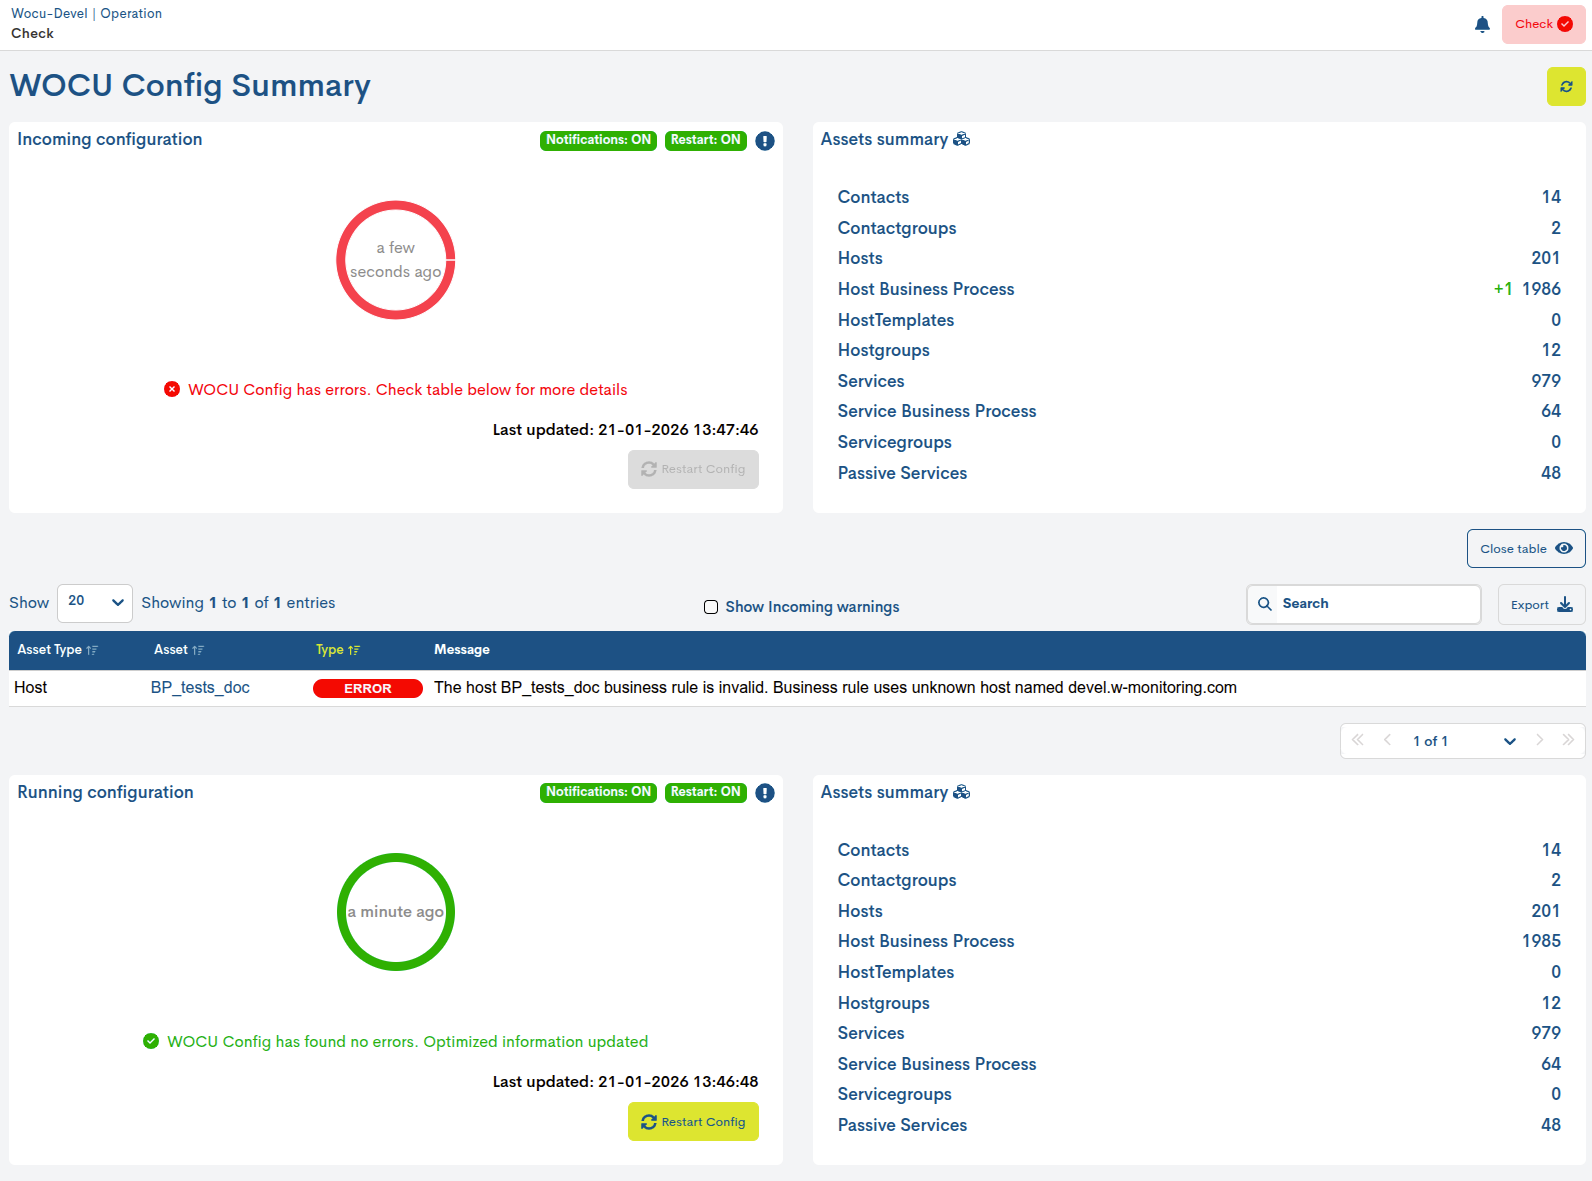
Once activated, it is no longer necessary to manually run check<check>, as the system performs this automatically. Also, you can review the configuration status in detail in the WOCU Config Summary View, visible after clicking the Check button. In this case, the Restart Config button will not be displayed.

If any error or inconsistency is detected in the configuration during this process, the Check button will be displayed in red. This indicator allows the user to quickly identify that there is a problem pending review.

By clicking on the red Check button, the system displays the WOCU Config Summary View, where the user can learn about the errors detected during the validation process.
Important
As long as errors exist, the configuration update cannot be applied until these have been reviewed and corrected.
Manual Check
The Check button executes the internal validation mechanismand changes control mechanism for the system asset configuration.
For any configuration change to be applied correctly, it is essential to first execute the action “Check. This validation process can result in two outcomes:
Validation successful: the system confirms that the configuration is valid and can be applied.
Validation with errors: the system displays detailed information about the detected problems that prevent validation until they have been corrected.
The Check action is executed by pressing the button with the tick located in the upper right corner of the screen:

See both case studies in more detail below:
Validation successful
After pressing the Check button, the system displays the WOCU Config Summary View whose function is to inform the user of the changes detected in the asset configuration and the general validation status before applying said changes to the system.
This view allows you to safely verify what will happen to the system before the new configuration goes live. As long asthere are no errors, the user can confirm this new version via the Restart Config button.
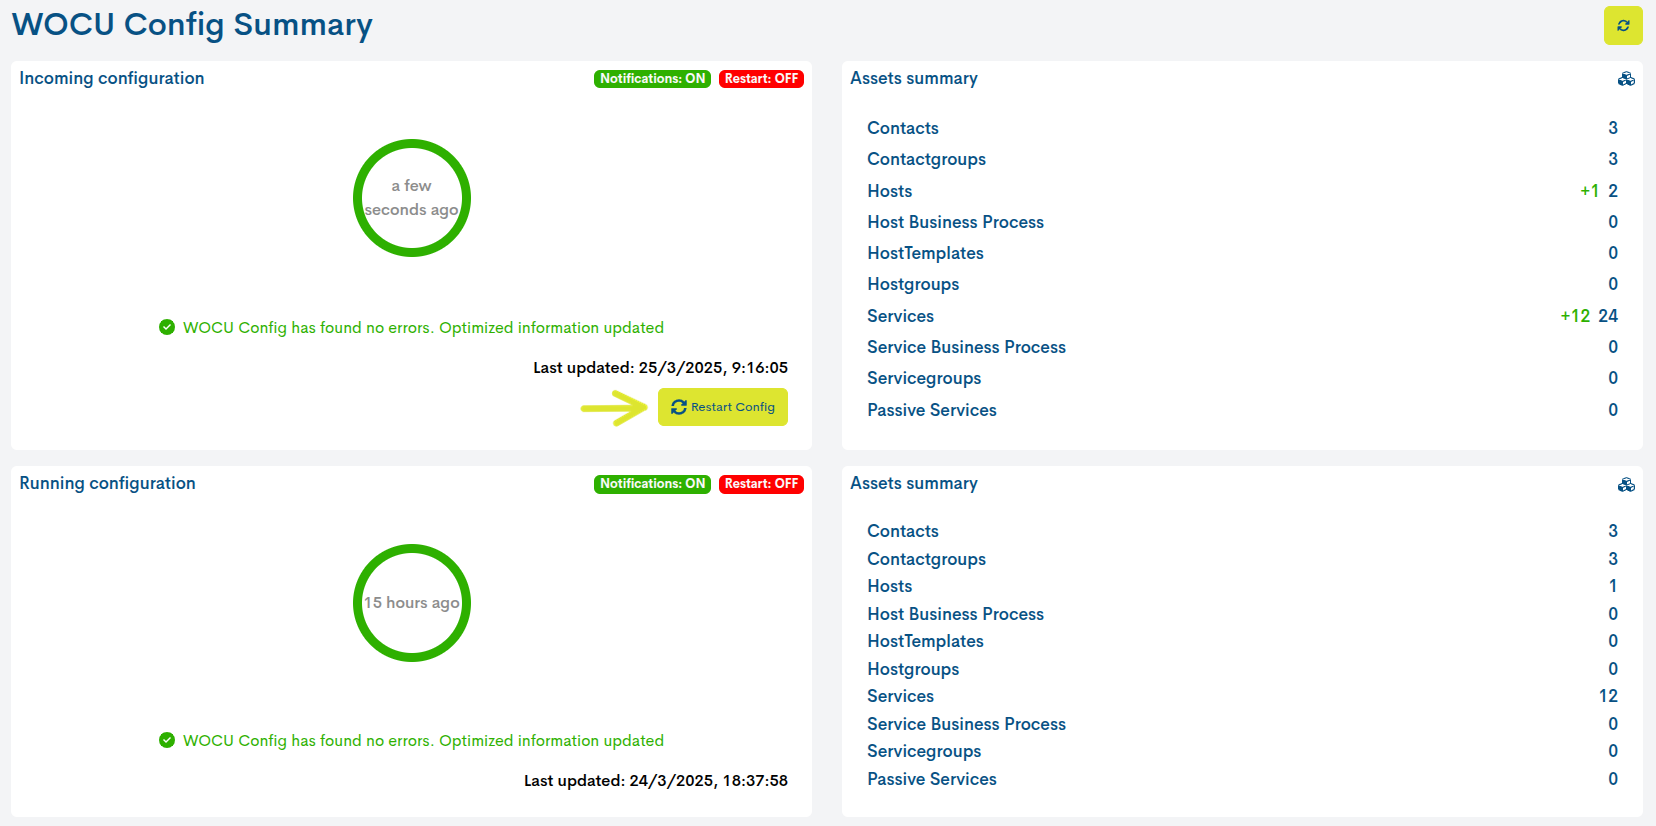
WOCU Config Summary View
This view is divided into two main blocks:
1. Incoming configuration
This corresponds to the new configuration detected after running the Check. This panel displays:

The validation result: with a green message indicating that the configuration is valid and no errors were found, or conversely, with a red message indicating the existence of errors that must be corrected before continuing.
The date and time of the last check (Last updated).
The Restart Config button, which allows you to apply the new configuration**(only available if there are no errors)**.
The numerical summary Assets summary, with the assets that have undergone some change in their configuration compared to the previous configuration.These are:
Contacts
Contactgroups
Hosts
Host Business Process
HostTemplates
Hostgroups
Services
Service Business Process
Servicegroups
Passive Services
Values in green indicate variations detected compared to the previous configuration.Previous configuration

2. Running configuration
This block displays the status of the currently active configuration on the system. This space displays the following information:

Confirmation that the active configuration is valid.
Date and time of the last update applied (Last updated).
Asset summary of monitored assets that are currentlyin operation.
Thanks to this section, the user can clearly differentiate between the configuration that is already operational and the new configuration detected after the last Check, pending application.
Validation failed
If the system detects errors or inconsistencies in the new configuration pending validation, the view check_wocu_config_summary will display a detailed list of the problems found, allowing the user to identify them and focus on correcting them.
By default, the table only displays errors, that is, critical incidents that prevent the new configuration from being applied. While at least one error exists, it will not be possible to restart the configuration or make the changes effective, and the Restart Config button will be locked.
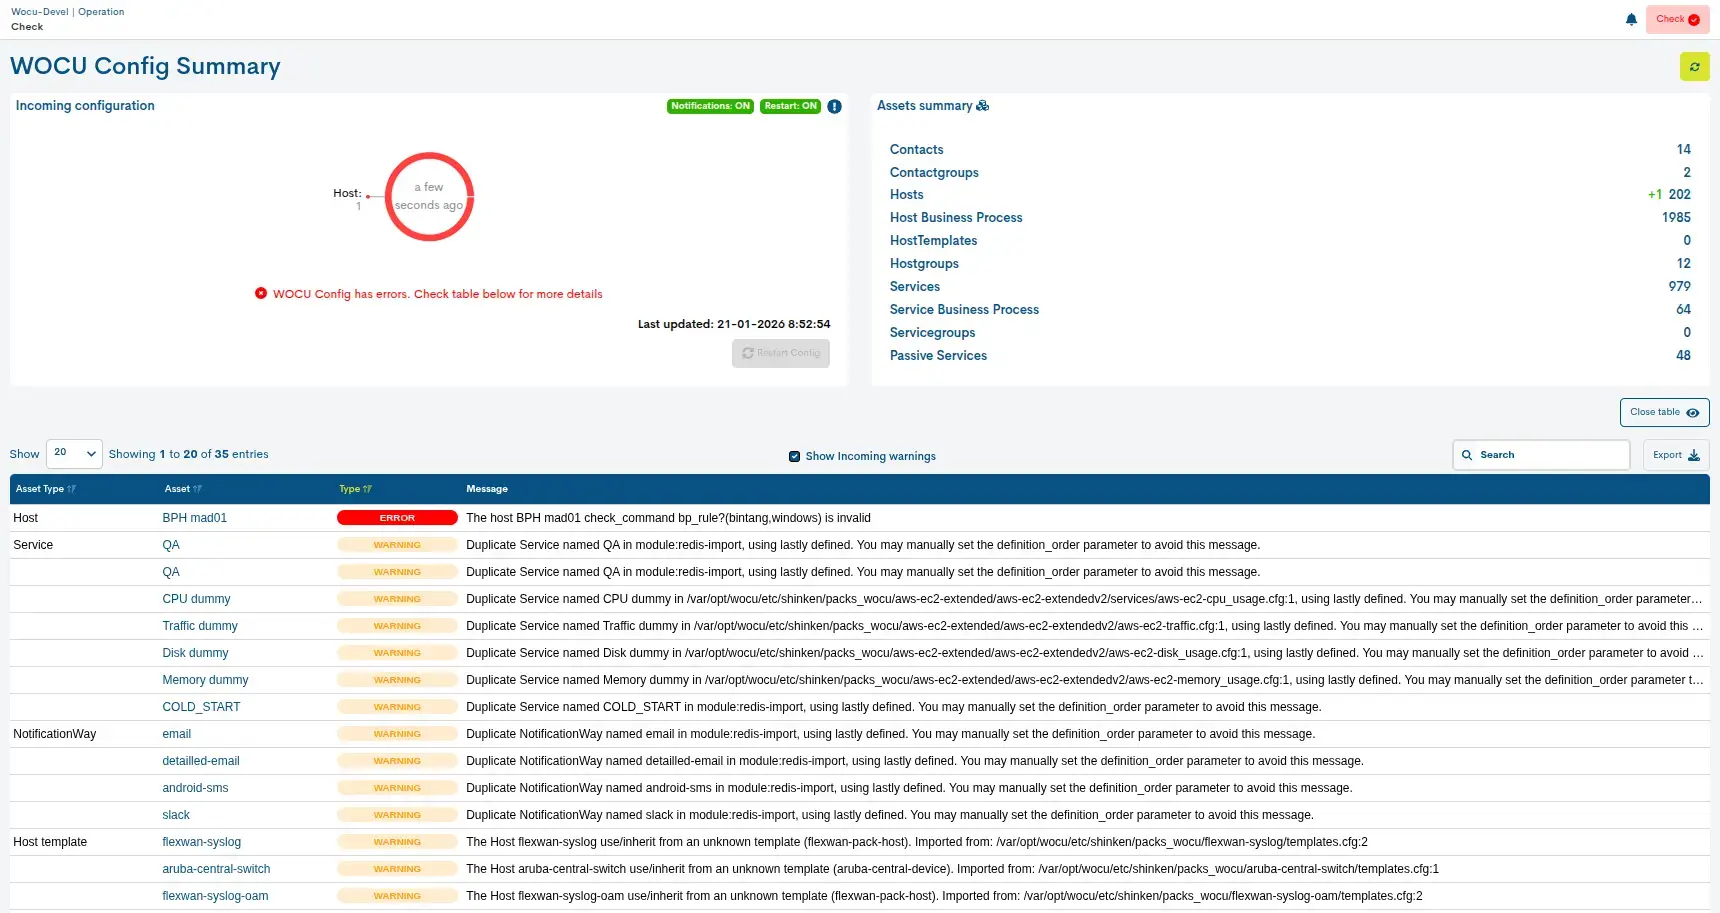
Also, above the results table is the option Show Incoming warnings, which allows you to add incidents of the type Warnings to the table. This separation is made because Warnings do not block the configuration reset; they only report possibleproblems, duplications, or areas for improvement. They are recommendations that should be reviewed, although they do not prevent applying the changes.

Finally, click the Close table button to hide the errors table and leave only the Incoming configuration and Running configuration summary panels visible.

Exporting the validation report
WOCU-Monitoring includes numerous functions for managing data, metrics, and graphs, but sometimes it may be necessary to use external tools. For this, it has an export function that allows you to download inventory data to your computer.
Exporting is done using the CSV and JSON buttons, located next to the search bar, which allow you to obtain the data in both formats.

CSV
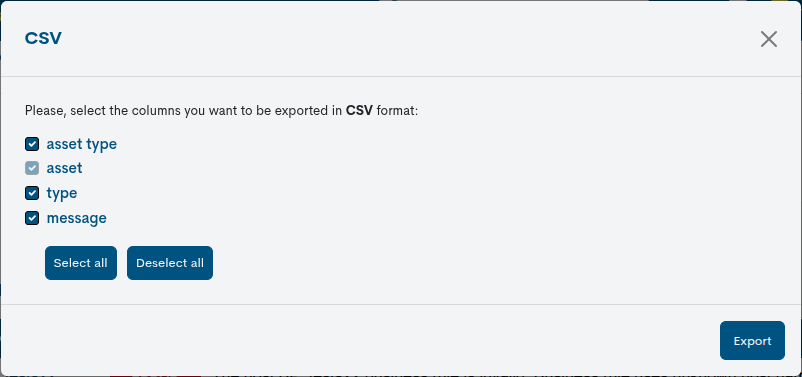
Clicking the corresponding button will open a new modal for selecting and marking parameters to export according to the user’s criteria. The available options are:
Asset Type
Asset (Mandatory)
Type
Message
Once the selection is confirmed, the download of a file in CSV (Comma Separated Value) format begins, a very simple format that organizes the columns using a separator (semicolon “;”) and the rows with a line break.
JSON
This other option follows the same procedure as the previous case, butstarting the download of a file in JSON (JavaScript Object Notation) format, a lightweight data exchange format capable of being read by any programming language and, therefore, being used to exchange information between different technologies.
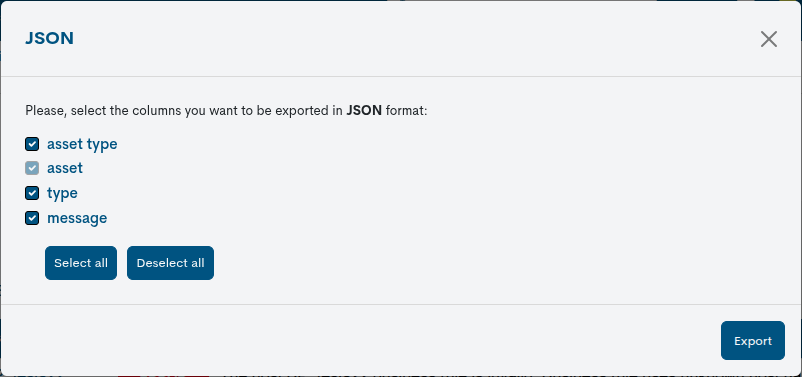
In both options, the system will offer the option to select the directory where to download and store the generated inventory fileand assign an alternative name to it.
Use the “Select all” button to select all available fields/boxes and perform a complete export. You can undo the action using the “Deselect all” button.