Snapshots
The WOCU Snapshots tool offers the possibility to save the status of the various Import Tool listings described above, as well as the configuration of their elements, and to return to this status later.
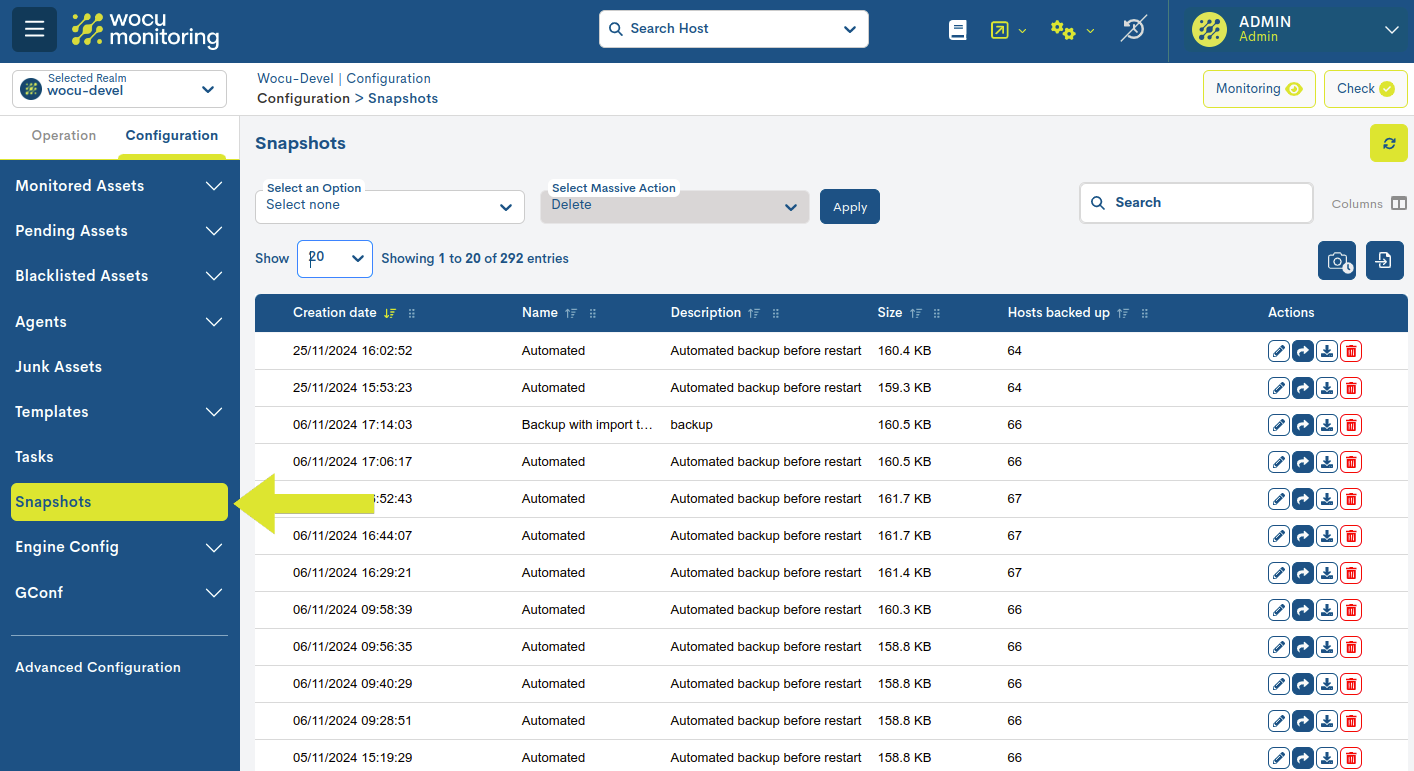
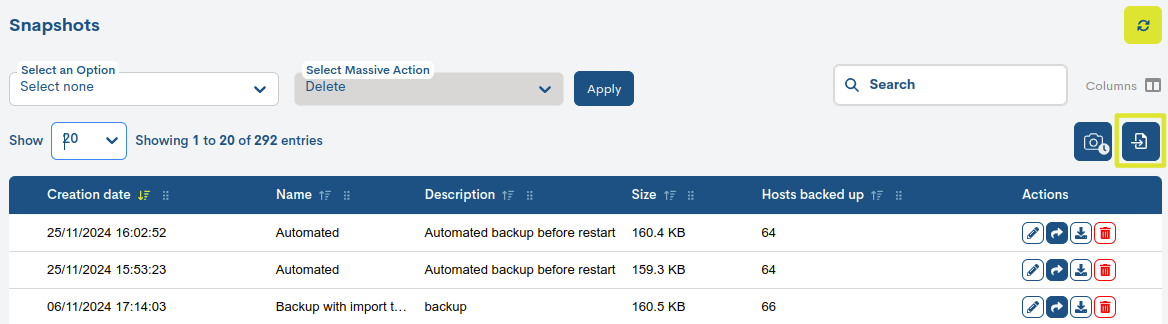
The tool is accessible through the Snapshots option in the main menu. Once inside the option, the user is presented with a list of the different Snapshots created in WOCU.
Snapshot list fields
The WOCU Import Tool’s list of State Snapshots has a number of fields:
Creation Date
Field indicating date and exact time when a Snapshot was created.
Name
Field including an identifier that helps to recognise each of the Snapshots.
Description
Field containing descriptive text for each Snapshot.
Size
Field indicating the size in KiloBytes of each of the Snapshots.
Hosts backed up
Field indicating the number of Hosts contained in each Snapshot.
Important
Backups of configurations made prior to WOCU restart will be logged with the name Automated in the global listing, along with the exact date and time of creation, for easy identification.

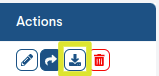
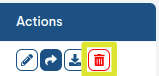
Actions from the Snapshot list
Because of their significance, the Actions applicable to each Snapshot are described below in this separate section.
WOCU has three actions for the management of each of the different Snapshots created and displayed in the list: Edit, Recover and Delete.
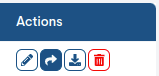
Edit
The Edit option allows the user to change the Name and Description fields, which help to identify each of the Snapshots.
Clicking on the Edit button of each of the Snapshots will take you to the edit menu:
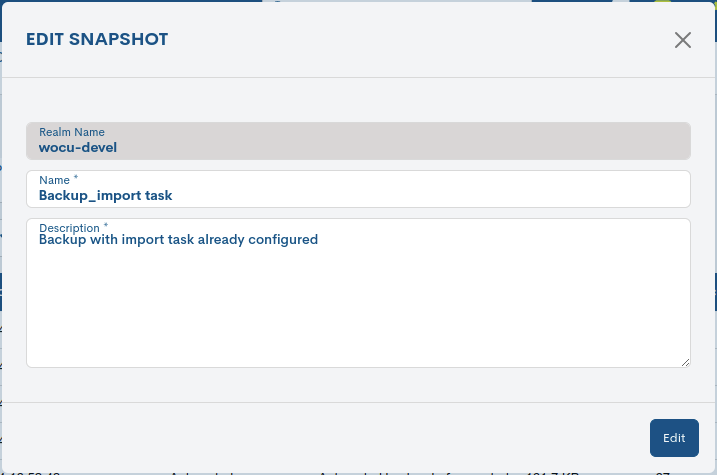
Once the fields have been edited and the desired changes have been made, click on the blue Edit Snapshot button to register and save the changes.
On the other hand, to discard the changes made, click on the cross at the top right of this same window.
Recover
The Recover option performs a restore of the status of the Import Tool listings according to the information of one of the Snapshots saved by the user. To perform a recovery, select the Recover option in the row of the corresponding Snapshot.

Once the button is pressed, a menu will appear asking for confirmation to proceed with the recovery:
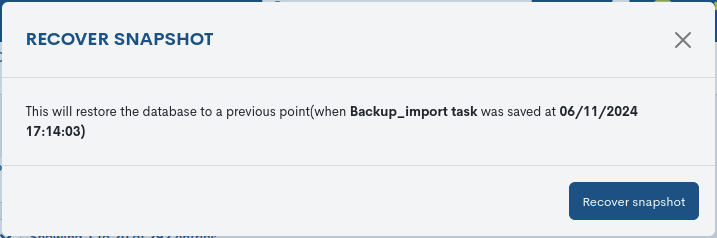
Recover Snapshot: This will restore the database to a previous point (When “Snapshot Name” was saved at “Date of creation”. (This will restore the database to a previous point (When “Snapshot Name” was saved at “Creation Date”.
Attention
Always use this option with caution. However, before executing a snapshot recovery, you can create a snapshot with the pre-restore state in case you need to undo the change.
To execute the recovery, click on the blue Recover button or cancel the process by clicking on the cross at the top right of this window.
After executing the restore, the following message will appear at the bottom of the screen:

(The Recovery process has been successfully completed).
Download
This option allows the download of files in encrypted (JSON) format, whose information is not readable by the operator. These files store the status of the asset configuration, captured in the corresponding Snapshot.
Executing this action will start the download of the file.
Note
By default the filename will be: snapshots_import-tool_[automatic Snapshot DB ID]_00h-00min_dd-mm-yyyy.json.
The downloaded file is useful for later use in the system itself. Thanks to the option Import Snapshot available in this same screen, it is possible to import the downloaded Snapshot, for a future restoration of the asset management tool: Import Tool.
Delete
The Delete option deletes one of the Snapshots permanently. Clicking on this action will delete the Snapshot from the corresponding row.
Executing this action will display the following confirmation message:
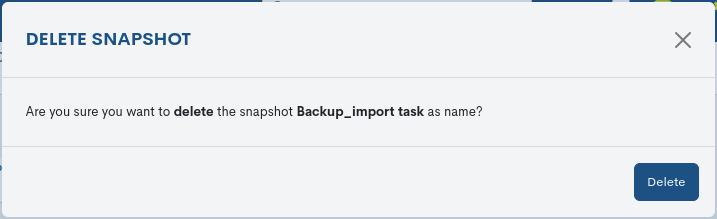
Delete Snapshot: Are you sure you want to delete the snapshot [Snapshot Name]?
To continue with the deletion, click on the red Delete button or to discard the process, click on the cross located on the right-hand side of this same window.
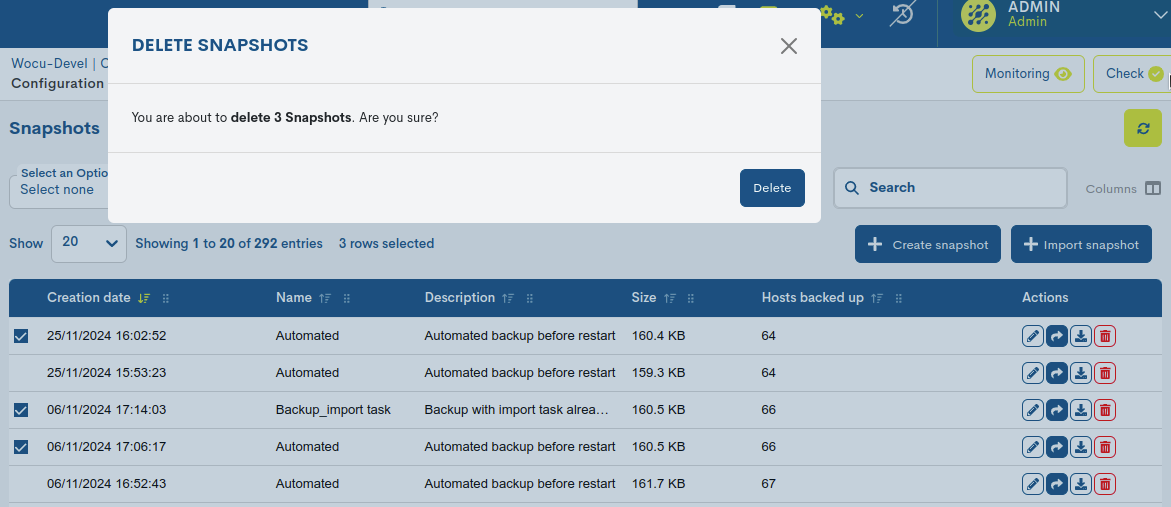
Bulk Snapshot deletion action
As a basic task in the management of the elements, the application allows a massive deletion of items present in the Snapshots list or table.
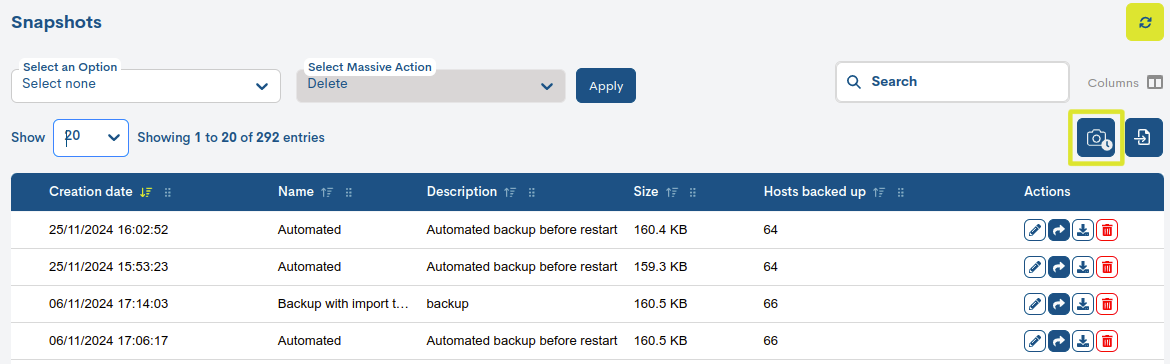
This process is executed from the following selectors:

Selection of items from the list
Clicking on this drop-down lists all possible item selection options. Click on the chosen option and the table will immediately reflect the changes.
The options available are:
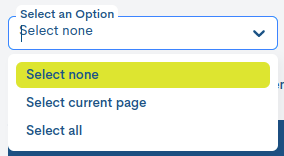
Select All: selects the complete listing.
Select Current Page: selects only the page we are currently positioned on.
Select none: does not perform any flagging. Useful for disabling the above options.
Selected records will always be highlighted with a coloured background.
Important
Manual selection of items is also possible by clicking on each item. To mark multiple items, hold down the CTRL key while marking the other options you wish to choose.
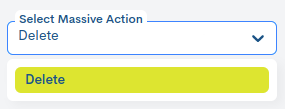
Delete action selection
Clicking on this drop-down menu displays a single option for deleting items from the list. Once the items to be removed have been previously chosen and the action has been confirmed, they will be definitively removed from the list.
The system will not apply any changes until the Apply button is clicked and the action is confirmed in the following dialogue box:
Añadir una nueva Instantánea (+ Add)
WOCU offers the user the possibility to create new Snapshots and to be able to retrieve the configuration state of the assets whenever necessary. To do this, click on the green Create Snapshot button (Create Snapshot) at the top right of the list.
The following edit form will then appear:
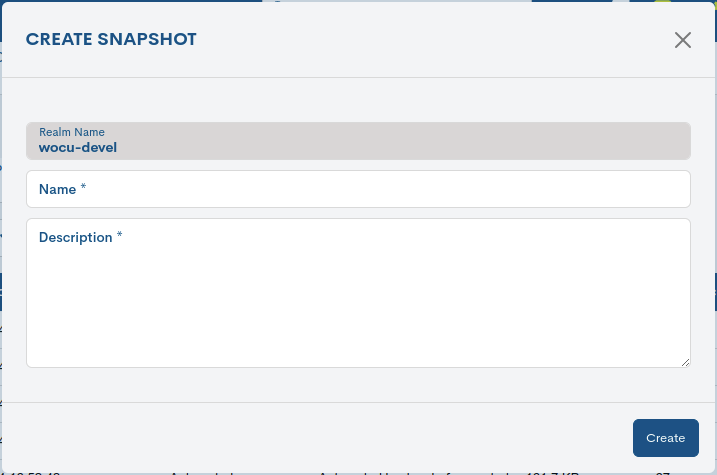
The two fields to be entered by the user are those that define the Snapshot and will help in its subsequent identification and recognition:
Name
Description
Note
It is advisable to use names that define the Snapshot as much as possible and to describe in sufficient detail the Snapshot and/or its purpose.
Once these fields have been filled in, click on the blue Add Snapshot button to save the new Snapshot in the WOCU list, or cancel the process by clicking on the cross at the top right of this window.
Each new Snapshot shall contain as many elements (together with their settings) as exist in the Import Tool at the time of its creation. The global status of the tool will be recorded and saved in that snapshot.
Import Snapshot
WOCU offers the possibility to import previously captured snapshots that have been downloaded from the tool itself via the Download action.
To do so, click on the blue Import Snapshot button (Import Snapshot) at the top right of the list.
The following import form will then appear:
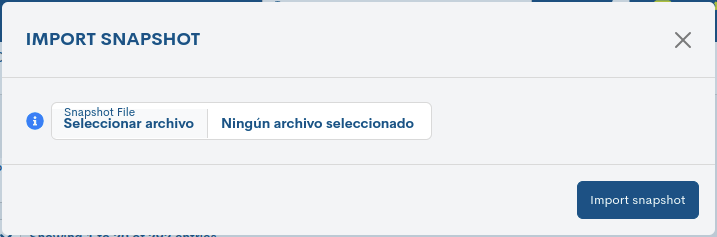
The import process is very simple, just attach the JSON file related to the Snapshot to be imported, in the JSON file field. Finally, confirm the action to reload the Snapshot in the global panel, and it will be ready to be restored if required.
Important
The different navigation, search and sorting options available on this screen are explained in detail in the section: Common navigation, filtering and sorting options.