GConf
Within the WOCU-Monitoring product suite, you will find the GConf. This module is for the comprehensive, unified management of the configurations of the network devices managed and monitored in the application.
This technology allows us to have version control on the hosts of your choice, storing backups of the configurations whenever necessary.
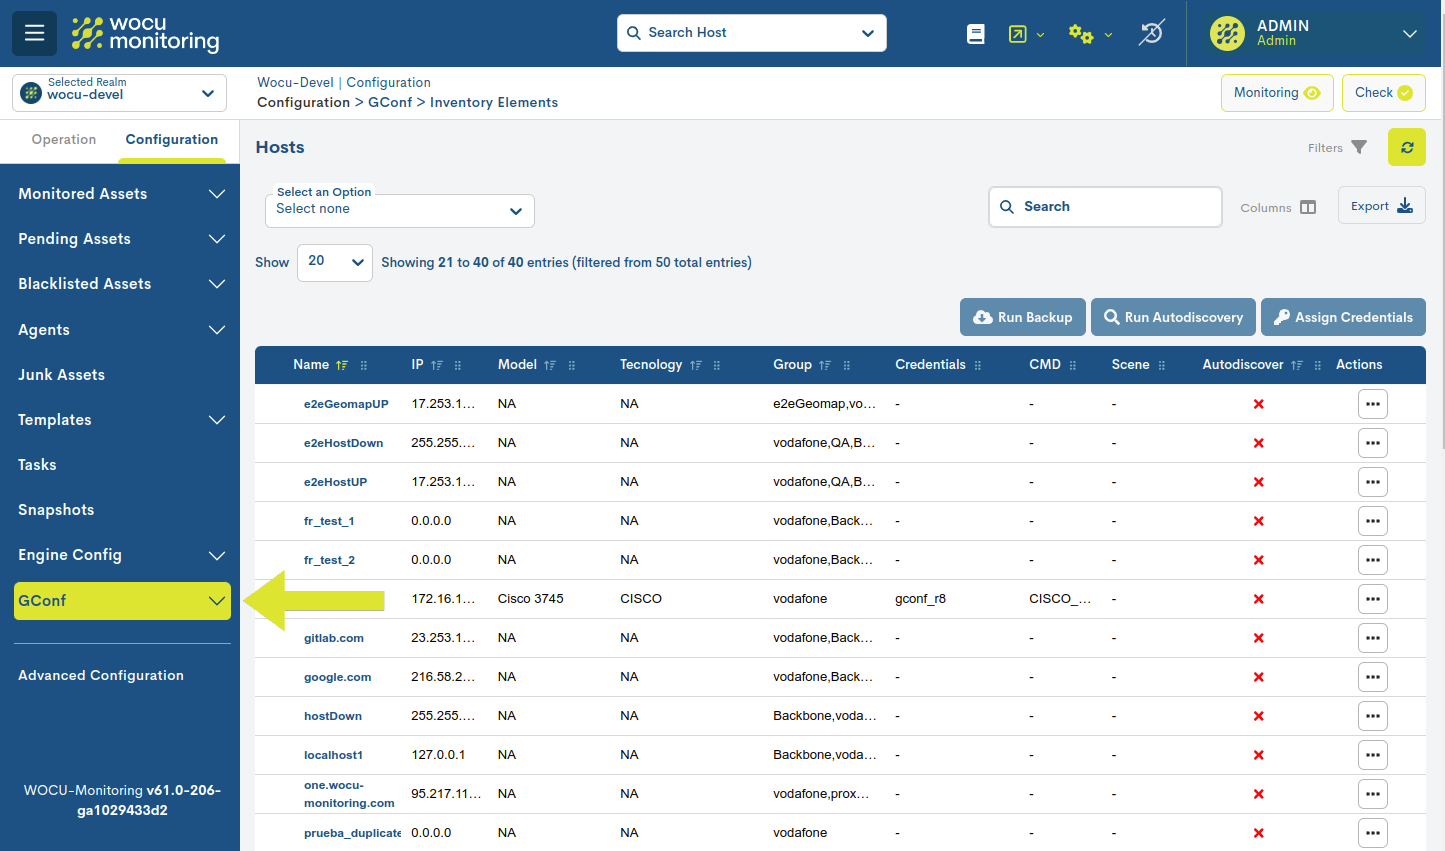
Once this module is enabled in the application, the user will have access from Configuration > GConf.
Device Inventory
First of all, it is necessary to know how to include in this inventorythe different devices that we are going to have control over.
. Add or edit a new Host in Monitored Assets.
. In the registration form or edit of the host in question, select the Enable checkbox located in the Gconf block.
Therefore, the Device Elements section is a detailed list of elements registered (previously) and with which it is possible interact with and perform a set of desired operations.
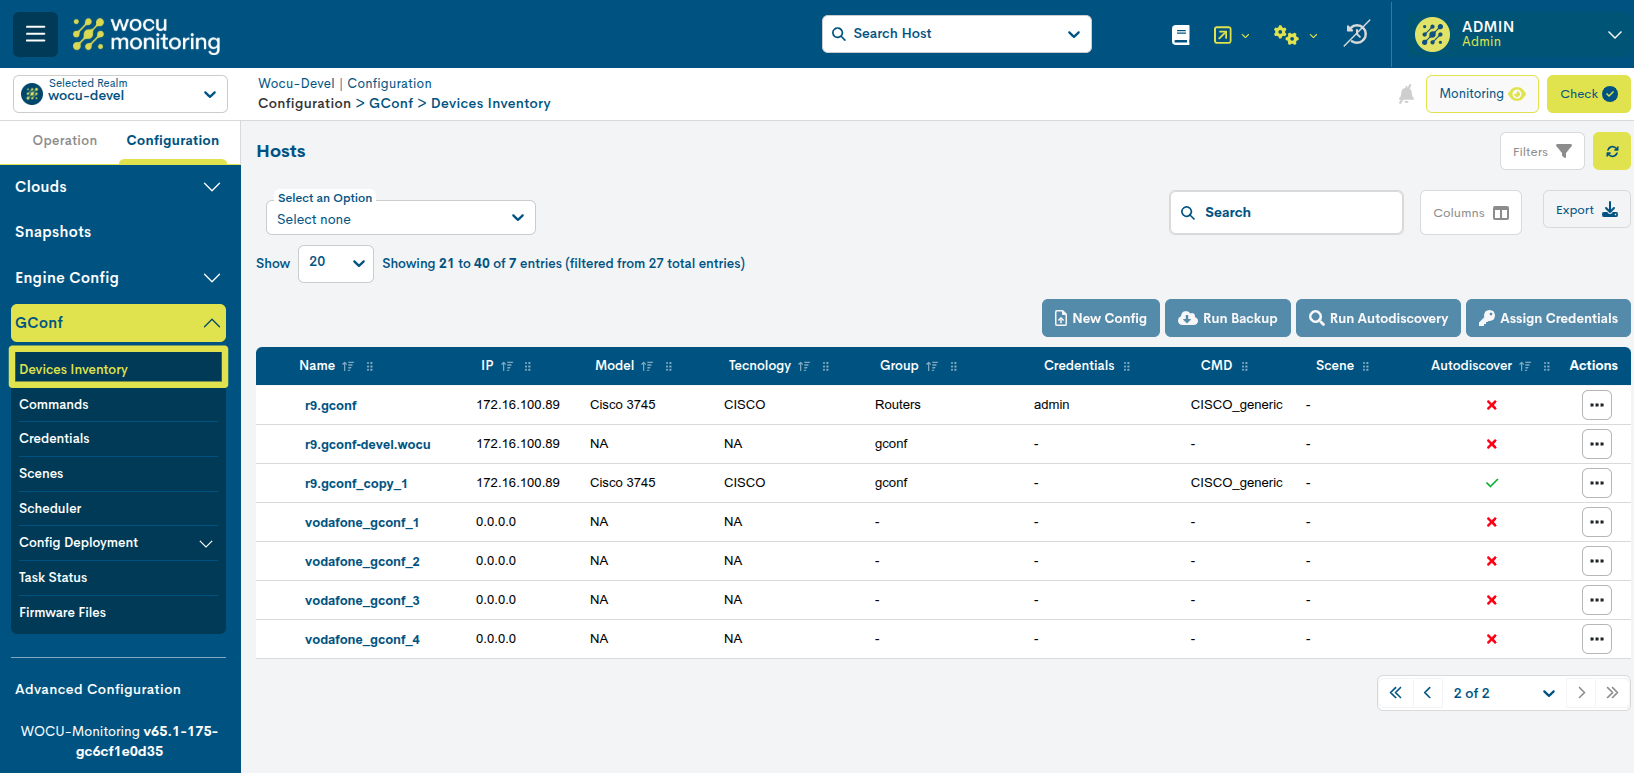
The different fields/columns of the table are described below:
- ✓ Name
Nombre formal del Dispositivo. Hacienco clic sobre esta etiqueta, se accede a la Detailed asset information.
- ✓ IP
IP Address of the Host.
- ✓ Model
Specific hardware model of the Device.
- ✓ Tecnology
Details the type of technology or protocol used by such a Host for communication and data transfer.
- ✓ Group
Details the group(s) to which the Device belongs. These logical groupings make it easier to perform and manage backups of the set.
- ✓ Credentials
Registers the Credentials with which attempt to access the Host.
- ✓ CMD
Details the unique identifier associated with a specific command or request command or request sent to the Host.
- ✓ Scene
The Scenes applied to the Host are detailed.
- ✓ Autodiscover
Indicates whether the Host is enabled to be auto-discoverable.
Actions
The possible actions applicable to each entry in the table are described below:

New Config
With this action, the user can associate new configuration files with a specific computer.
Using the Configuration files available drop-down menu, you can select one of the available files, which will be automatically registered as a new backup of your computer.
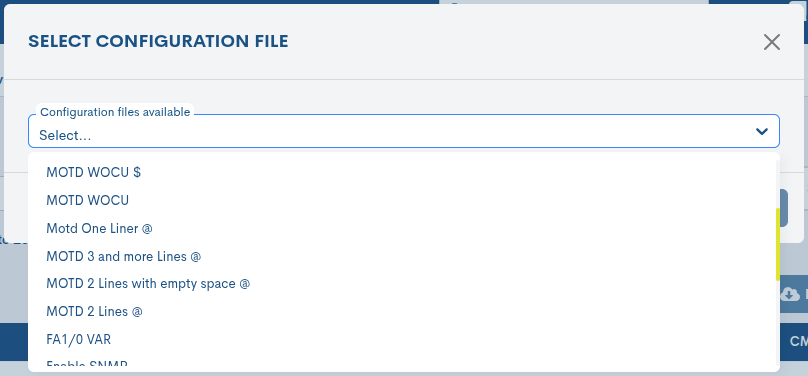
Important
The files displayed in the drop-down list have been previously added from the management view Configuration Files.
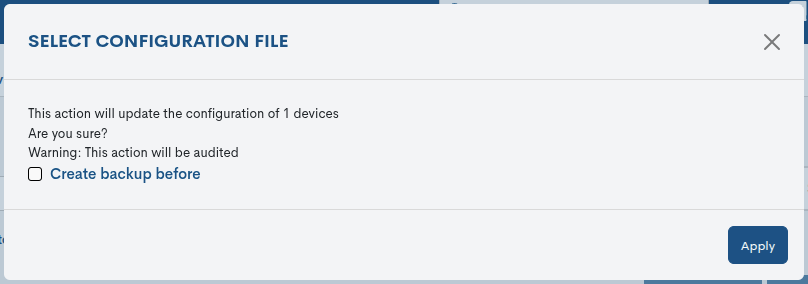
The system will then display a confirmation window, where the user validates the action before applying the change to the device, and can also decide whether to create a backup beforehand (ensuring a restore point if necessary) by checking the Create backup before box.
The action is confirmed by the Apply button.
Autodiscover
With this action the system tries to discover the typology of an equipment, that is, its make and model in order to be able to interact correctly with itself.
Attention
In order to be able to execute the Autodiscover action, it is necessary that the equipment must have the Credentials configured.

The action is confirmed by the Apply button.
This is followed by the implementation of the task of self-discovery task. Once completed, the Device along with its new attributes will be displayed in the Device Inventory.
Backups
Through this action, the user accesses the historical list of configuration backups for a specific device. From this space, it is possible to view changes, download configurations, delete them, and compare versions to detect modifications to the infrastructure.
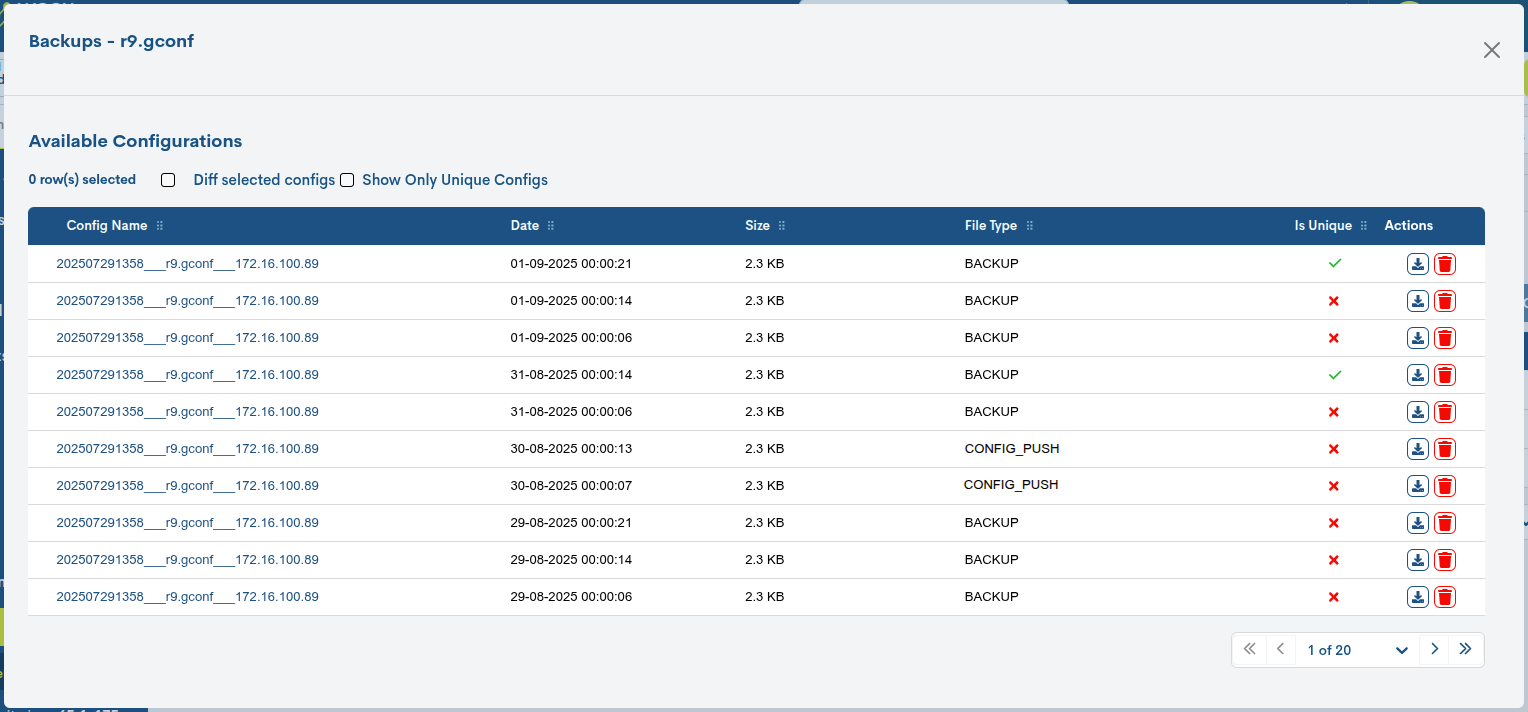
For each entry (backup), the following information is recorded:
Config Name: name of the registered configuration. The format is the following:
YYYYYYYYMMDDHHMM___name___IP, where YYYYY is the four digits for the year, MM for the month, DD for the day, HH for the hour, and MM for the for the minutes. The separator character (_) is followed by the name of the monitored component (router, port, etc.) and finally the associated IP address.Date: date and exact time of the execution of the backup.
Size: indicates the size of the backup in kilobytes (KB).
File Type: Indicates the file type. Possible values are:
CONFIG_PUSH: File containing new configurations, manually added from the management view Configuration Files.
BACKUP: file corresponding to a generated backup.
Is Unique: Indicates that the backup contains a different configuration than the previous ones and is kept as a unique reference in the history. Therefore, it is saved as a relevant reference point, since it reflects a new configuration state compared to previous copies that recorded no changes.
The cell will display a tick if the file is considered unique and a cross if not.
Actions: Actions applicable to each backup:
Download (down arrow icon): Downloads the configuration file locally, for later use in case of loss, corruption, or damage to the original data, etc.
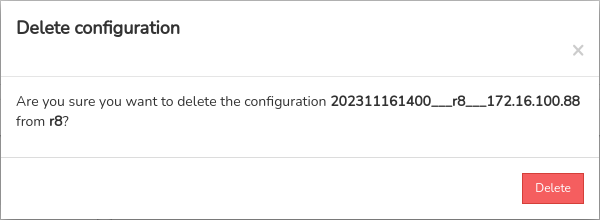
Delete (trash can icon): Deletes the backup of the WOCU-Monitoring database.
When you click on a particular configuration, the system reveals the full configuration of the selected item. It is presented in raw for easy reading and comprehension.
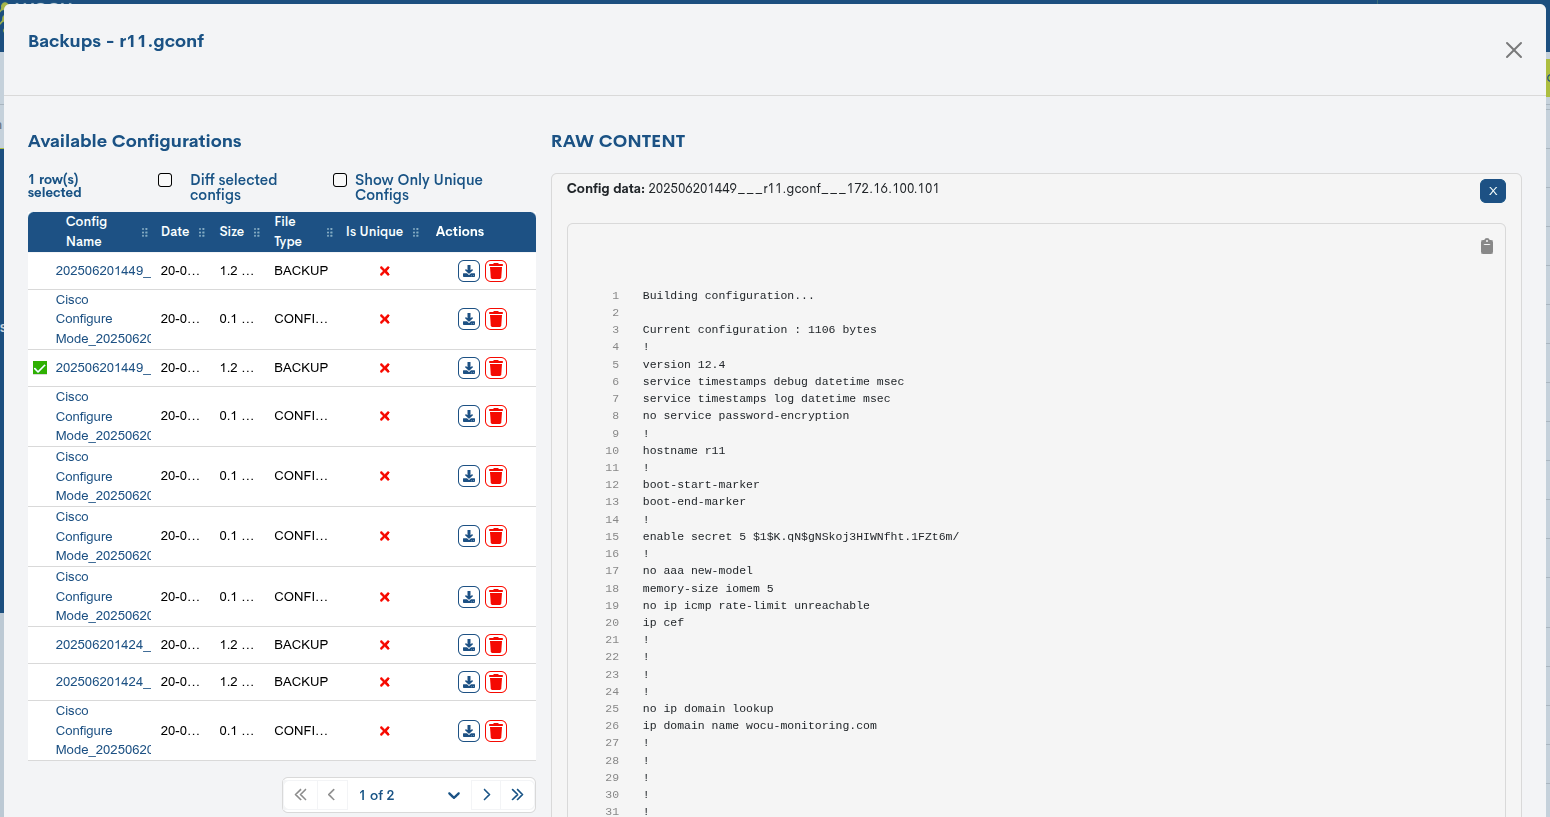
Diff selected configs
Selecting the Diff selected configs checkbox enables the ability to compare the differences or discrepancies between two versions of stored configurations.
On the right margin of the view, the values that have been deleted with a red background colour and new values with a yellow yellow.

This function is valuable for understanding and tracking changes in thconfiguration over time, facilitating the detection of potential problems, resolving conflicts and effectively managing the evolution of the monitored Hosts’s configuration.
Show Only Unique Configs
By selecting the Show Only Unique Configs checkbox, the backup history will be filtered to show only unique (distinct) configurations.
A unique backup is one that is kept because it represents a different configuration compared to previous copies. When backups are performed periodically and no new features or changes in the device configuration are detected, new backups do not replace the existing one, as they do not provide different information. In this case, the first valid backup is marked as unique.
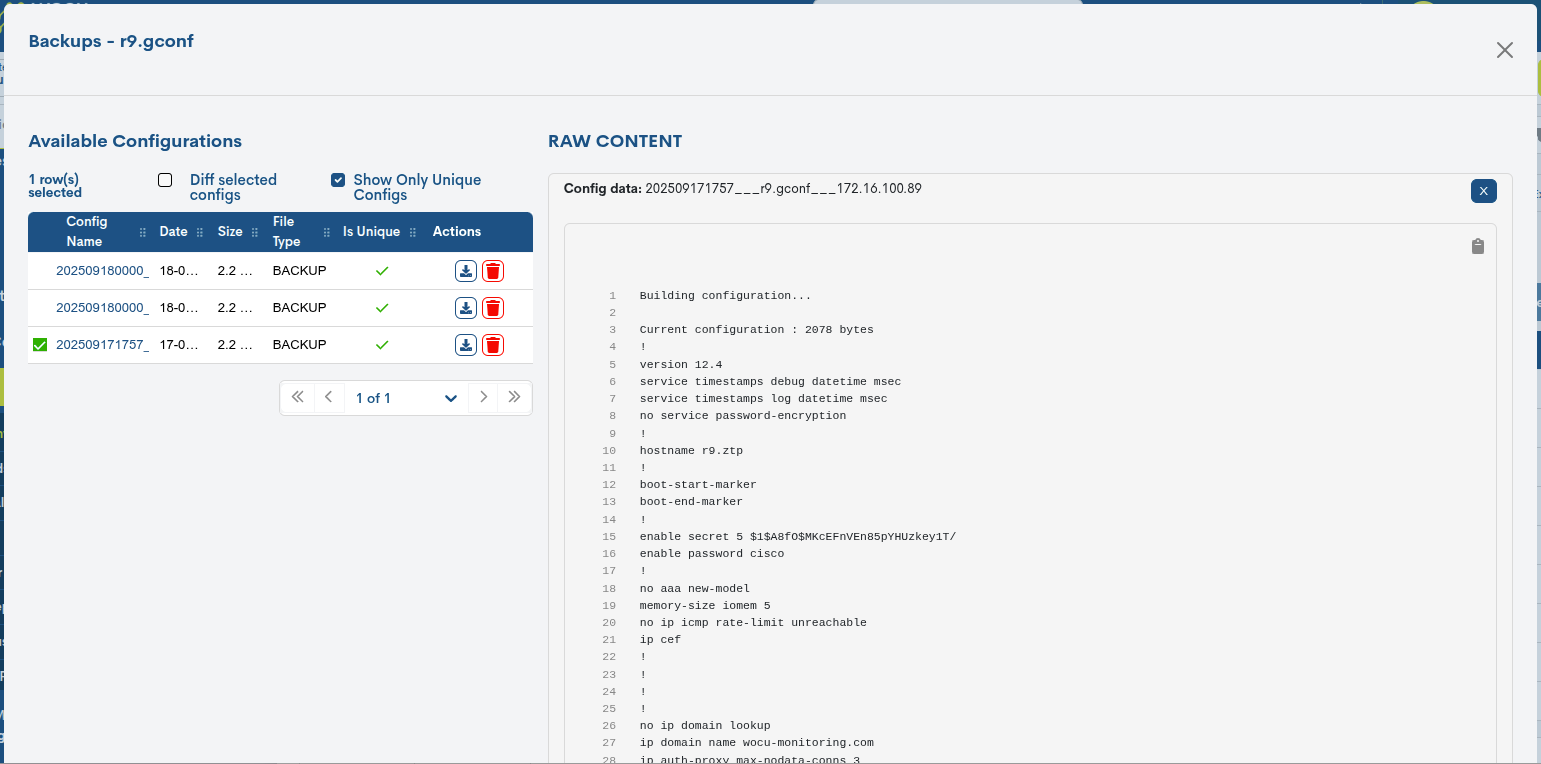
This uniqueness is maintained until a change occurs in the asset configuration. At that point, the newly generated backup will reflect these changes and will be considered a new, unique backup within the history.
Run Backup
As its name suggests, this bulk action will attempt to perform a backup of the device, capturing the current state and configuration and creating a snapshot for later use in case of failures, errors, or unwanted changes. This practice is essential for proactive configuration management, allowing for efficient version control over time.
Attention
In order to execute the action, the equipment must have configuredthe Credentials.
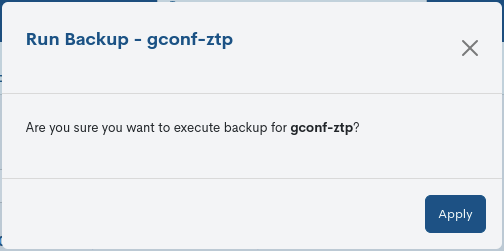
The action is confirmed by the Apply button.
Logs
In this section (purely informative) you will find a paginated list with entries referring to the history of actions performed on the Host in question.
Each log contains detailed information about relevant events, operations and relevant states of the Host, allowing the user to track and analyse performance, identify potential problems and track tracking of critical activities.
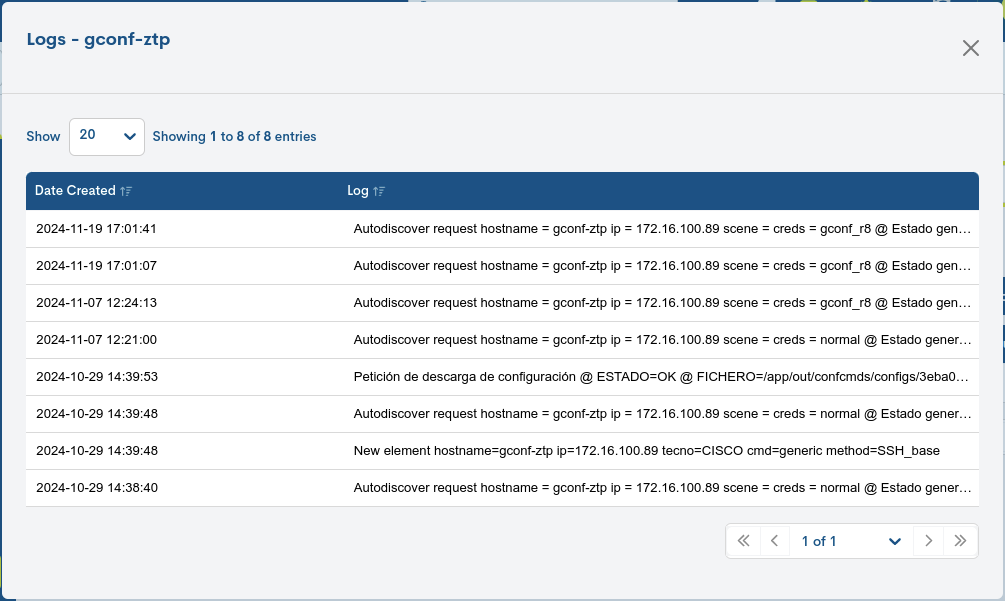
The different fields/columns of the table are described below:
- ✓ Date created
Refers to the exact date and time at which a particular activity was recorded. This data allows the user to track when specific events occurred in the system.
- ✓ Logs
Displays specific details about the events, operations or status recorded.These logs may include error messages, warnings, configuration changes, connections or disconnections, among other relevant events.
New Config
A través de esta acción el sistema permite asociar nuevos ficheros de configuración a una selección previa de dispositivos de manera conjunta.
Note
Use el componente de Multiple Selection of Elements para agilizar el proceso de selección en listados extensos.
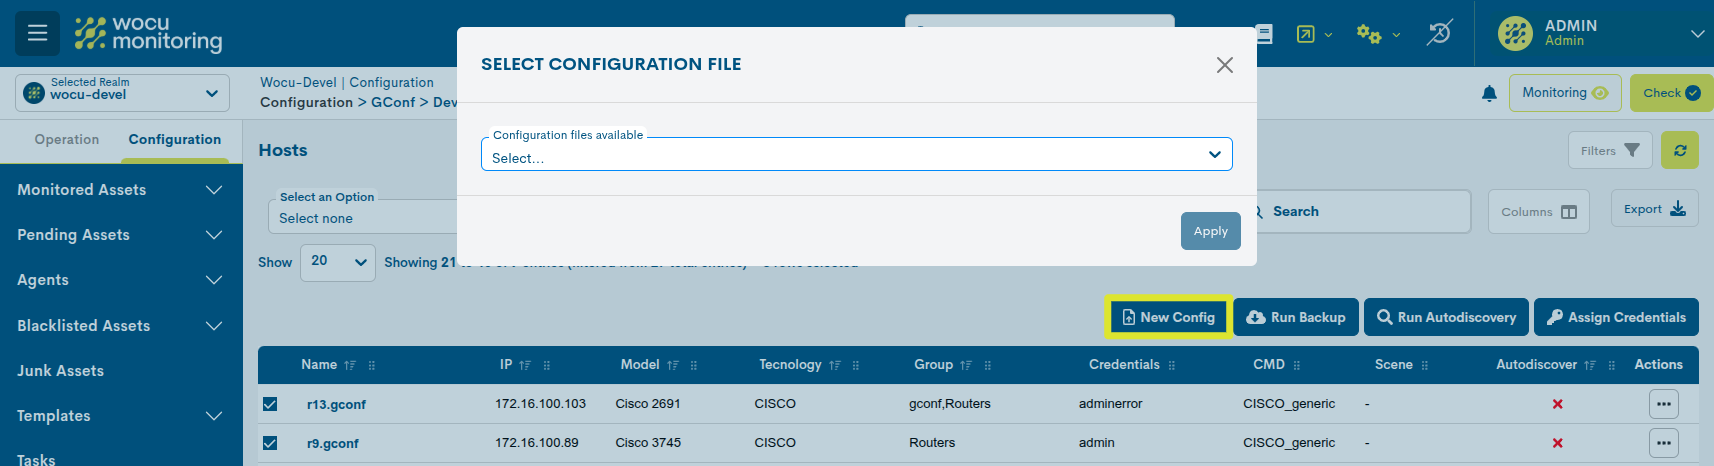
Mediante el desplegable Configuration files available, se puede seleccionar uno de los ficheros disponibles, el cual quedará registrado como un nuevo backup de los equipos seleccionados.
Important
The files displayed in the drop-down list have been previously added from the management view Configuration Files.
The system will then display a confirmation window, where the user validates the action before applying the change to the device, and can also decide whether to create a backup beforehand (ensuring a restore point if necessary) by checking the Create backup before box.
The action is confirmed by the Apply button.

Run Backup
Through this action, the system allows for the creation of backups to a pre-selected group of devices collectively. Instead of performing individual backups for each device, with this option, system administrators carry out backups for multiple elements, thus simplifying the backup and recovery process.
Será necesario confirmar la acción en el siguiente cuadro de diálogo. Seleccionando la casilla Run Autodiscovery on backup, la ejecución del backup irá acompañado de un autodescubrimiento para la detección de atributos descriptivos de los equipos seleccionados.
Note
Use el componente de Multiple Selection of Elements para agilizar el proceso de selección en listados extensos.

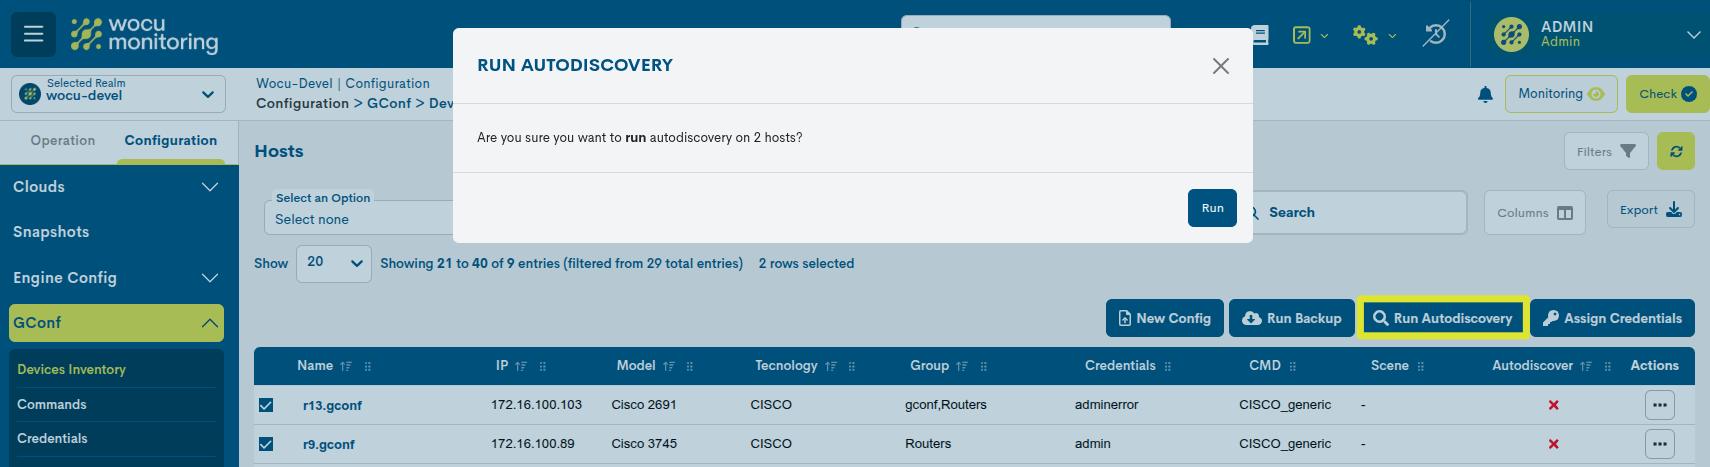
Run Autodiscovery
Through this action, the system initiates a self-discovery process for the previously selected set of devices. With this action, the system attempts to identify the type of a device, including its brand and model, in order to interact correctly with it.
Note
Use el componente de Multiple Selection of Elements para agilizar el proceso de selección en listados extensos.
It will be necessary to confirm the action in the following dialog box:
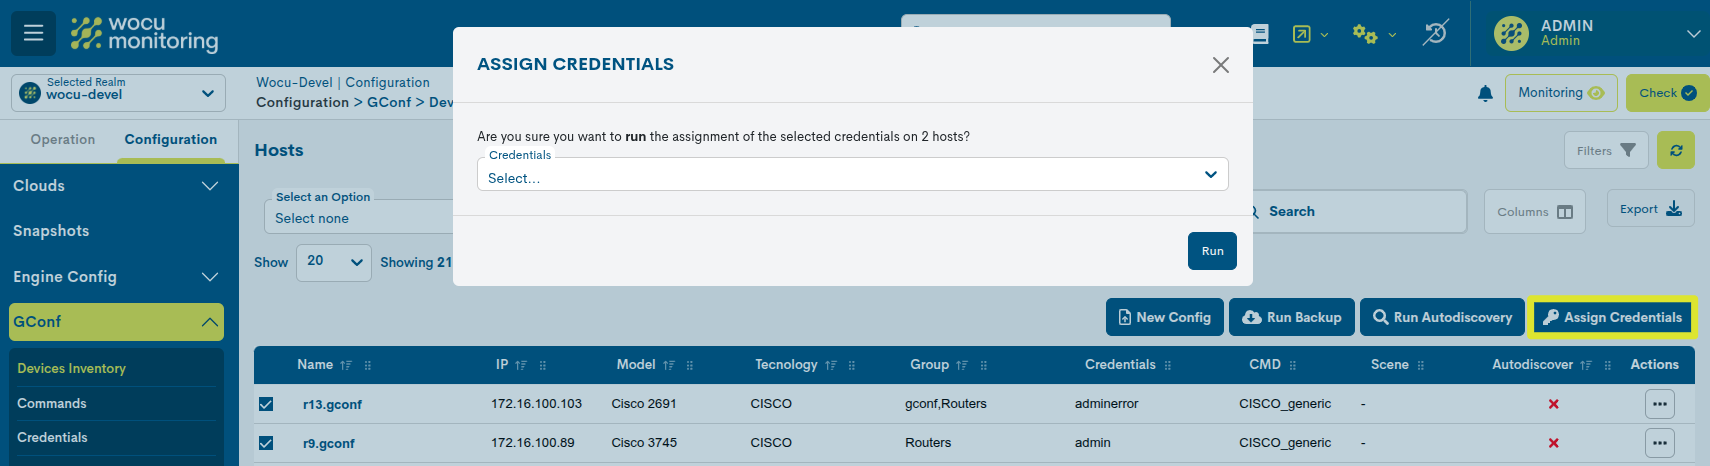
Assing credentials
Through this action, you can assign credentials to a specific group of devices. The credentials are generated in advance from the Credentials section. To carry out this process, you must select the credentials you wish to assign to the previously selected devices.
Note
Use el componente de Multiple Selection of Elements para agilizar el proceso de selección en listados extensos.
Detailed asset information
By clicking on the name of a particular item, its corresponding detail view will pop up with the configuration values of the different attributes of the item registered in the configurations system.
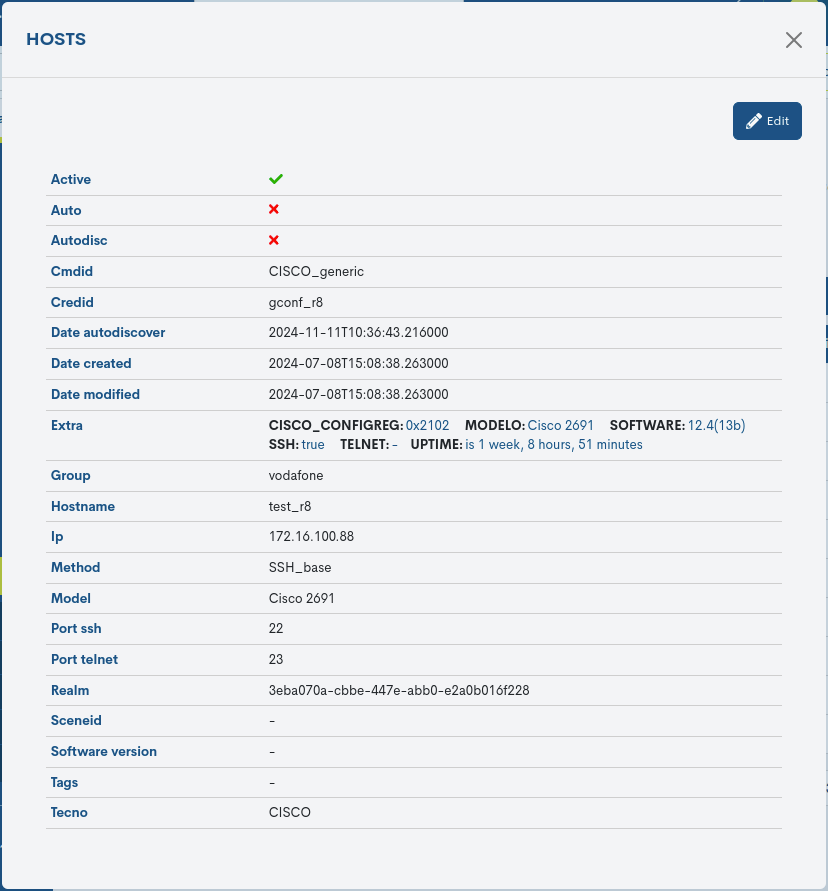
The following is a description of the different attributes:
- ✓ Active
Indicates whether the Device is active, i.e. is being monitoring in the system.
- ✓ Autodisc
Indicates whether the Host is enabled to be auto-discoverable.
- ✓ Cmdid
Details the unique identifier associated with a specific command or request command or request sent to the Host.
- ✓ Credid
Registers the Credentials with which attempt to access the Host.
- ✓ Date Autodiscover
Records the exact time (date and time) at which the Hosts was self-discovered.
- ✓ Date created
Records the exact time (date and time) when the Host was created.
- ✓ Date modified
Records the exact time (date and time) at which the last modification of the Host was made.
- ✓ Extra
Include additional information of interest on the Host in issue: specific model, software, whether it has been discovered by SSH, duration of states, etc.
- ✓ Group
Details the group(s) to which the Device belongs. These logical groupings make it easier to perform and manage backups of the set.
- ✓ Hostname
Formal name of the Device in question.
- ✓ IP
Contains the IP address of the Host.
- ✓ Method
Refers to the base connection method used to establish secure communication with that Host.
- ✓ Model
Technical model of the Host.
- ✓ Port ssh
Refers to the port number used to establish SSH connections to that Host.
- ✓ Port Telnet
Refers to the port number used for Telnet connections to that Host.
- ✓ Realm
Realm to which the Device belongs. This is a unique identifier”Self-generated”
- ✓ Sceneid
The Scenes applied to the Host are detailed.
- ✓ Tags
Records the internal descriptive tags associated with the Host.
- ✓ Tecno
Details the type of technology or protocol used by such a Host for communication and data transfer.
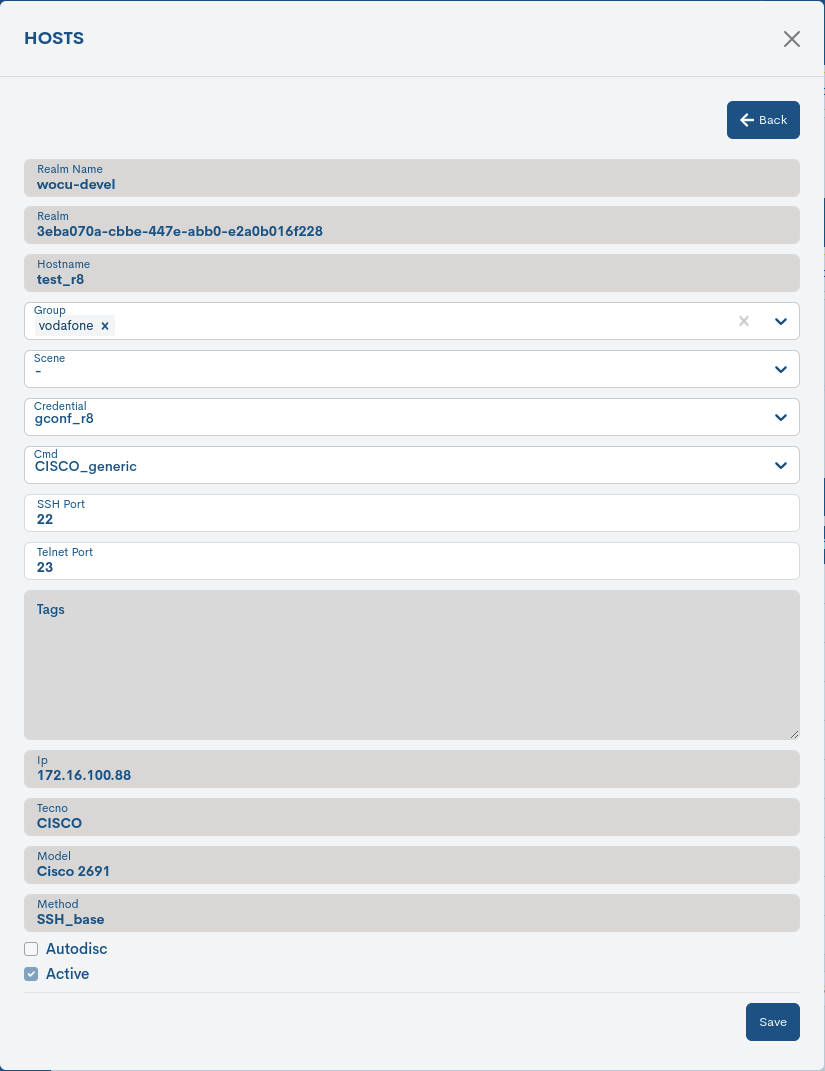
The system also allows changes to the configuration of the element from the information modal itself. Through the button Edit button, you can access the editable form with the configuration parameters of the original element, for free modification and update.
Filtering, Selection, and Exporting Items
Por defecto, todas las opciones de filtrado vienen ocultas dejando un espacio más amplio y despejado para la visualización y lectura de datos. Basta con hacer clic sobre la opción Filters seguido del icono de embudo (ver imagen) y se desplegarán los filtros disponibles.
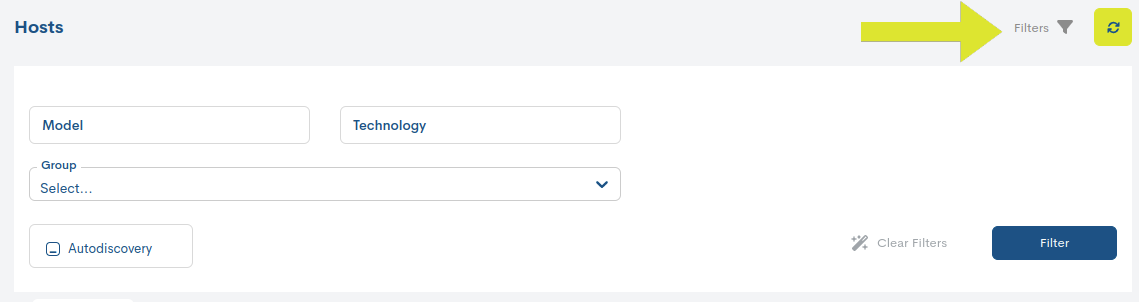
Filter by Model
Useful filtering option to display only assets that belong to a specific model. To do this, it will be necessary to select or enter the name of a specific model in the dropdown menu, and the table will automatically be restricted to show only the relevant assets.
The action is confirmed by the Filter button. The action is toggled using the Clear Filter button.
Filter by Technology
Useful filtering option to display only assets according to the technology or type of technology they use. In other words, this filter allows users to categorize and specifically visualize assets related to a particular technology.
To do this, it will be necessary to select or enter the name of a specific technology in the dropdown menu, and the table will automatically be narrowed down to display only the relevant assets.
The action is confirmed by the Filter button. The action is toggled using the Clear Filter button.
Filter by group
The tool uses groups to facilitate the creation and management of backups for the set. Therefore, by expanding this filtering option, all managed groups will be listed. By selecting one or more of them, the table will be automatically narrowed down to display only the elements belonging to the chosen groups.
The action is confirmed by the Filter button. The action is toggled using the Clear Filter button.
Autodiscovery
Through the Autodiscover action, the system attempts to identify the type of a device, including its brand and model, in order to interact correctly with it.
Therefore, this filter is useful to display only the assets that have undergone the autodiscovery action for data extraction and logging.
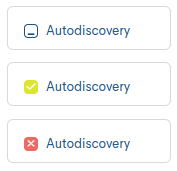
Icon |
Value |
Descripción |
|---|---|---|
ー |
Off |
The filter is not enabled. The table displays all items by default. |
✔ |
True |
Filter enabled. The table is updated to display items that meet the filter condition. |
✖ |
False |
Filter enabled. The table is updated to hide items that meet the filter condition. |
Multiple Selection of Elements
By clicking on this dropdown menu, all possible options for element selection will be displayed. Upon choosing one of them, the table will immediately reflect the changes.
The available options are:
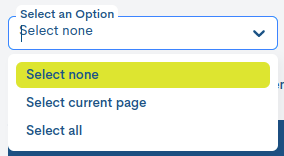
Select All: selects the entire list.
Select Current Page: selects only the page currently being viewed.
Select none: does not mark any items. It is useful for disabling the previous options.
The selected records will always appear highlighted with a green background.
Important
Manual selection of items is also possible by clicking on each of them. For marking multiple items, hold down the CTRL key while selecting the other options you wish to choose.
Export of the list of Items
Although WOCU-Monitoring offers a multitude of functions for data administration, metrics, graphics, etc., at some point, the use of other external tools may be required to handle such information. Therefore, the export function is integrated, which facilitates downloading inventory data into a file onto the hard disk for processing or later use.
Following the action Packs, there are two options available for downloading files in CSV and JSON formats.
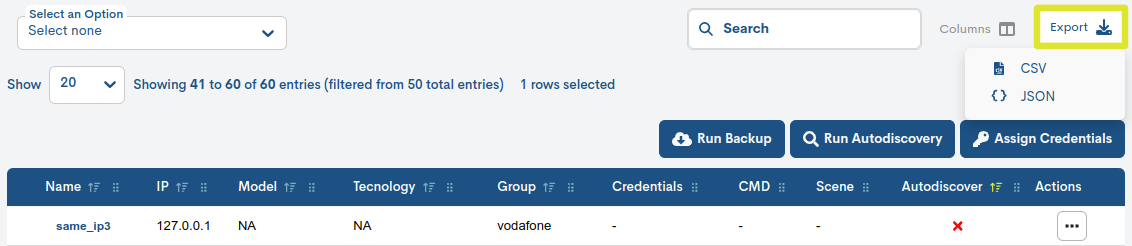
Clicking on any of the buttons initiates the download of files in the following formats:
CSV (Comma Separated Value)
Clicking on the CSV button will open a new modal for selecting and marking parameters to export according to the user’s criteria. The available options are:
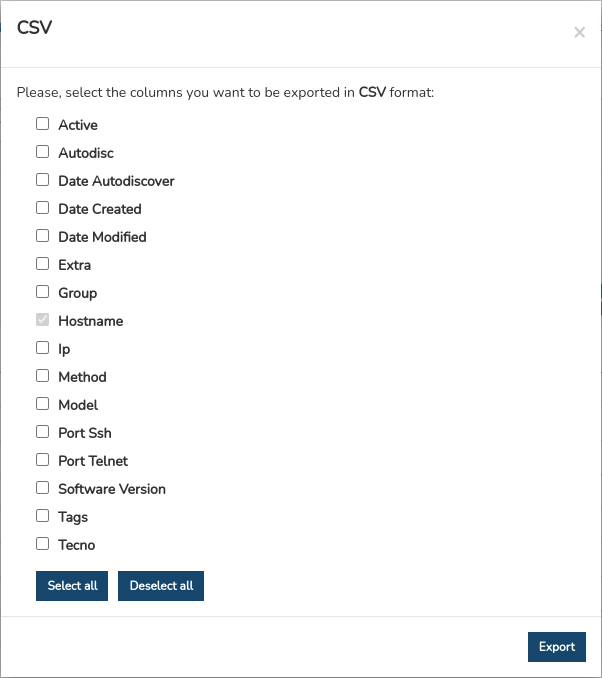
Active
Autodisc
Date Autodiscover
Date created
Date modified
Extra
Group
Hostname (Mandatory)
Ip
Method
Model
Port ssh
Port Telnet
Software version
Tags
Tecno
Once the selection is confirmed, the download of a CSV file begins. This format is simple, separating columns by a delimiter (semicolon “;”) and rows by a newline.
Note
Use the Select all button to select all available fields/boxes and perform a complete export. You can undo this action using the Deselect all button.
JSON (JavaScript Object Notation)
This other option follows the same procedure as the previous case but initiates the download of a JSON (JavaScript Object Notation) file, a lightweight data interchange format capable of being read by any programming language, and thus used for exchanging information between different technologies.
In both options, the system will offer the choice to select the directory where to download and store the generated inventory file, and assign an alternative name to it. By default, the system assigns the following name:
gconf_[nombre del reino]__00h-00min_dd-mm-aaaa y la extensión ``.csv`` o ``.json`` según la opción escogida.
Commands
The Inventory Commands section is a detailed list of all the access commands to be executed in order to query and collect data to Hosts.
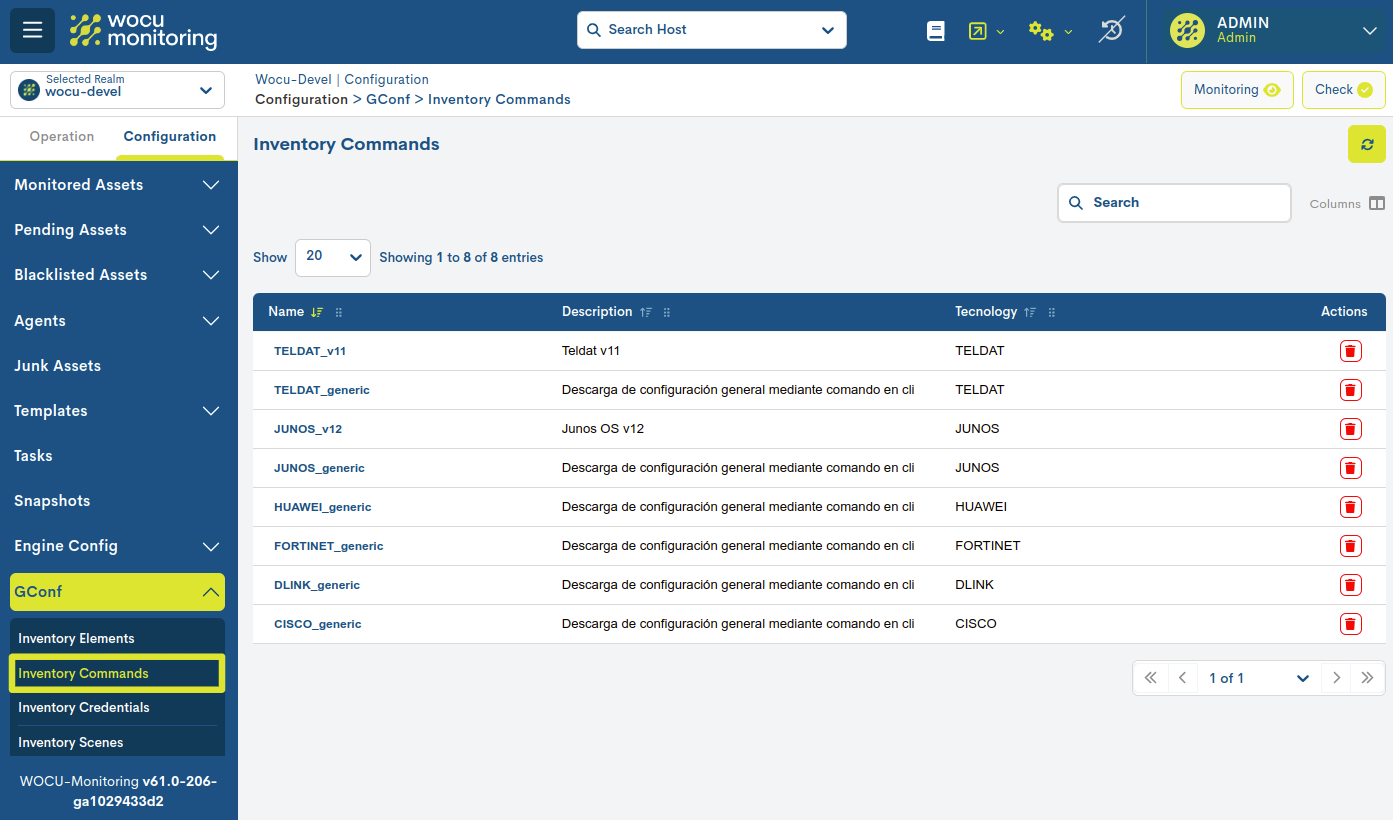
The different fields/columns of the table are described below:
- ✓ Name
Formal name of the command in question.
- ✓ Description
Refers to a text field that provides a detailed detailed description or an explanation of the functionality or purpose of the command in question. This attribute is used to document and clearly communicate the nature and intended use of the command.
- ✓ Tecno
Details the type of technology or protocol used by the command.
Actions
The possible actions applicable to each entry in the table are described below:

Delete
With this action, the command is permanently deleted. To consolidate the deletion, it will be necessary to confirm the action in the following dialog box:

Detailed command information
Clicking on the name of a particular command will bring up its corresponding corresponding detail view will pop up with the configuration values of the various attributes of the element registered in the configurations.
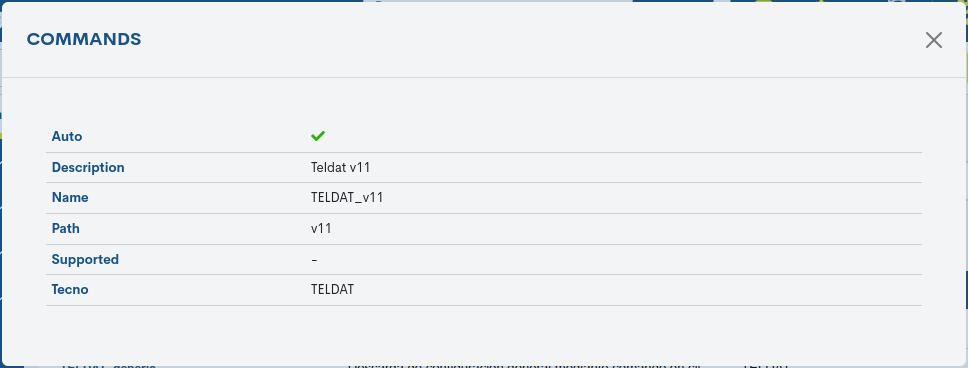
The following is a description of the different attributes:
- ✓ Description
Refers to a text field that provides a detailed detailed description or an explanation of the functionality or purpose of the command in question. This attribute is used to document and clearly communicate the nature and intended use of the command.
- ✓ Name
Formal name of the command in question.
- ✓ Path
Refers to the name of the file hosting the command.
- ✓ Tecno
Details the type of technology or protocol used by the command.
Credentials
The Inventory Credentials section is a detailed list of all the credentials or authentication information necessary to access and collect data from hosts, so it is important to correlate them correctly with each item present in the Device Inventory.
From this space, it is possible to create, edit, delete and view the different managed credentials.
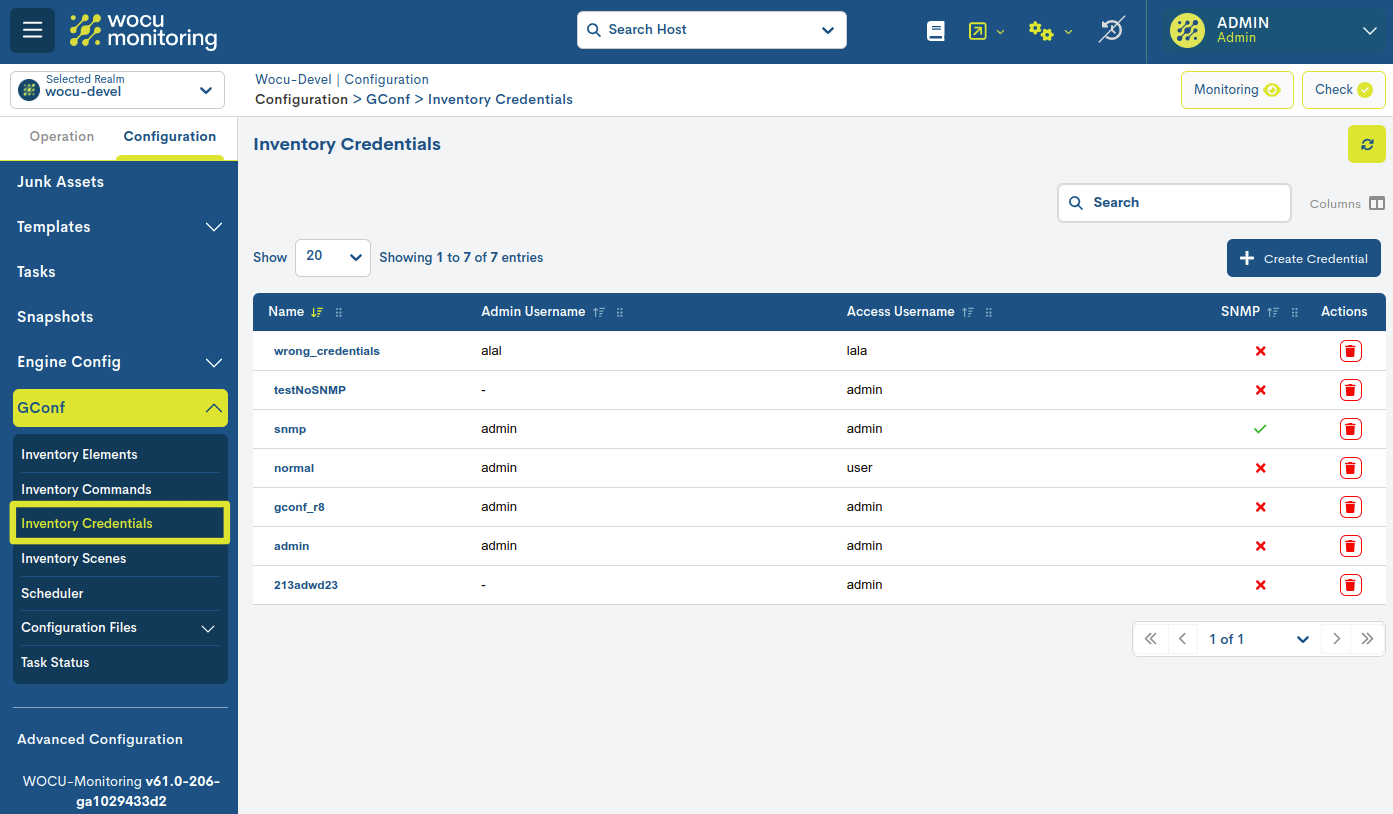
The different fields/columns of the table are described below:
- ✓ Name
Formal name identifying the credential.
- ✓ Admin Username
Name of the administrator user in case you need to access the equipment as such.
- ✓ Access Username
Name of the user accessing the equipment.
Actions
The possible actions applicable to each entry in the table are described below:
Delete
With this action, the credential is definitively erased.
In order to consolidate the deregistration, it will be necessary to confirm the action in the following dialogue box:
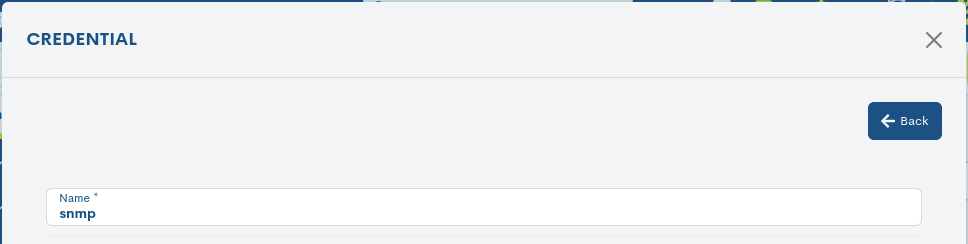
Detailed information on the credential
Clicking on the name of a particular credential will bring up its corresponding detail view with the configuration values of the different attributes registered in the configuration system.
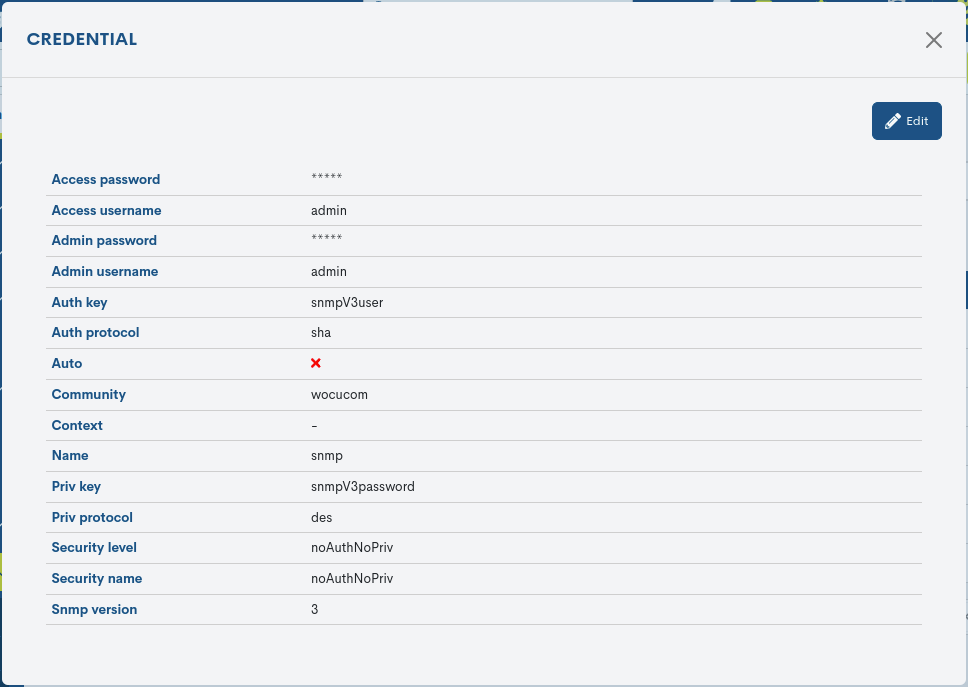
The following is a description of the different attributes:
- ✓ Name
Formal name of the credential.
- ✓ Access Username
User with standard privileges.
- ✓ Access Password
Access password for the user with standard privileges.
- ✓ Admin Username
User with Administrator privileges, in case there is a need to escalate privileges within the team.
- ✓ Admin Password
Password relating to the Administrator user.
- ✓ Community
Refers to the SNMP community. A text string used as a password to access the discovered devices and retrieve information to be imported into WOCU-Monitoring.
- ✓ Security Name
Security name or username. Applicable only for SNMP protocol version 3.
- ✓ Auth Protocol
Authentication type. It can be MD5 or SHA v3. Applicable only for SNMP protocol version 3.
- ✓ Priv Protocol
Authorization type. It can be AES or DES v3. Applicable only for SNMP protocol version 3.
- ✓ Auth Key
Authentication key. Only applicable for SNMP protocol version 3.
- ✓ Priv Key
Authorization key. Only applicable for SNMP protocol version 3.
- ✓ Security Level
It can be used with no authentication or authorization (noAuthNoPriv); only authentication (authNoPriv); or authentication and authorization (authPriv). Applicable only for SNMP protocol version 3.
- ✓ Context
SNMP context name. Only applicable for SNMP protocol version 3.
- ✓ SNMP Version
Specific version of the SNMP protocol that has been used.
The system also allows for changes to be made to the configuration of the credential from the information modal itself. Through the button Edit button, you can access the editable form with the configuration of the original element, for free modification and update.
Registration of new credentials
New credentials will be initiated from the button + Create Credential.

The following form must then be completed:
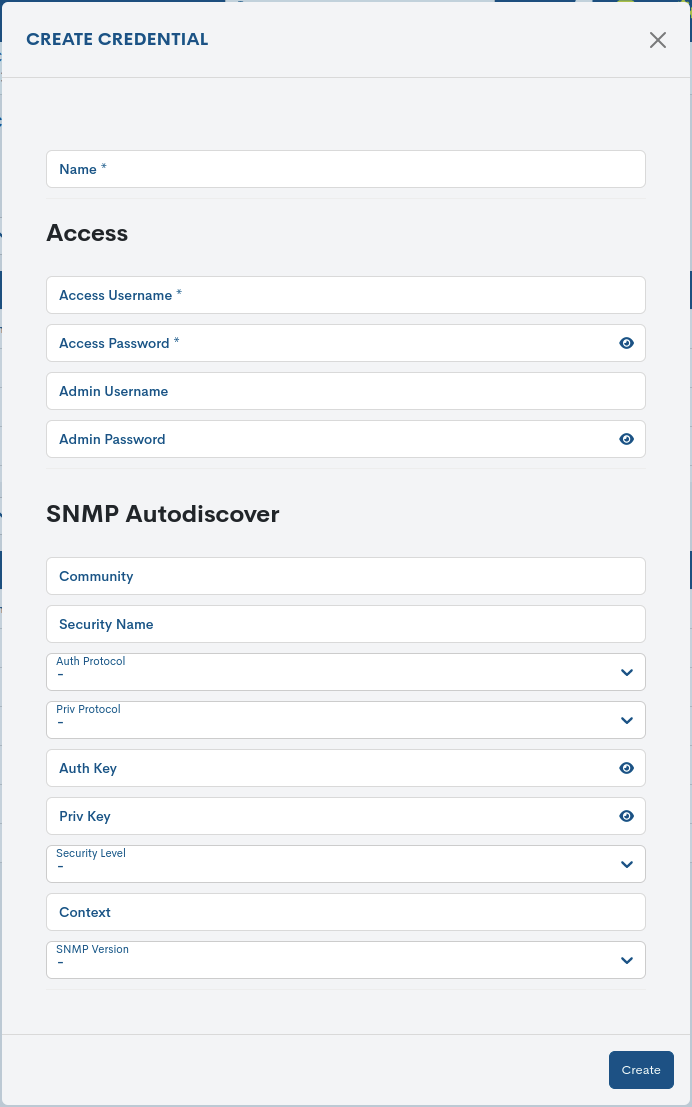
Note
These attributes match those described in: Detailed information on the credential.
Scenes
A Scene is a set of reproducible instructions that cover a specific scenario for successful access to a given piece of equipment, moments prior to connection (e.g. jump machines).
Therefore, the Inventory Scenes section shows a detailed list of the different scenes defined. It is of paramount importance to link scenes with those teams where it is necessary.
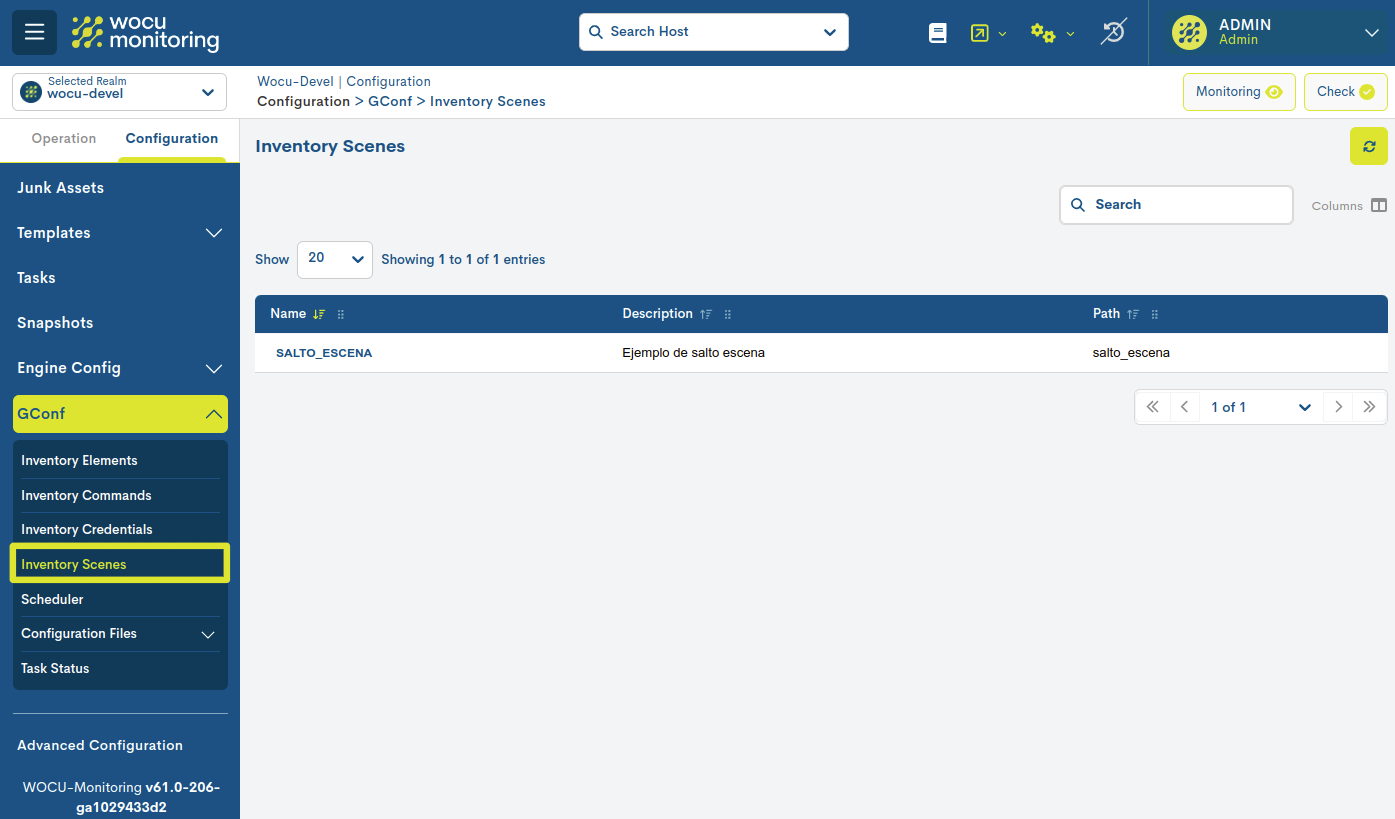
The different fields/columns of the table are described below:
- ✓ Name
Formal name of the scene.
- ✓ Description
Brief description of the scene.
- ✓ Path
Name of the file containing the scene configuration.
Detailed scene information
By clicking on the name of a particular scene, its corresponding detail view with the configuration values of the different attributes registered in the configuration system.
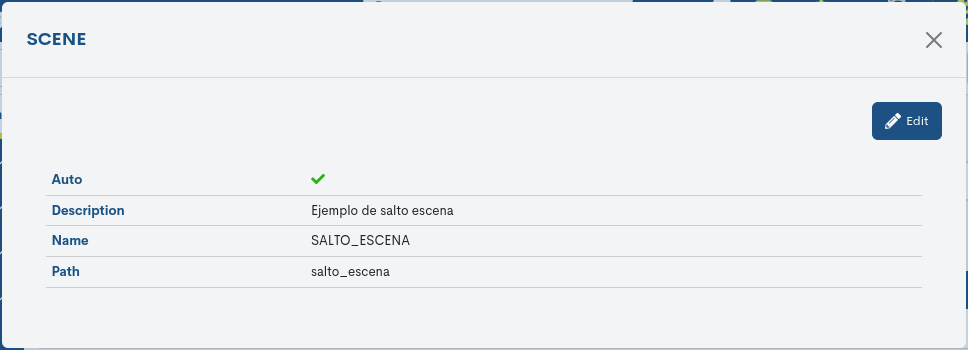
Note
These attributes are in line with those described in the previous point.
Scheduler
The Scheduler section is a space for the scheduling of tasks for the execution of backups. In other words, this section is used to set the frequency, timing and repetition of backup operations in an automated manner.
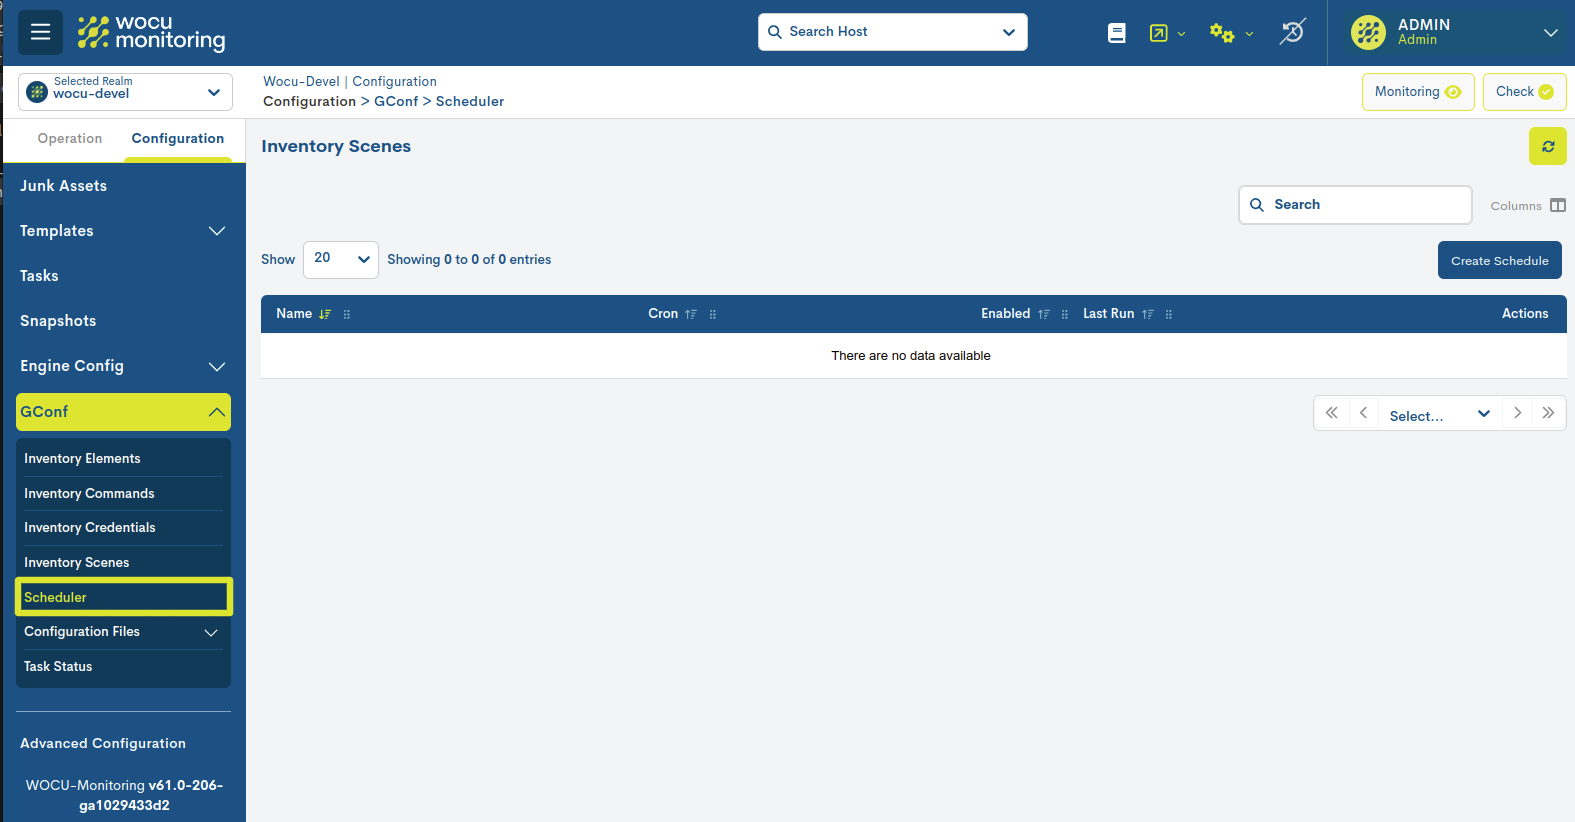
The different fields/columns of the table are described below:
- ✓ Name
Name assigned to the scheduled task.
- ✓ Cron
Logs the frequency and exact time at which the backup is to be executed automatically. This is expressed in Crontab format.
- ✓ Enabled
Indicates whether or not programming is active for execution.
- ✓ Last run
Indicates the date and time of the last time the scheduled scheduled. Provides information on the most recent time that the backup operation was successfully completed.
Actions
The possible actions applicable to each entry in the table are described below:
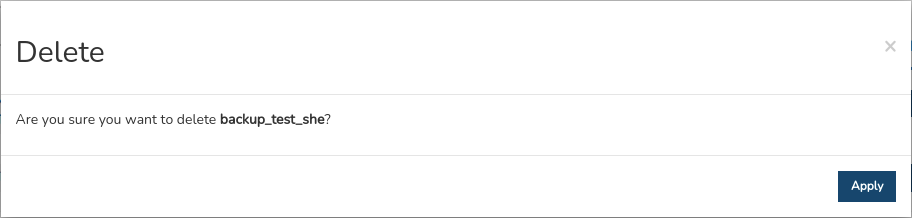
Delete
With this action, the credential is definitively erased.
In order to consolidate the deregistration, it will be necessary to confirm the action in the following dialogue box:
Detailed information on a programme.
By clicking on the name of a particular item, its corresponding detail view will pop up with the configuration values of the different attributes of the item registered in the configurations system.
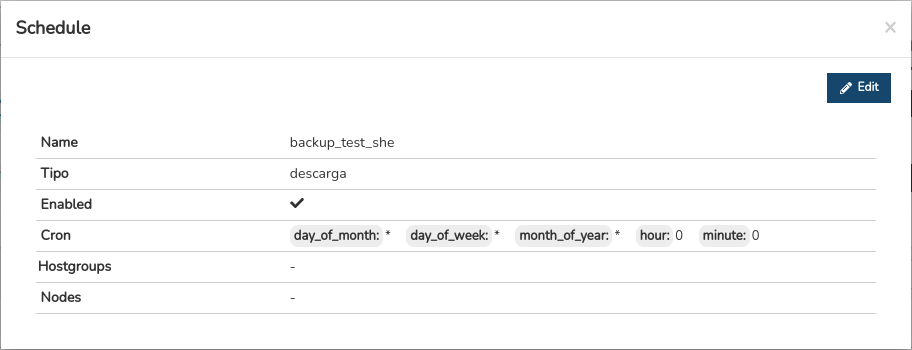
The following is a description of the different attributes:
- ✓ Name
Identifying name of the programme.
✓ Type
- ✓ Enabled
Indicates whether or not programming is active for execution.
- ✓ Cron
Logs the frequency and exact time at which the backup is to be executed automatically. This is expressed in Crontab format.
- ✓ Hostgroups
Register the group of devices to be backup to.
- ✓ Nodes
Register the individual teams to be backup.
The system also allows changes to the configuration of the element from the information modal itself. Through the button Edit button, you can access the editable form with the configuration parameters of the original element, for free modification and update.
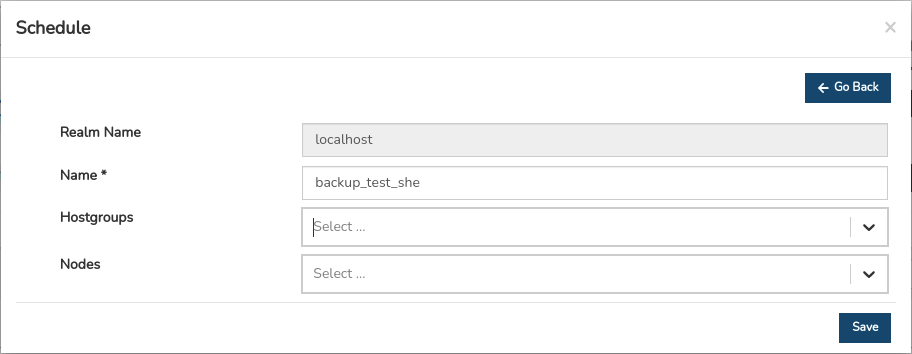
Registration of new programmes
The creation of new schedules shall be started from the button + Add.
The following describes the corresponding fields to be configured in the following form:
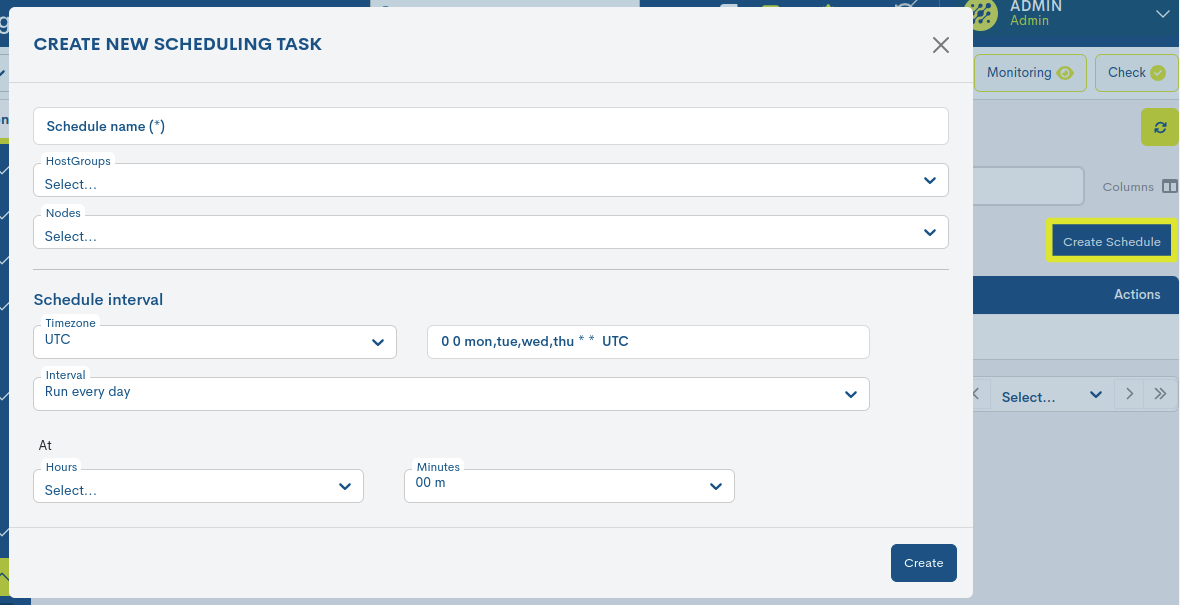
- ✓ Schedule Name
Unique identifier of the newly scheduled task.
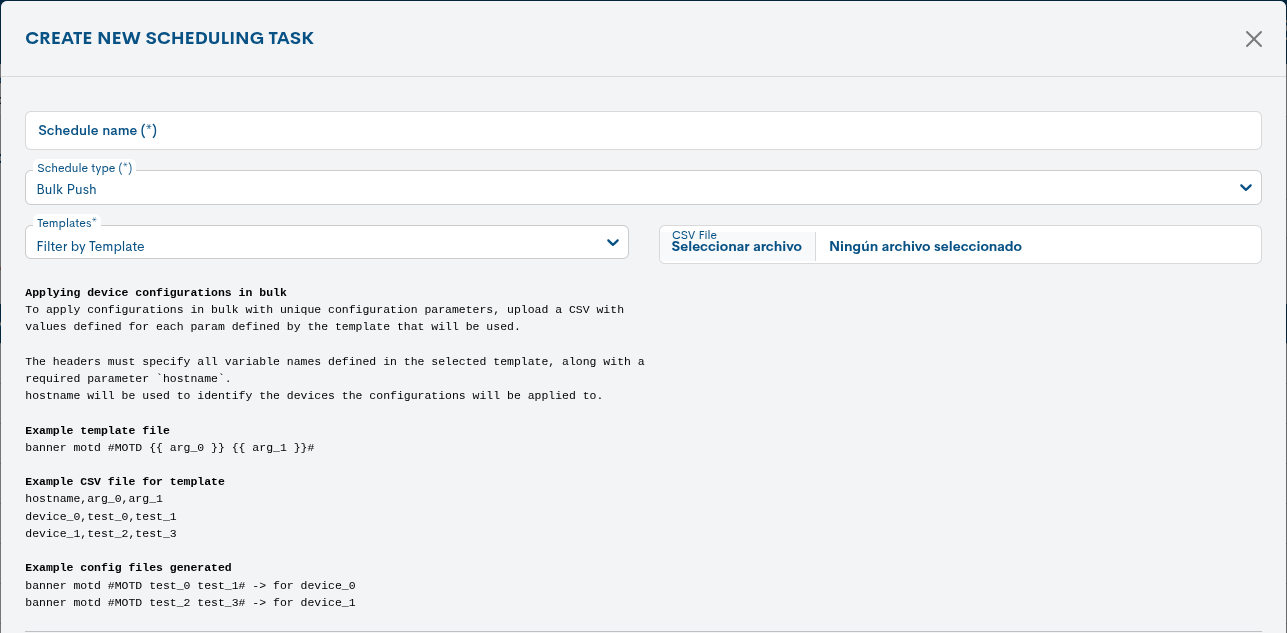
✓ Schedule Type
Scheduled task type selector. The possible options are:
Backup: Creates backups of the selected devicesin the settings.

Bulk Push: Allows you to apply configurations in bulk by uploading a CSV file and selecting a template. The system will use this information to automatically execute the configuration on the devices according to the established schedule.
- ✓ Host Groups
Selector of equipment groups to be backed up.
- ✓ Hosts
Selector of individual teams to be backed up.
- ✓ Model
This filter limits task execution to devices of a specific model.devices of a specific model.
- ✓ Tecnology
Device selector based on the technology they use.
- ✓ Version
Filter devices based on a specific software version.
Schedule Interval
This section establishes the frequency and time zone in which the task will be executed.
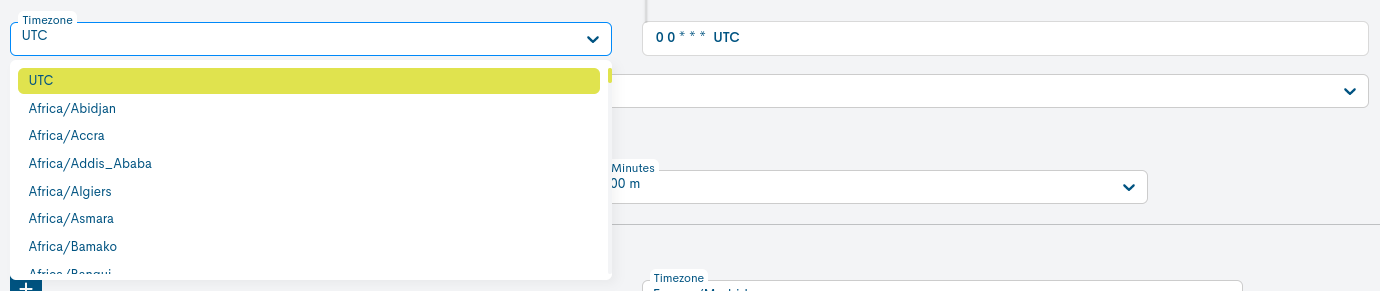
- ✓ Timezone
For selecting the time zone to be considered in the collection of data for the new task. This option is useful for operators who want to schedule tasks using a time zone different from the one they are currently in.
✓ Interval
Run every day: This option will restart the task daily. To configure it, you will need to specify the hour and minute at which the task will be launched each day using the time selectors At.

Run every week: This option will restart the task weekly. Its settings display a series of selectors:

Run at days: to define the day or days of the week for launch.
Days Week: Selector for predefined settings for the automatic generation of tasks. Selecting one of the available options will automatically set the corresponding configuration.
Default: This option configures the launch of tasks by default on Mondays (Mo) and at the time set by the user.
Working days: Tasks will only be released on working days(Mo, Tu, We, Th, Fr).
Weekend: Tasks will only be released on weekends(Sa, Su).
Run every month: This option will restart the task monthly. In its settings, the following selectors are displayed:

On day: to indicate the day of the month on which the task will be launched.The numbers from 1 to 31 represent the days of the month.
Time Selector At: to schedule the hour and minute at which the task will be launched on each set day of each month.
Attention
If the 29th, 30th, or 31st are selected, months with fewer days will be excluded from execution.Months with fewer days.
Run on cron schedule: Finally, this option allows you to configure it just as you would in Crontab format, providing all the flexibility of this tool for more specific and customized scenarios.

Important
To use this option, you need to know the tool Crontab format.
Complete the new configuration by clicking the Create button.
Config Deployment
From this section it is possible to automate changes of configuration on managed and monitored network equipment in the application, through the import and management of files and the linking custom templates.
Note
Once the configuration files have been registered, they can be appliedmassively to Devices through action Bulk application of settings, present in the listing of Hosts.
This section is subdivided into the following views:
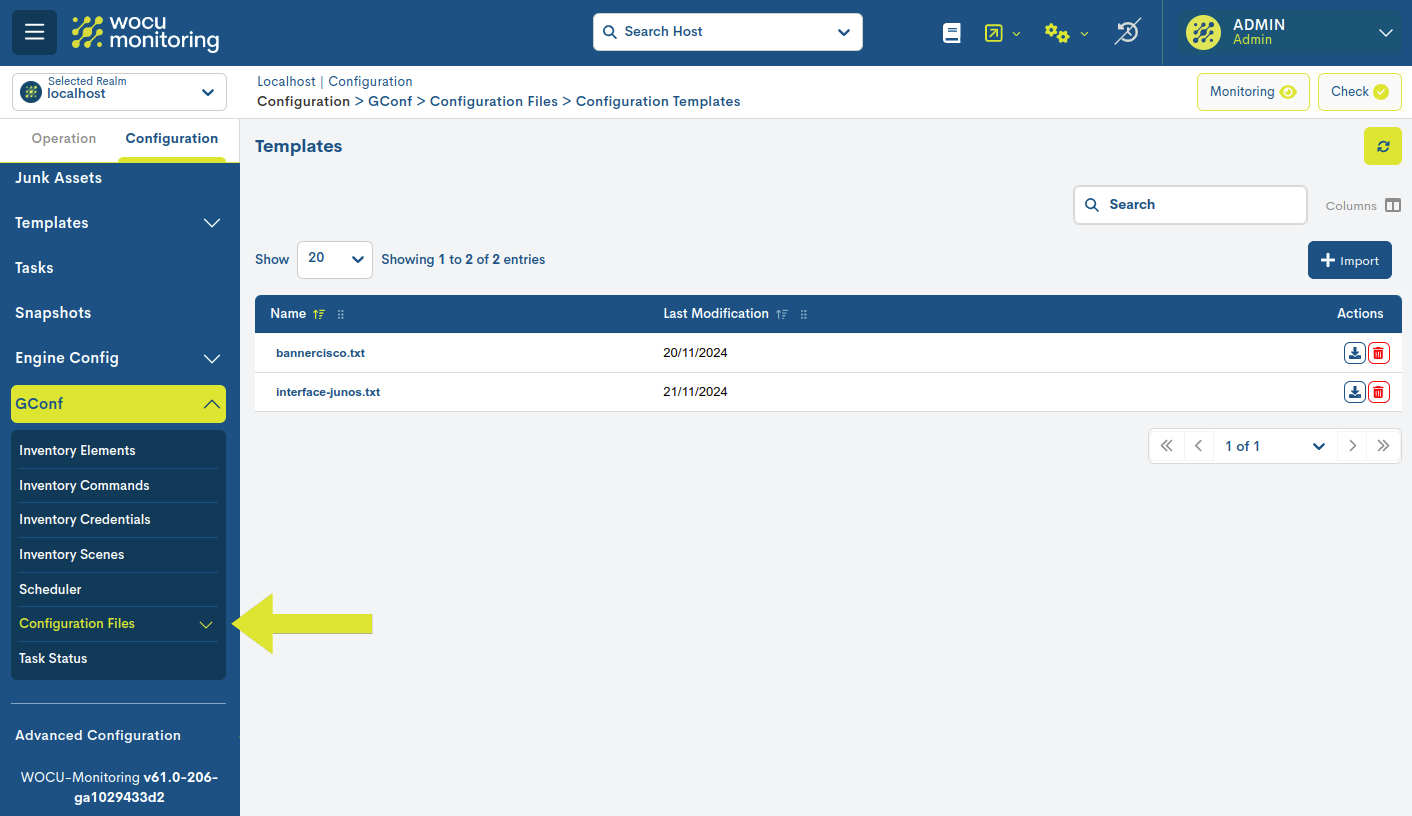
Configuration Templates
This view is intended for importing and managing templates,which can later be linked to a certain equipment orgroup of selected teams.
These templates act as models or configuration profiles, in which that the user can freely define and edit the blocks thatmake up the desired configuration. In addition, it is possible to associate the templates to a configuration file, which will inherit their attributes and parameters, serving as a basis for configuring the equipmentmonitored.
Important
Modifications made to the templates are the responsibility of theuser and will be recorded for audit. Both the changes and their implementation will require manual validation to ensure compliancetraceability and control of actions.
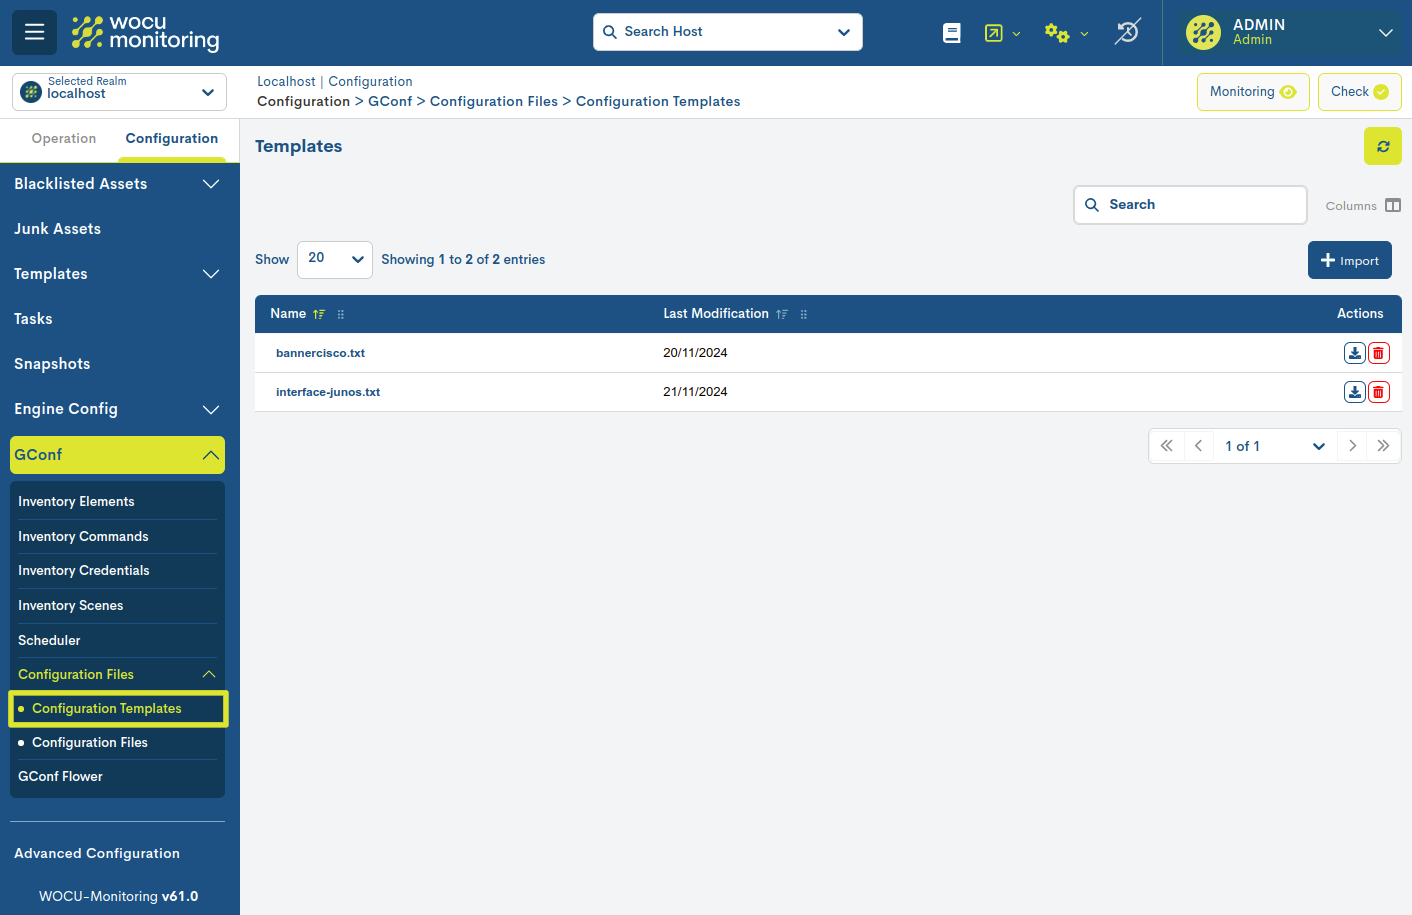
The different fields/columns of the table are described belowwhere the existing templates are presented:

- ✓ Name
Identifying name of the template.
- ✓ Last Modification
Exact date on which the last update of the file.
Actions
The possible actions applicable to each entry in the table are described below:

Download
Facilitates the download of the file. Executing this action will start the download of the file to the hard drive, for subsequent processing or use.

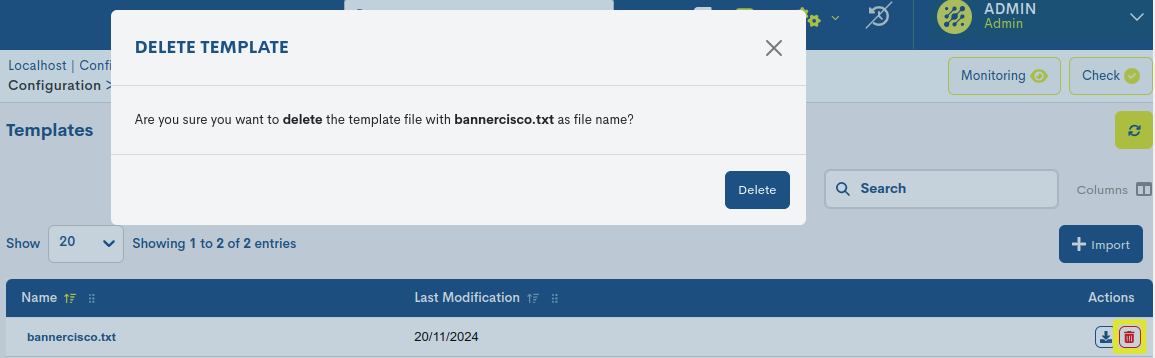
Delete
Proceeds to the definitive deletion of a specific template. To to consolidate the deregistration, it will be necessary to confirm the action in the nextdialog box.
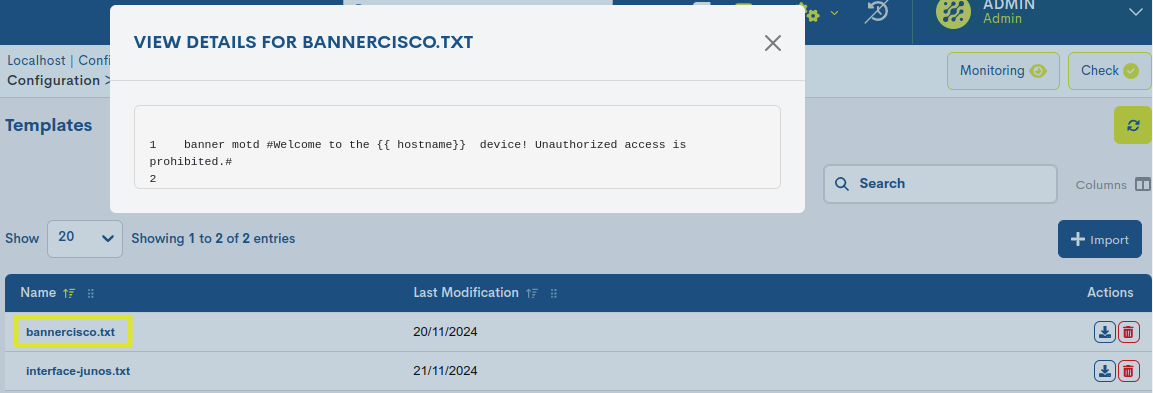
Detailed information about a Template
By clicking on the name of a specific item, its corresponding detail view with configuration valuesdifferent configuration attributes.
Template Import
From this location it is possible to import new templates to WOCU-Monitoring.
When you click the Import button, a new window will appear that will allow selecting the file from the system. Only upload one template at a time.
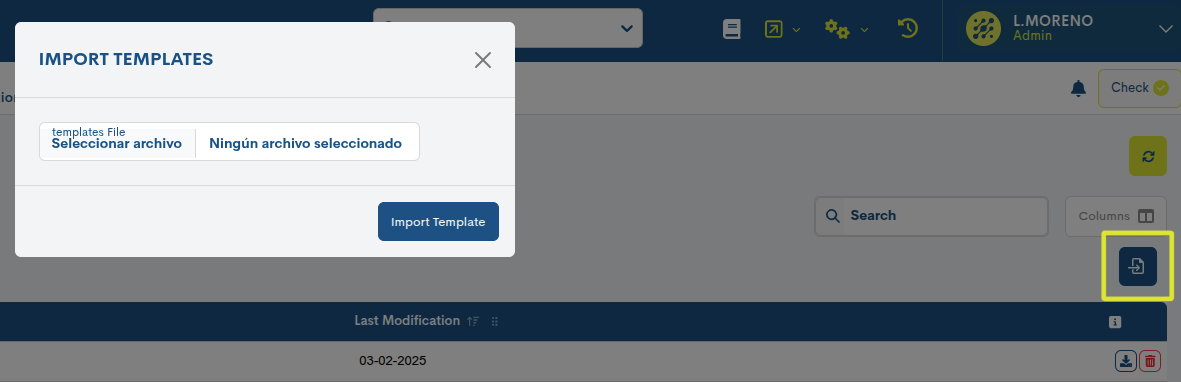
During the loading and storage process, it will be verified that the template meets the required format. Otherwise, it will be generatedan error message stating that the file is invalid.
Configuration Files
The different configuration files are managed from this sectionwhich may be linked to one or more monitoring equipment.In addition, the user will be able to add a new file, which will be stacked in the table with the existing ones.
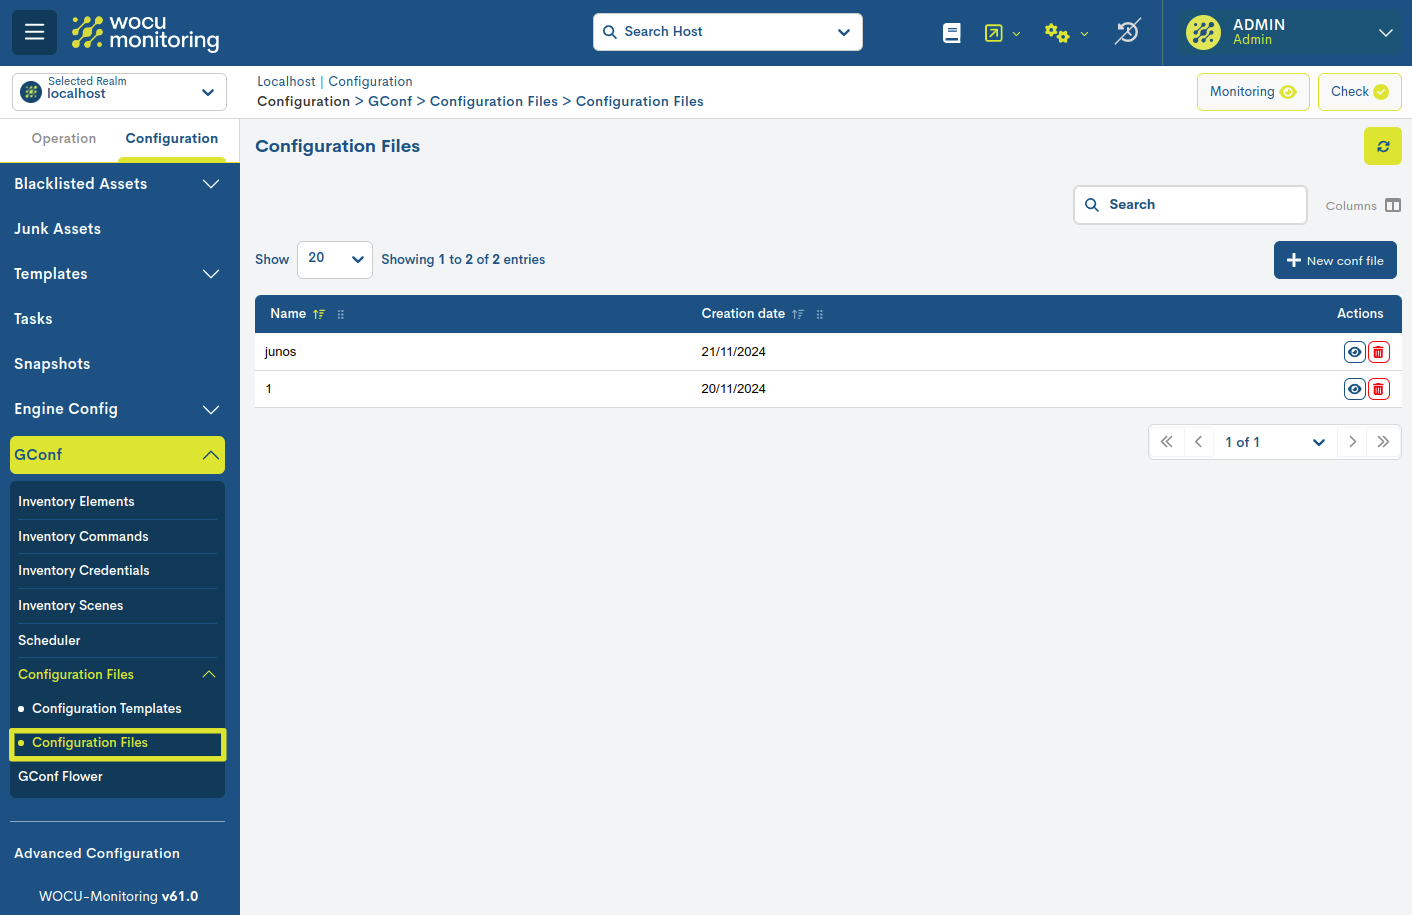
The different fields/columns of the table are described below:

- ✓ Name
Identifying name of the configuration file.
- ✓ Creation date
Exact date on which the configuration file was created.
Actions
The possible actions applicable to each entry in the table are described below:

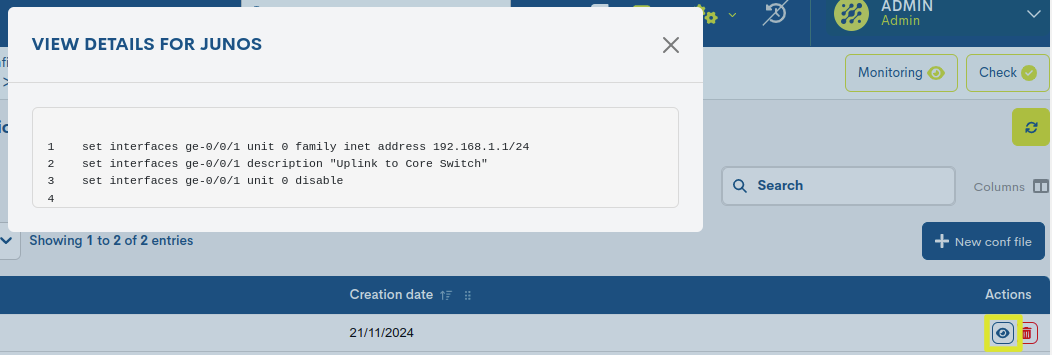
View details
With this action the user can access the entire fileconfiguration. This action is merely informative, it does not perform any modification. If you need to edit the file, it will be need to create a new one from a template.
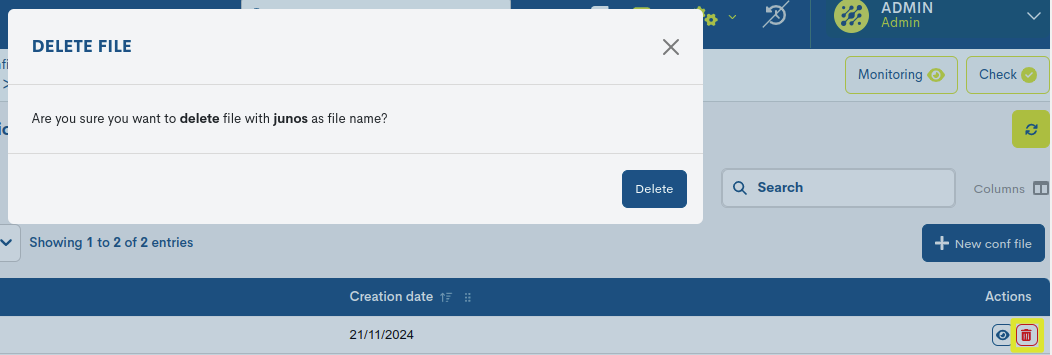
Delete
Proceeds to the definitive deletion of a specific file. To consolidatethe cancellation, it will be necessary to confirm the action in the following boxdialogue.
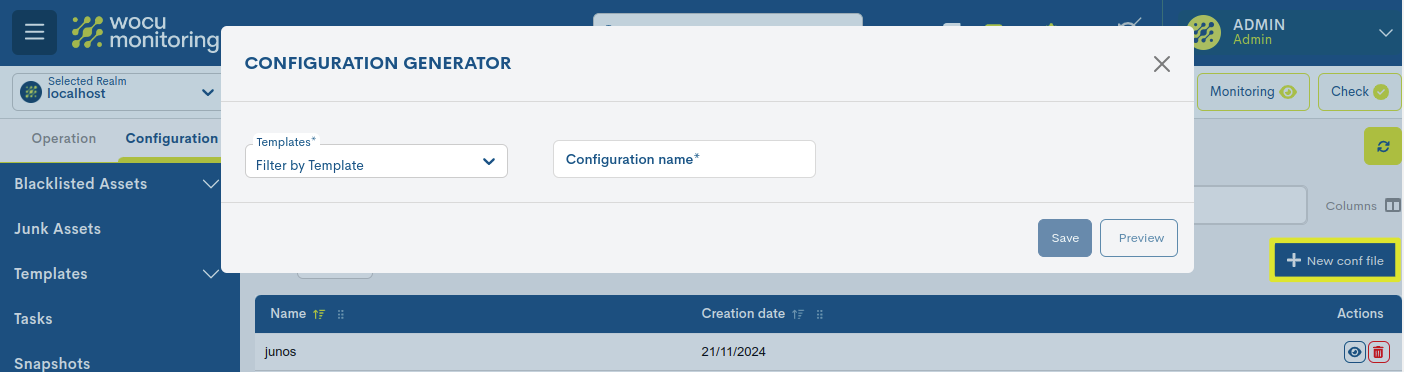
Registration of new files (New conf file)
From this location it is possible to generate new filesconfiguring network equipment in WOCU-Monitoring. Additionally, it is possible carry out modification of existing templates for transform them into a new configuration file.
When you click the + New conf file button, a window will be displayed with the following two fields that must be completed:
- ✓ Templates
Available template selector. These templates have been createdpreviously in the Configuration Templates section.
- ✓ Configuration name
Field used to save the identifying name of the filecorresponding configuration.
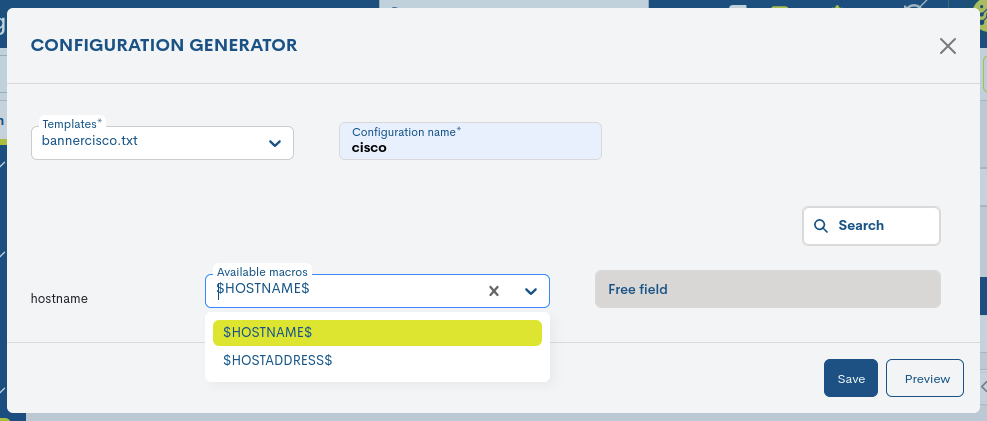
From this moment on, there are two ways to configure variableswhich must be replaced by a value:
1. Using pre-established Macros
WOCU-Monitoring has a library of macros that facilitate the settings on the devices. In this case, the macros are used to replace variables.
The Available macros field displays the options available for your selection.
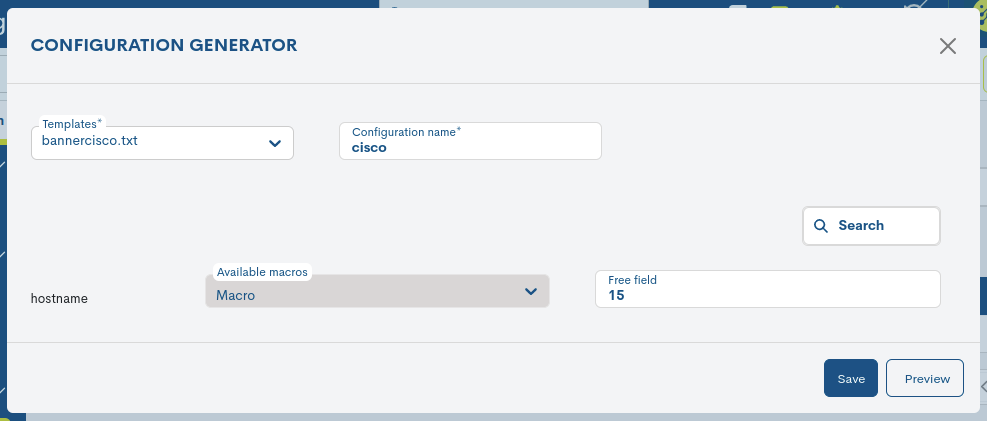
2. Free use of configuration values (Free fields)
The system also allows you to replace the variable with any valuemanually entered by the user.
Finally, from the Preview action you can see the resultprovisional file according to the established configuration:
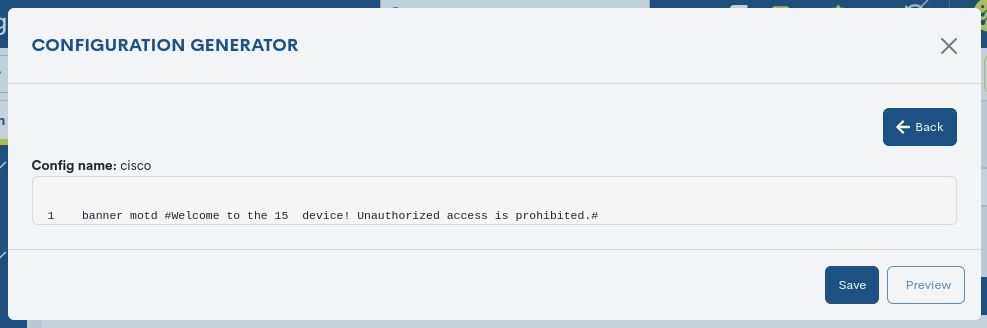
Once the configuration files have been registered, they can be appliedmassively to computers via the Bulk application of settings action,present in the Hosts listing.
Task status
This table offers detailed information on the situation and status current of tasks executed and deployed in GConf.
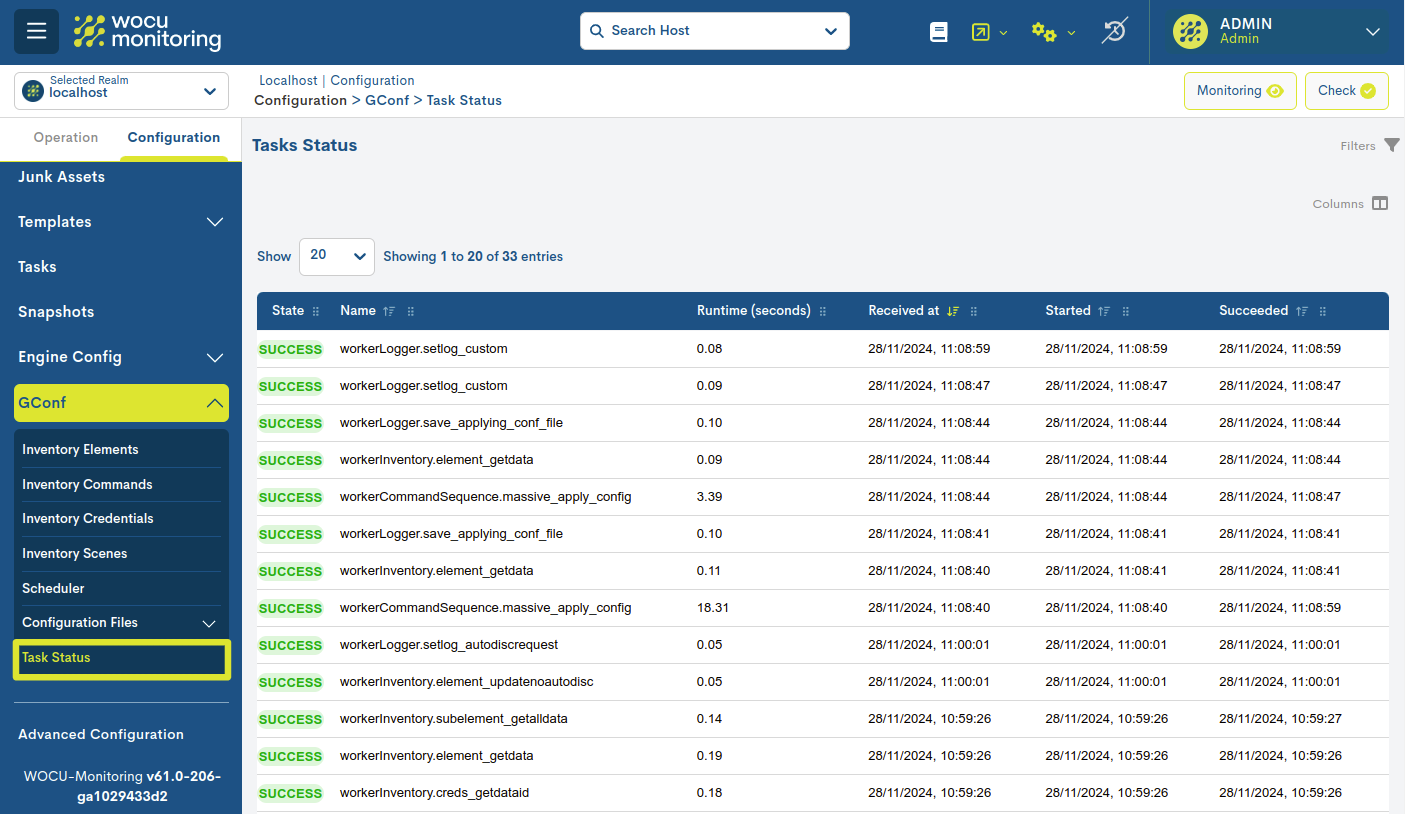
The different fields/columns of the table are described below:
- ✓ State
This field reports the current status of the task in question. The statuses possible are:
Failure: assigned when the execution of the task failed, whennot being able to satisfy the request due to some internal error or due to theexistence of other tasks launched simultaneously.
Pending: the task is waiting to be executed.
Received: the task has been received in the task manager, but still has not been processed.
Retry: the task is being retried.
Revoked: the task is revoked due to configuration problems orsome internal error.
Started: the task has been started.
Success: the task has been executed successfully.
- ✓ Name
Identifying name of each of the executed tasks.
- ✓ Runtime (seconds)
Total time (measured in seconds) it took to execute eachtask. This value represents the total duration from start to task completion.
- ✓ Received at
Reports the exact date and time in which the task manager receives thetask at hand.
- ✓ Started
Reports the exact date and time in which a task began its executionin the system.
- ✓ Finished
Reports the exact date and time that a specific task was completedcompleted.
Note
Tasks will be kept for 90 days in the tool, once after this period, it will be removed from view as well as the datarelated thereto.
Actions
Acciones aplicables sobre las tareas ejecutadas en el sistema.
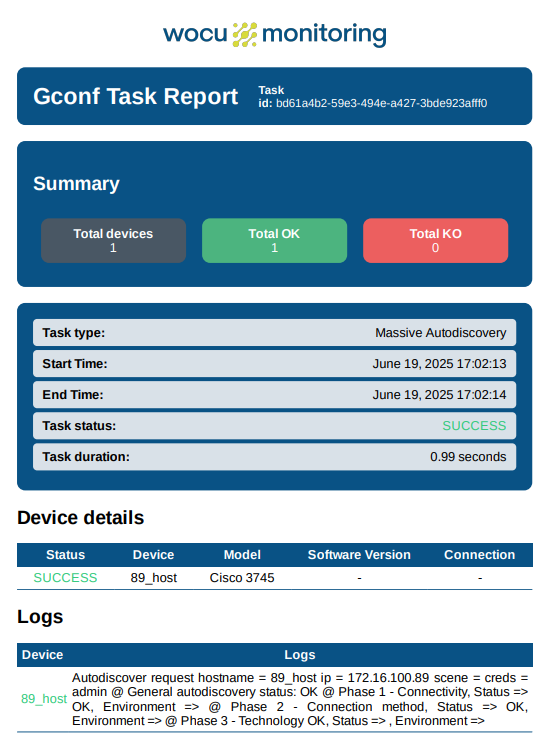
Download report
Clicking on this button downloads a report in PDF format about the specific task. The report includes a general summary of the execution status, start and end times, devices involved, detailed results per device, and the logs corresponding to the process.
Vista Job Information
By clicking on the callsign of any record in the table, A new window will appear with a summary of the task result:
Note
This action performs a mere query of the parameters that it does not performany change in the registry.

The fields in this information window are detailed below:
✓ Name: identifying name of the Task in question.
✓ UUID: numerical and unique identifier assigned by the system to each Task.
✓ Status: current status of the Task in question.
✓ Runtime (seconds): time it took to execute the Task.
Date: date and exact time of the execution of the backup.
Reports the exact date and time that a specific task was completedcompleted.
✓ Gráfica circular: muestra de forma visual y resumida el resultado global de una tarea ejecutada, indicando cuántos dispositivos finalizaron correctamente (OK) y cuántos fallaron (KO) respecto al total.
El círculo se divide en sectores proporcionales al número de dispositivos en cada estado: en color verde las ejecuciones correctas (OK) y en color rojo, ejecuciones con error (KO).
El porcentaje de cada color representa su peso sobre el total y el número mostrado indica la cantidad absoluta de dispositivos procesados.
✓ Result: output block that the system returns with informationindividualized on the configuration managed in the system.
Status: current status of the Task in question.
Device name: official device name.
Logs: summary message of the result.