Adding shortcuts to the top bar of WOCU-Monitoring
This top bar contains a series of information and options that remain accessible at all times as the user navigates through the different screens and modules of WOCU-Monitoring.

The fixed functionalities found in the bar are:
Link to Home screen (Home)
Number of logged-in users (Logged users)
Number of active sessions (Active sessions)
Auto-refresh screen option
User with which you have accessed the system
Current software version
Within the user’s usual operations, it is common to use other resources external to WOCU-Monitoring, whether they are corporate portals, complementary tools, external documentation generated in another portal, etc. For this reason, and as a way of speeding up and facilitating routine tasks or possible needs that may arise, the application allows you to centralise and add other new shortcuts in the top bar. In other words, this space is reserved for the Administrator to configure certain technical and visualisation aspects, with the aim of streamlining the dynamics and daily operations of the users.
Important
Remember that the shortcuts are global and will be visible to all users without restriction.
A case study for adding shortcuts to the top bar in WOCU is described below.
1. Access the WOCU Advanced Settings module
By clicking on the user name available in the top bar of WOCU-Monitoring, a menu with the option Advanced Configuration will be displayed. Clicking on it will take you to the WOCU-Monitoring Administration environment (Site Administration).

Attention
To access the Advanced Configuration module, you must be registered as an Administrator in the system.
2. Locate the Links option in the first table
Next, a new window will open in the browser giving access to the WOCU-Monitoring Administration module (Site Administration). This environment has different sections for the configuration of advanced parameters of different elements of the application.
In this location we find the Links option, from where we can add or edit new shortcuts to the top bar of the interface.

3. Add a new shortcut
After clicking on the + Add button, located in the same row as the Link element, as shown in the previous image, you will access a new window for adding new accesses, whose fields will have to be edited manually.
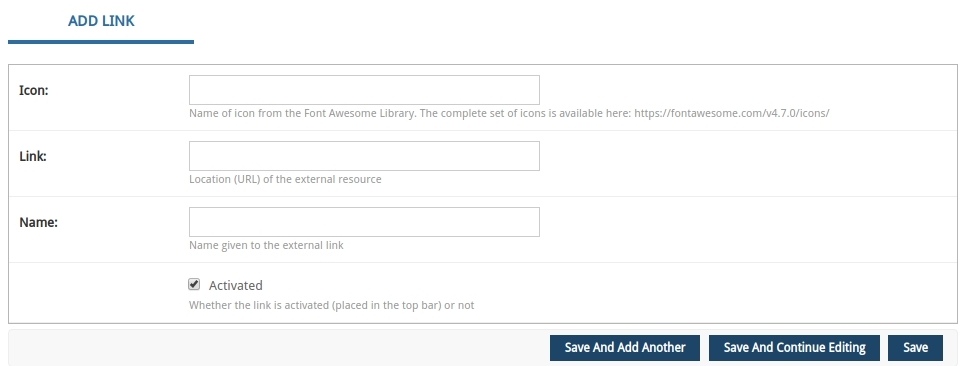
These are:
- Icon
Field to add the name of the icon that will accompany the shortcut. Its use is not mandatory.
WOCU-Monitoring works with the Font Awesome repository. The configuration is very simple, just add the name of the icon to be associated with the shortcut and WOCU-Monitoring will interpret and add it.
See example:
Search for the icon in the Font Awesome gallery.
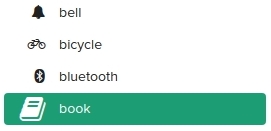
Add the corresponding name to the Icon field.

- Link
Field to add a valid
URLthat will direct to the tool, portal, website, etc., of interest. Regarding the construction of the address, in some cases it will be the result of the access by HTTP protocol to the monitoring IP (in this example the internal IP 192.168.1.3 has been used), adding a suffix afterwards: http://<monitoring_IP>/<suffix>.See examples:
http://192.168.1.3/grafana
http://192.168.1.3/aggregator/api-docs/
https://a3sec.com/manualdeusuariowocu/- Name
Identifying term of the link to be displayed in the bar.
See examples:
GrafanaAPI docs.
User manual- Activated
Checking this box will activate this new shortcut and make it part of the main WOCU-Monitoring toolbar. By default this option is enabled. By unchecking the box the link will be configured but will not be visible.
4. Save the configuration you have set up
Once the configuration is complete, save the changes you have made. There are several options for saving:
- Save and add another
This option saves the final configuration and subsequently presents a new empty form for the configuration of another new link.
- Save and continue editing
This option saves the configuration made so far, allowing you to continue editing the form.
- Save
This option saves the configuration and returns to the main Administration page in WOCU-Monitoring.

5. Log back in
Finally, you will have to log in again to display the newly added shortcut in the main toolbar.
See example:
6. Manage and modify links
Finally, it is also possible to access the complete list of links (both enabled and disabled). To do so, click on the 🖉 Change option.
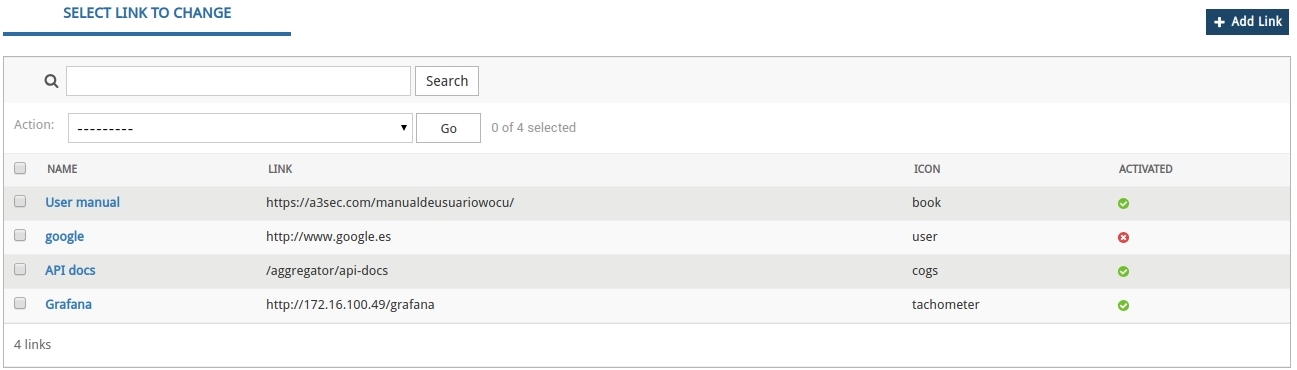
From this view it is possible:
1. Add a new link, thanks to the + Add Link button.
2. Access the configuration of each of them by clicking on their name.
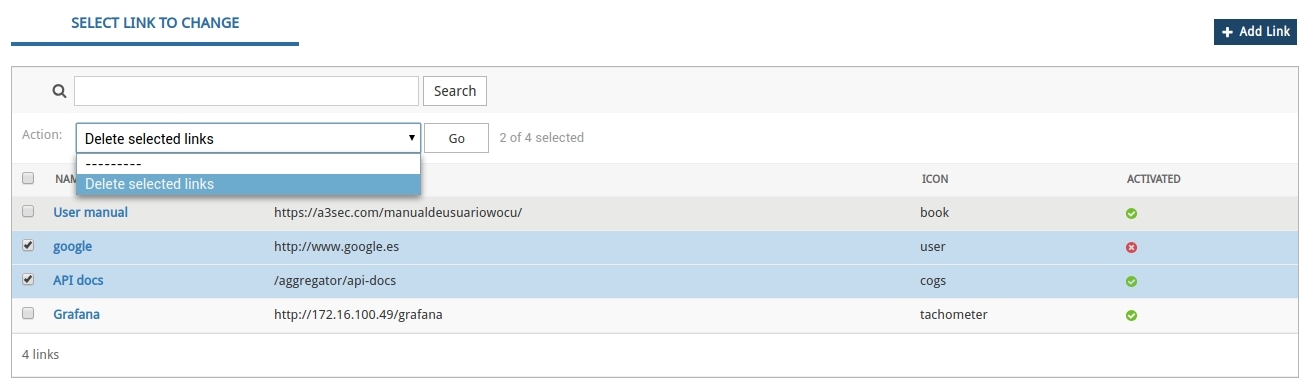
3. Individual or mass deletion of links. Only in this view will the deletion action be present, which definitively deletes the link, both from the top bar and from the advanced configuration of WOCU-Monitoring. Once the selection box of the link to be deleted has been ticked, use the drop-down menu to select the action Delete selected links, and finally, confirm the operation by clicking on the button GO.