Scheduling Reports
WOCU-Monitoring allows the automation of the Reports operation, thanks to the possibility of scheduling its generation and launch at the user’s discretion. This functionality speeds up the process of producing and processing reports, thanks to the wide flexibility in the programming of dates and periodicity.
A case study for the creation/updating of the report schedule in WOCU-Monitoring is described below:
Important
For a detailed description of each configuration parameter, see the following section: new-scheduling.
CASE STUDY
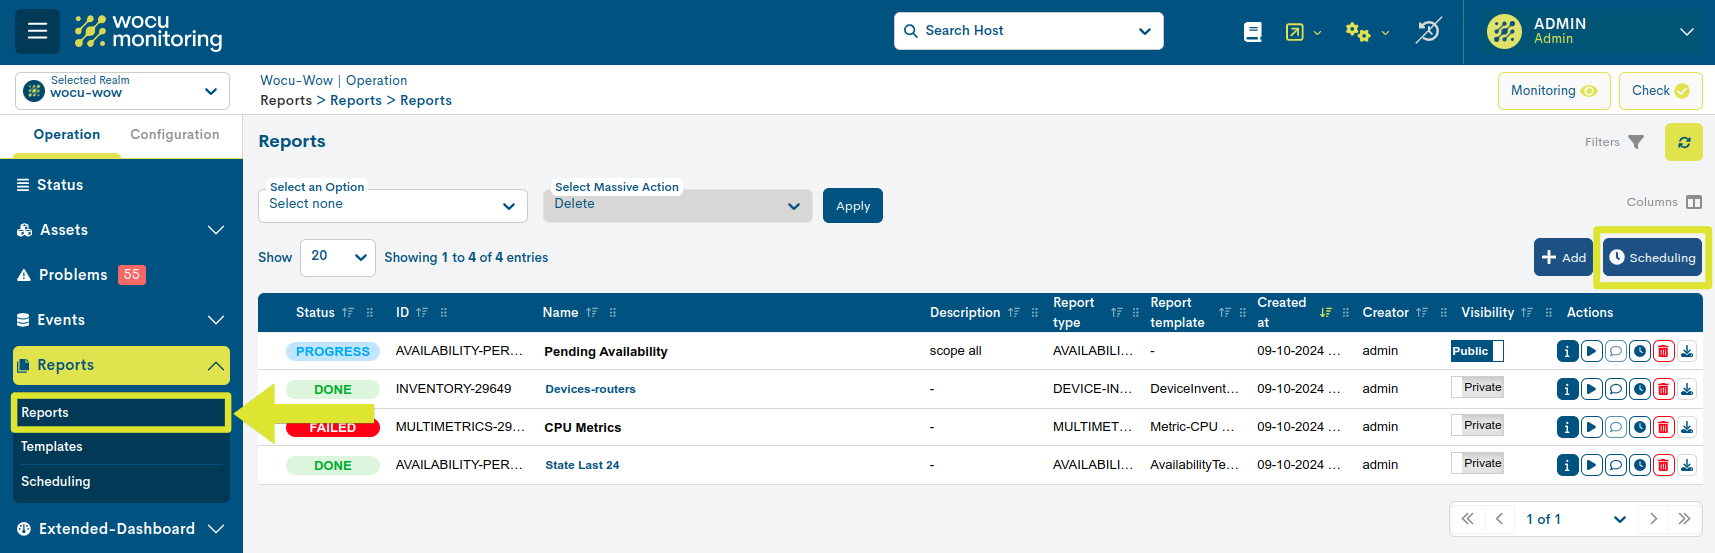
Report scheduling is done from the report-info module, using the Schedule.
In this use case, the goal is to schedule the data samples to be collected during the previous week’s working hours. That is, Monday through Friday, from 8:00 a.m. to 5:00 p.m. of the previous week.
To achieve this, the following configuration will be implemented:
To display all fields in the programming form, you will need to first select the report type (Report type) and assign a name (Name).

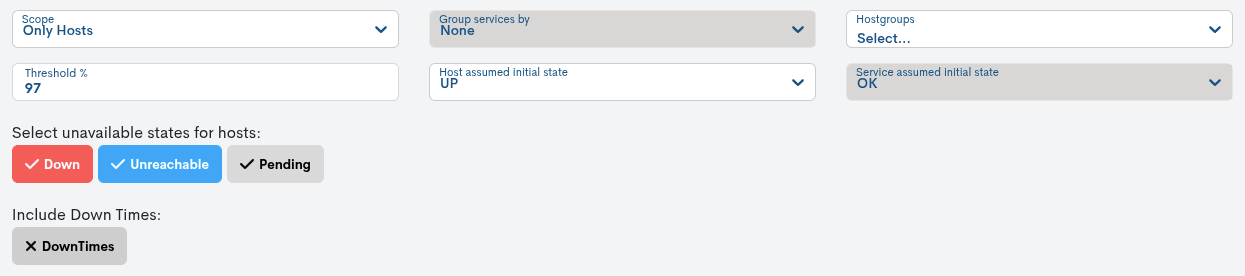
Next, it is necessary to define the report, since certain specific parameters must be adjusted according to the selected typology. In this use case, a report of type Availability Reports is configured. Specifically, a report is established that collects only the devices (Scope) that have an availability threshold of 97% and that have registered the unavailability states: Down, Unreachable, and Pending.
Next, there is the section Scheduling Form where the report schedule is defined. In this use case, we want to schedule the data samples collected in the report to correspond to the previous week’s working hours, that is, from Monday to Friday, between 8:00 AM and 5:00 PM. To do this, it will be necessary to establish the following configuration:
1. Schedule name: Name that identifies the new schedule:
working days - previous week.2. Enabled: check this option to enable the execution of the report according to the schedule.
3. Expired at never: This box is checked so that the schedule does not expire and is launched cyclically until a new change.

4. Schedule interval: To run the report every Monday, select the Run every week option in this dropdown menu and mark Monday (
Mo) as the day of the week for the report to run, in Run at days. The time is set to08 h(At) and00 m(Minutes).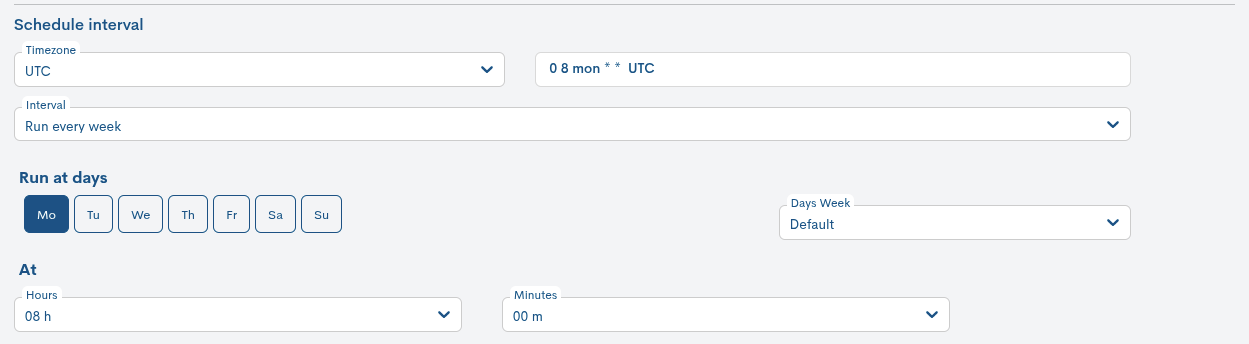
5. Time ranges: to indicate the range in which samples are to be collected to compute the report, the criterion Advanced shall be used, using the format datetokens.
Note
For more information on datetokens see the following links:
In this case, the report will be launched every Monday of each week, with the data recorded in the days and working hours of the previous week, for this, five date ranges will be configured, one for each day. Use the + button to nest several date ranges.
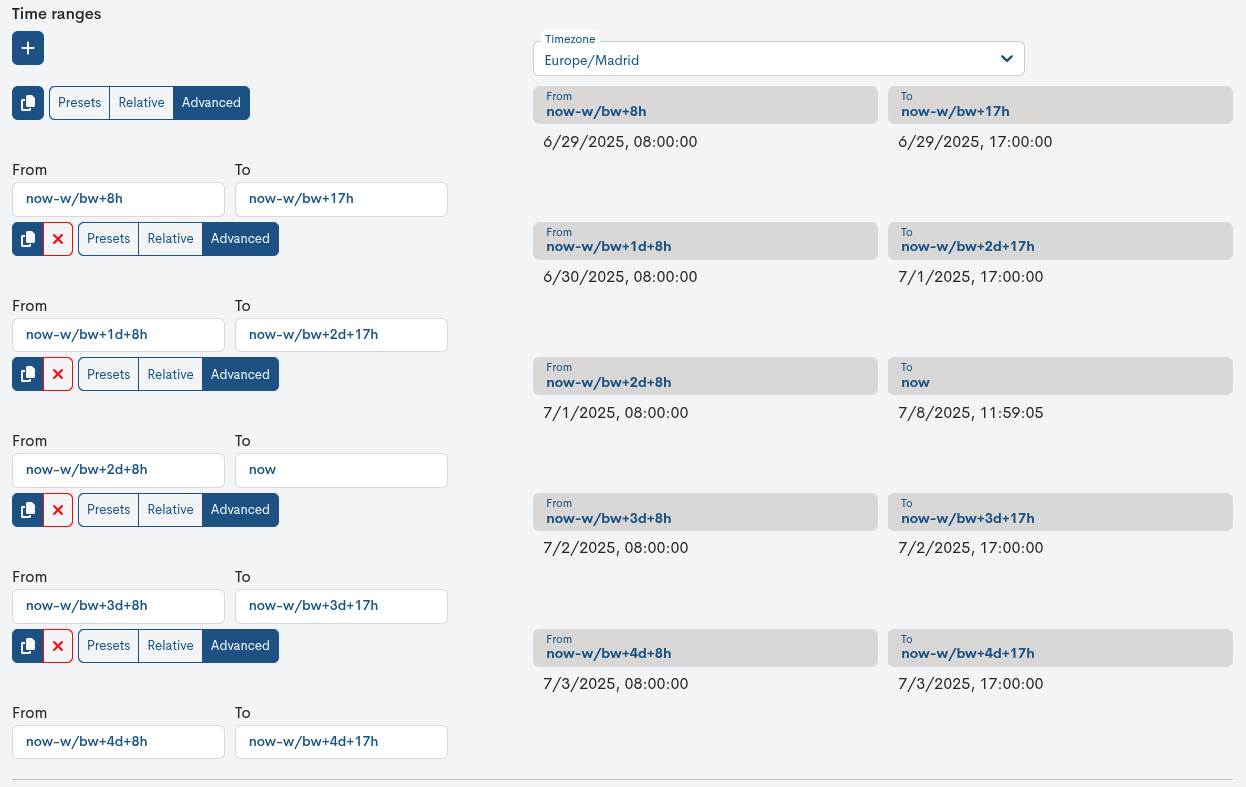
Following the datetokens format, each interval must follow the following nomenclatures:
Day
From
To
Monday (8:00-17:00 h)
now-w/bw+8hnow-w/bw+17hTuesday (8:00-17:00 h)
now-w/bw+1d+8hnow-w/bw+1d+17hWednesday (8:00-17:00 h)
now-w/bw+2d+8hnow-w/bw+2d+17hThursday (8:00-17:00 h)
now-w/bw+3d+8hnow-w/bw+3d+17hFriday (8:00-17:00 h)
now-w/bw+4d+8hnow-w/bw+4d+17h6. Recipients: Select one or more recipients from the contact dropdown menu to receive an email when the report is finished.
Attention
Only users with permissions to view the realm in question will be available in the drop-down menu, with the exception of the Administrator, who will have the total list of users registered in the system, regardless of the viewing permissions or realm restrictions associated with them. More information can be found at: Realm display configuration.

Remember
The visibility of the report is configured in the Visibility field, during the report creation process.
7. Report name: Finally, the identifying name of the report to be generated (
Ex-SLA) is entered in this field.This field is required.Once the configuration is complete, the report will be generated according to the parameters set by clicking the blue Schedule button.

Important
It is possible to view, modify, and manage the various schedules configured from the section: Scheduling.