Uploading geolocation data
WOCU-Monitoring has different fundamental modules for infrastructure monitoring, including the geolocation functionality, which allows to visualise the real and exact location of the monitored devices, together with their current status (Down, Up, Unreacheable).
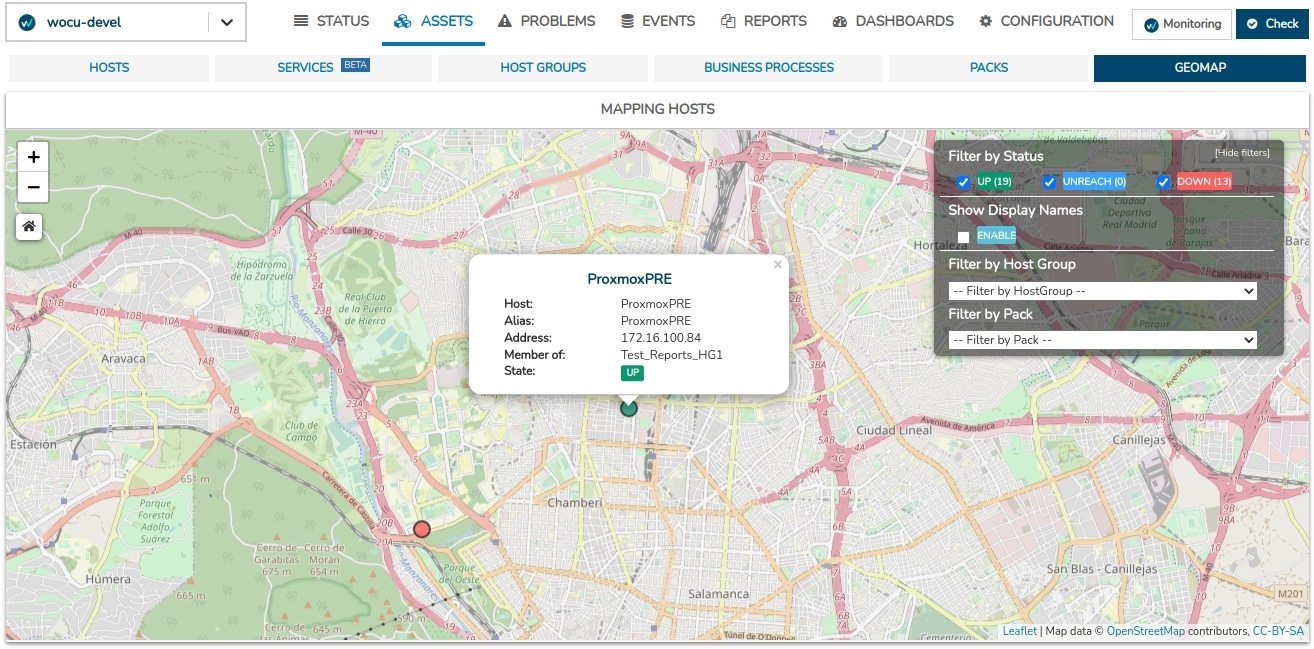
Only those Hosts whose geographical coordinates (Latitude and Longitude) have been included in the configuration can be displayed. There are three ways to load this data:
Prior to monitoring: by creating and launching Import Tasks (Tasks).
Post-monitoring:
In the manual registration of new devices from the Module Importing and Configuring Assets.
From the tab: Edit Host.
The procedure to be followed for the different aggregation modes is described below:
Creating and launching a Task
The Import Tasks (Tasks) are the different ways in which new Assets are registered in WOCU-Monitoring for monitoring. These are automatic import systems, configured by means of simple wizards that facilitate the massive registration of Assets and/or their automatic update.
1. Access the Asset Configuration Module
From the import_tool module of a specific Realm, we can configure automatic import tasks from different sources (SNMP, CMDB, CSV, Nagios…).

Note
The Importing and Configuring Assets will only be visible and accessible from standard Realms, i.e. it will be hidden for Realms based on Hosts Groups and Multirealm.
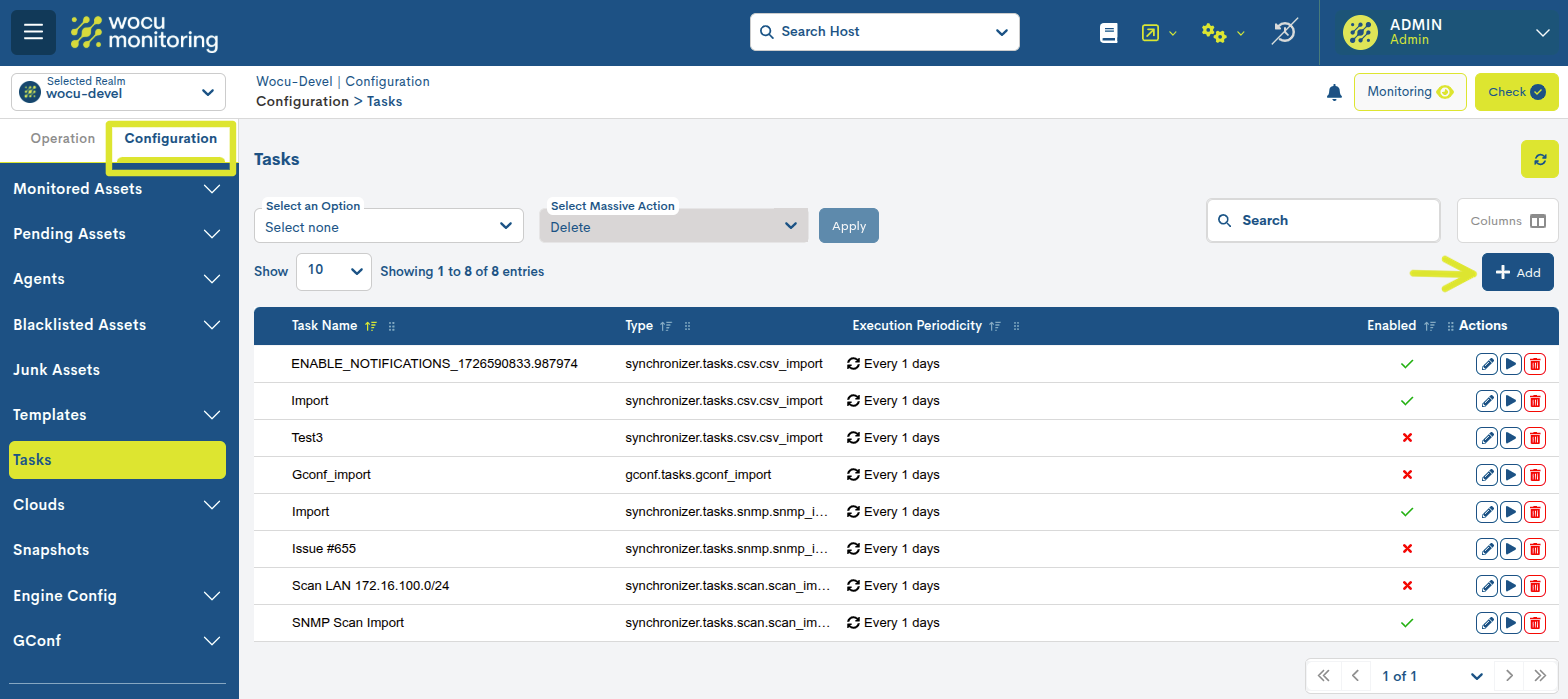
2. Create a new task: CSV_Import.
WOCU-Monitoring allows the user to create, configure and launch new tasks for the import of complete networks. To do this, click on the green + Add button at the top right of the list.
This time we will create an import task by CSV file: CSV_Import task. Each of the different fields to be filled in for the task configuration are detailed below:
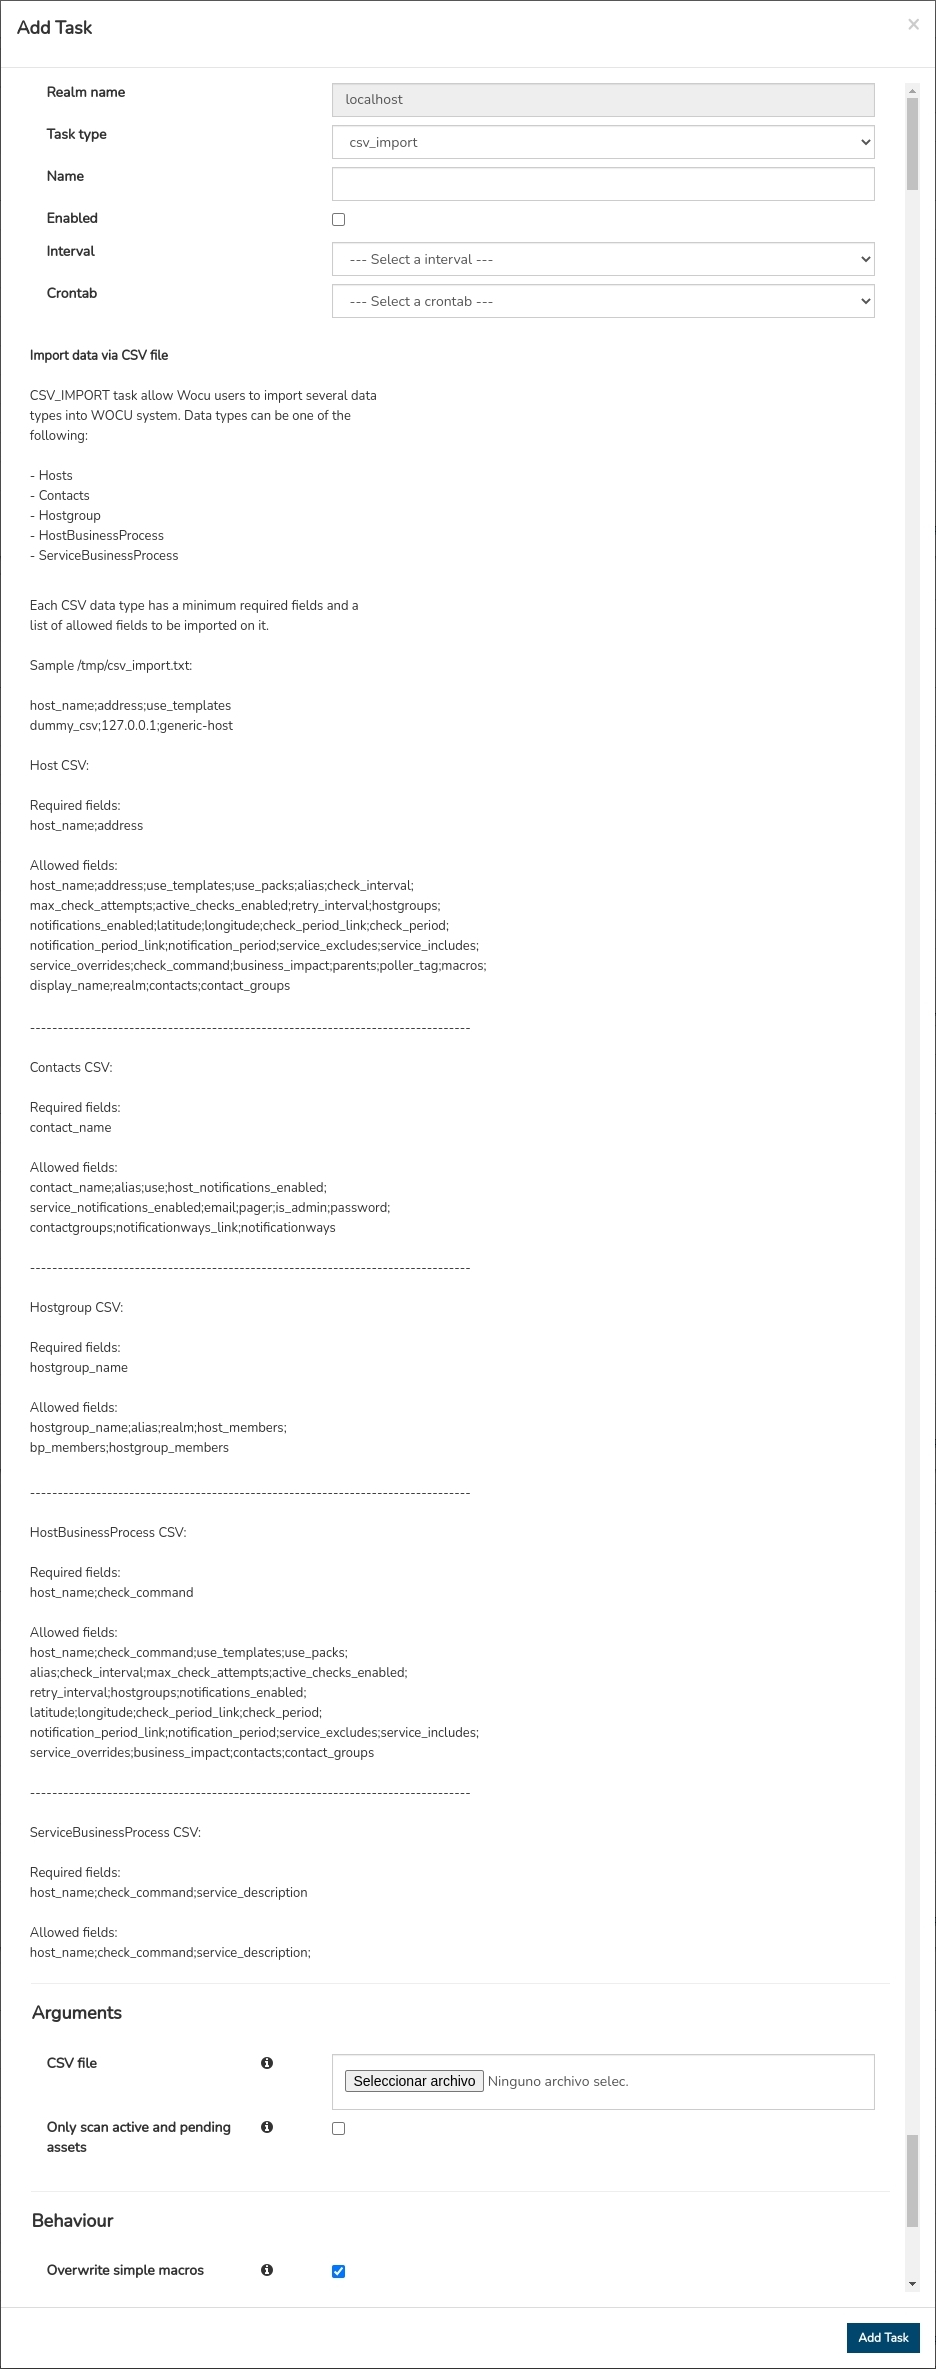
- Realm Name
Non-editable field. Indicates the name of the Realm that is the subject of the import task.
- Task Type
Indicates the type of task to be generated. It is the first field that can be selected in the drop-down menu and conditions the rest of the fields.
- Name
Collects the name chosen by the user to identify the newly created task.
- Enabled
Checking this box enables and activates this new import task for its next execution. By default this option is enabled.
- Interval
By means of this drop-down it is possible to choose how often the Asset import of this new task will be executed. The possible options available are:
Task executed daily (Every 1 days).
Task executed every second (Every 1 second).
Instructions (grey background box)
This box provides instructions on the format to be respected by the CSV file to be used as the source of the Host data to be imported.
The different fields of the configuration must be defined in the first line of the file. The separator to be used between field and value is the “;”. Once an order of fields (columns) has been defined, the corresponding values for each Host shall respect this structure.
Attention
See the following example for loading device geolocation data:
host_name;address;latitude;longitude
dummy_csv;127.0.0.1;40,6323;-3,1778The different fields supported by this task are detailed below. That is, you can choose which of them to include in the CSV file and which not to include (those not included will appear empty in WOCU).
Column choices are:
address;alias;business_impact;check_command;check_interval;
contact_groups;contacts;display_name;host_name;hostgroups,
latitude, longitude, macros, max_check_attempts,
notifications_enabled;parents;realm;retry_interval;use
Csv File
WOCU’s flexibility to import data sources extends to all types of formats, including CSV. In this field the user must select and attach the file with the Host inventory to be imported.
In this particular case and as shown in the previous example, in order to be able to display Hosts on geomaps available in WOCU, the CSV file must have at least the following fields and structure:
host_name;address;latitude;longitude
- Overwrite simple macros
This option allows you to enable or disable the updating of the simple macros of the Assets. By default this option is enabled.
- Overwrite complex macros
This option allows you to enable or disable the updating of the complex macros of the Assets. By default this option is disabled.
- Scan only active and pending assets
This option allows you to enable data enrichment only for Hosts present in the Assets and Pending databases, excluding from the import all other Hosts that are not present in these databases. By default the option is disabled.
Once the configuration is set, you will need to press the Add tasks button to activate the new task. The task will then be immediately available in the list with the other created tasks.

3. Launching and executing the task.
From the initial view of the section, it is possible to manually launch tasks via the Run action.

Important
Remember that the frequency of automatic task execution is defined in the Interval field.
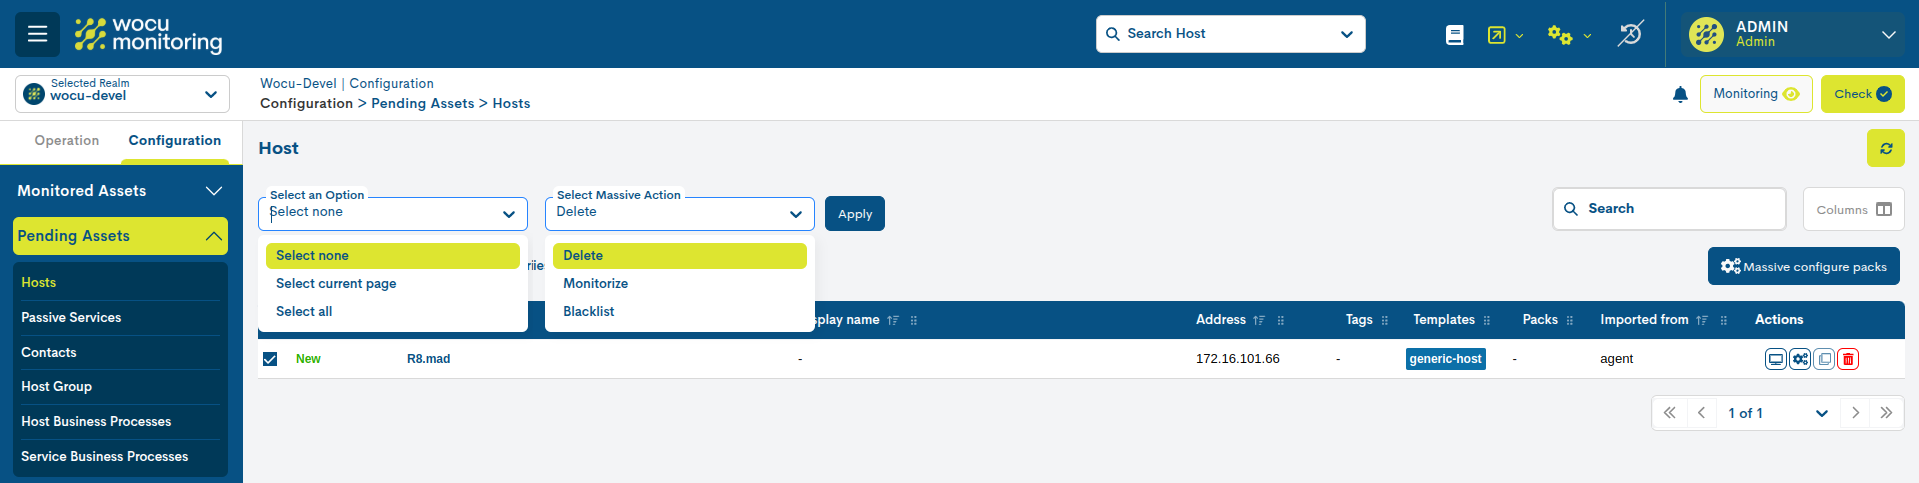
4. Host Management from Pending Assets
Once the task has been completed, the imported items will first be provisionally added to the Pending Assets list, and will then be integrated into the WOCU-Monitoring database, but will not yet be monitored.
At this stage the user must decide what to do with the network of Hosts, whether to send them to the Monitored Assets list where the Assets that WOCU-Monitoring is already monitoring are listed, or to send them to the Blacklisted Assets list where they will not only remain here indefinitely, but if new import tasks are run, the Blacklisted Assets will be systematically filtered out and will not be discovered again.
Note
Host management is executed from the drop-down selectors:
Selection of list items
Selection of shipment and destination of items
More information can be found at: Asset dispatch actions: Blacklist, Monitor or Remove..
4. Make changes effective: WOCU Check.
After importing, configuring and editing Hosts in any of the Listings, the changes shall be consolidated through the execution of the Apply changes: Check action.

A new view will immediately appear informing the user of the updates in the asset configuration that will be applied or of the abnormal system operation.
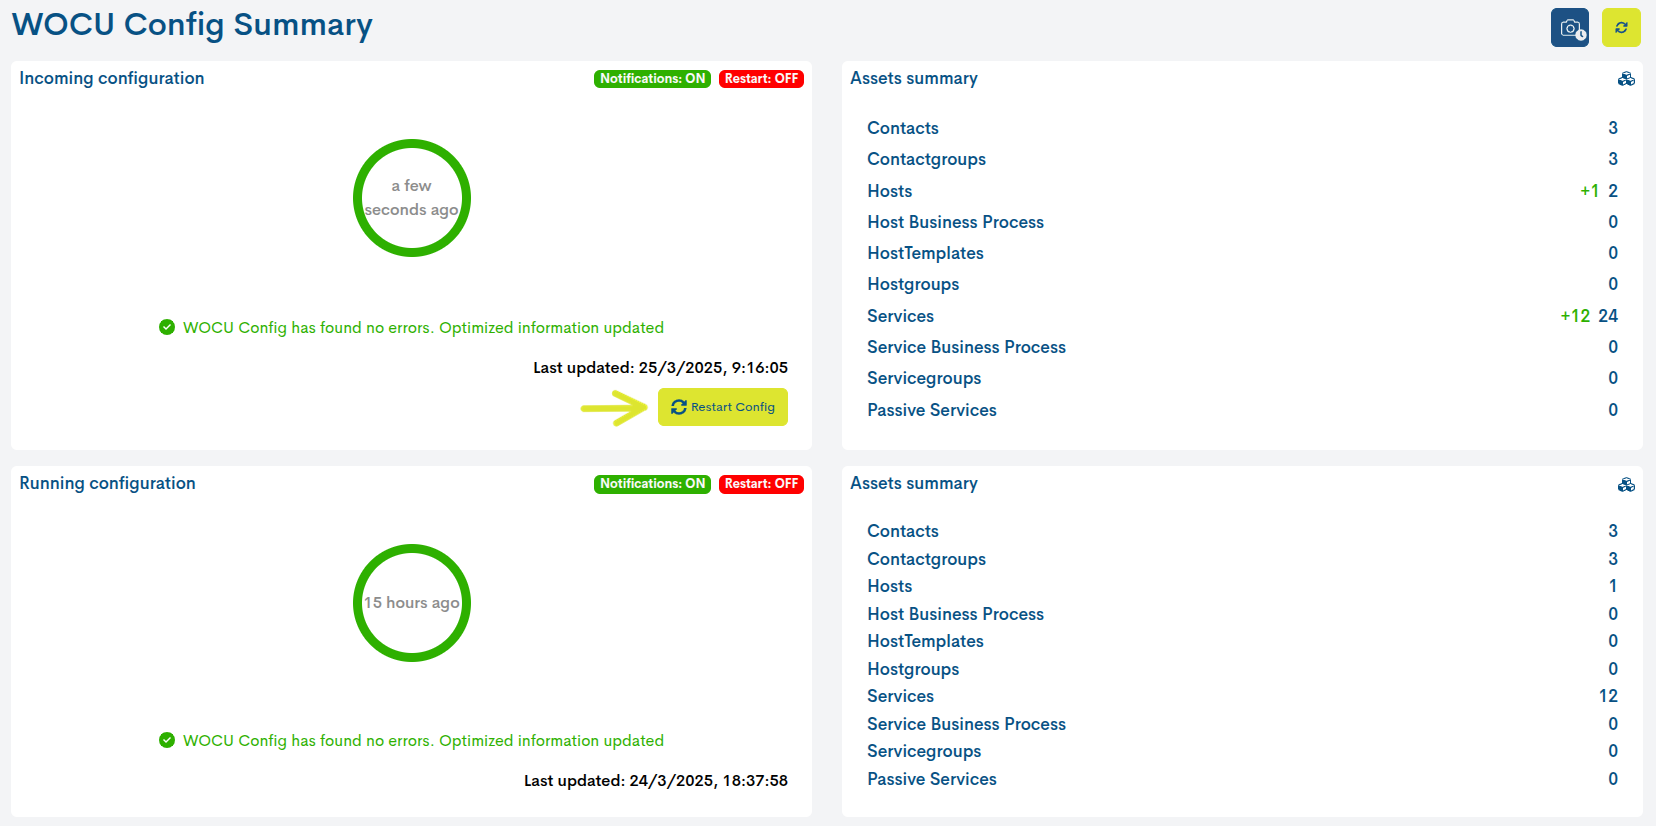
After the restart of WOCU-Monitoring the new Hosts in Monitored Assets will start to be subject to the monitoring tasks of the tool.
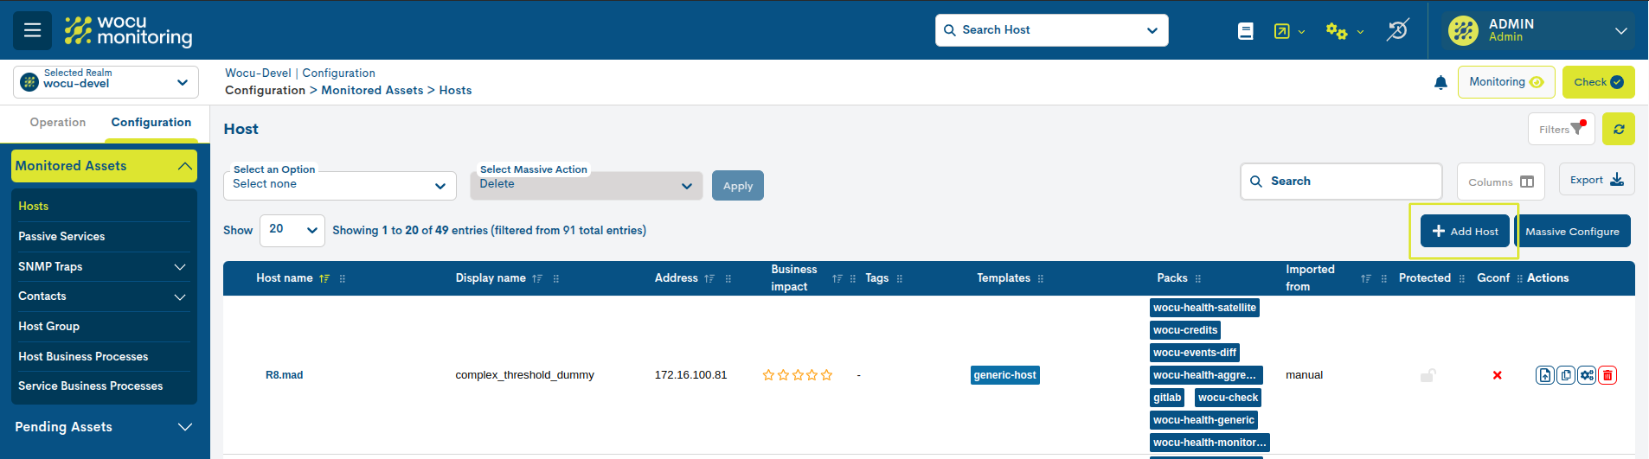
Manually add new Hosts
WOCU-Monitoring offers the user the possibility to manually add new Hosts to be part of the monitored technological infrastructure. To do this, click on the Add Host button located in the section Hosts:
Next, you have to fill in the configuration form for the registration of the Host, in whose fields you will find:
Latitude: field to record the geographical latitude coordinates of the Host.
Longitude: field to record the geographical longitude coordinates of the Host.
Once this data has been completed, the Host can be visualised on the different geomaps presented in WOCU-Monitoring.
Important
Because of its importance, the detailed description of the process of creating and configuring a new Host is detailed in the point: Add Host.
Edit from the Assets Detail View
WOCU-Monitoring allows from the Detailed view of Hosts and Business Processes, the manual modification of basic asset configuration parameters, among which are: Latitude and Longitude.
Attention
Only in standard Realms will the editing tab be visible, i.e. it will be hidden for Realms based on Hosts Groups and Multirealm.
1. Locate the Host in the inventory on the Assets tab.
Within the Realm of the Host in question, access Hosts Inventory and locate the Host to which the geolocation data is to be uploaded.
Note
Use the various filters, search bar or item sorting options to make it quicker and easier to locate Hosts in large inventories.
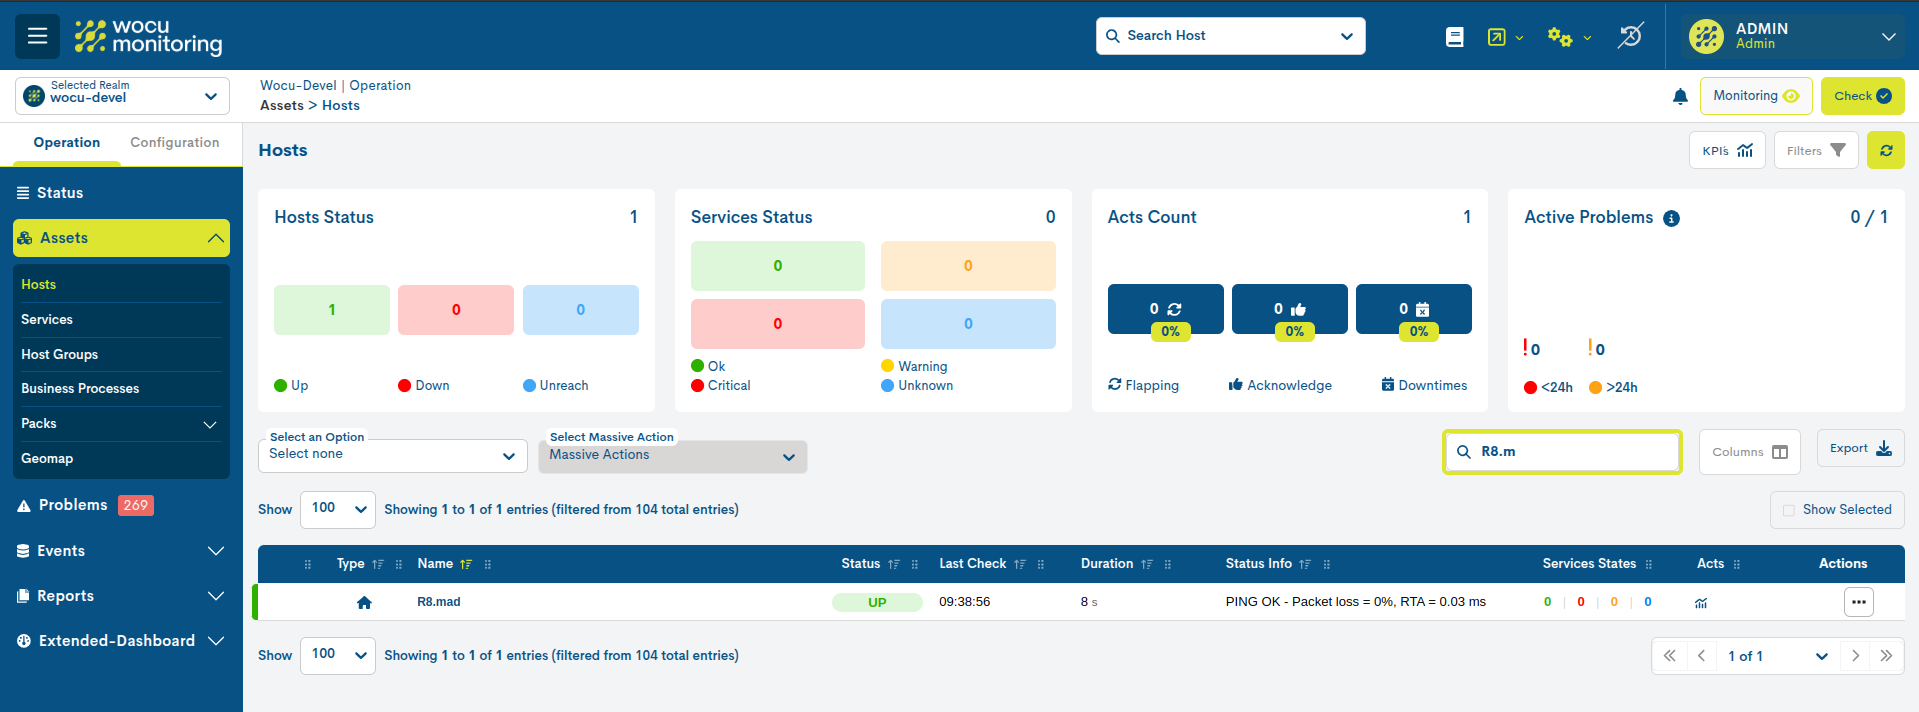
Once the Host is found, click on the Host name and a new Detail View window will pop up, presenting complete and updated information about the Host.

Attention
This view is accessible from different parts of WOCU. Find out about the different access points in: Detailed view of Hosts and Business Processes.
2. Add the geolocation data in the edit form.
In the Edit (Edit) tab of the Detail View, it is possible to make changes to the Hosts configuration and consequently to add geolocation data in the fields:
Latitude: field to record the geographical latitude coordinates of the Host.
Longitude: field to record the geographical longitude coordinates of the Host.
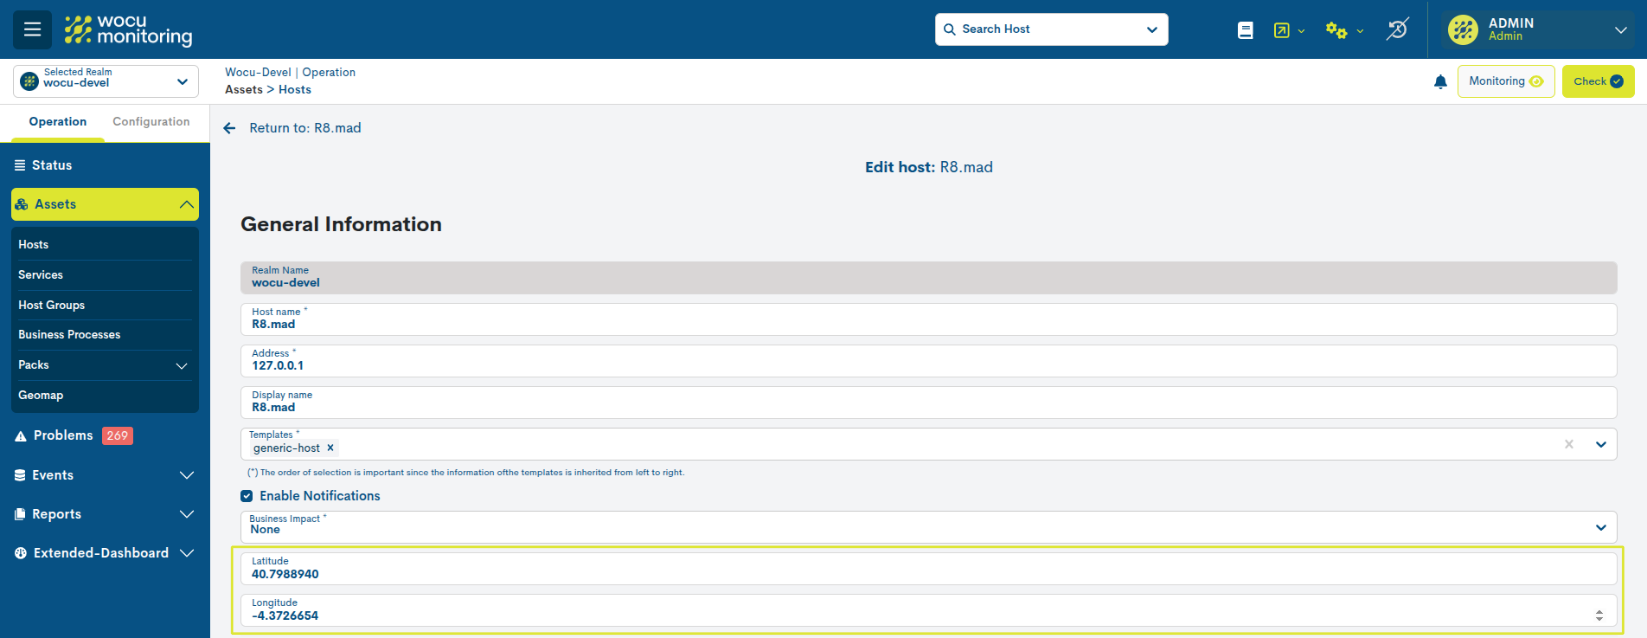
Once you have modified the data in the corresponding fields, click on the blue button Edit Host to save the configuration made so far, and you will be able to continue editing the form.
3. Update the new configuration using WOCU Check.
Finally, any changes to the asset configuration will be consolidated through the execution of the Apply changes: Check action.
A new view will immediately appear informing the user of the updates in the asset configuration that will be applied or of the abnormal system operation.