Enable Audit Module
Audit module provides a detailed record of the actions executed in WOCU-Monitoring, tracing all movements made in terms of asset configuration and changes tracked by the system, with the purpose of enabling a later audit of the processed information.
For the enabling and start-up of this module in the tool, the following guidelines should be followed:
1. Creating a Logger
Access to Advanced Configuration.

At the level of Administration the first step will be to create a new Logger, using the + Add option:
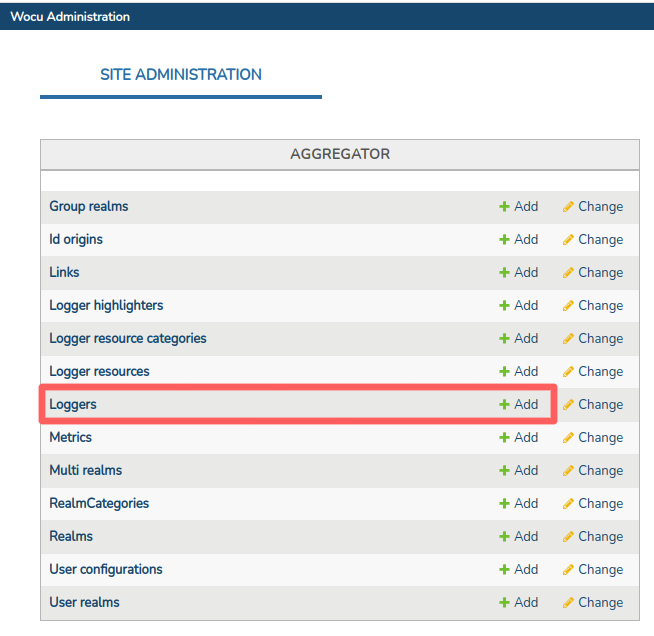
Then complete the following fields:
Name: add
logger.Logger IP: add
127.0.0.1.Logger Port: add
9200.For the Logger server field, the access point shall be selected or set to ElasticSearch.
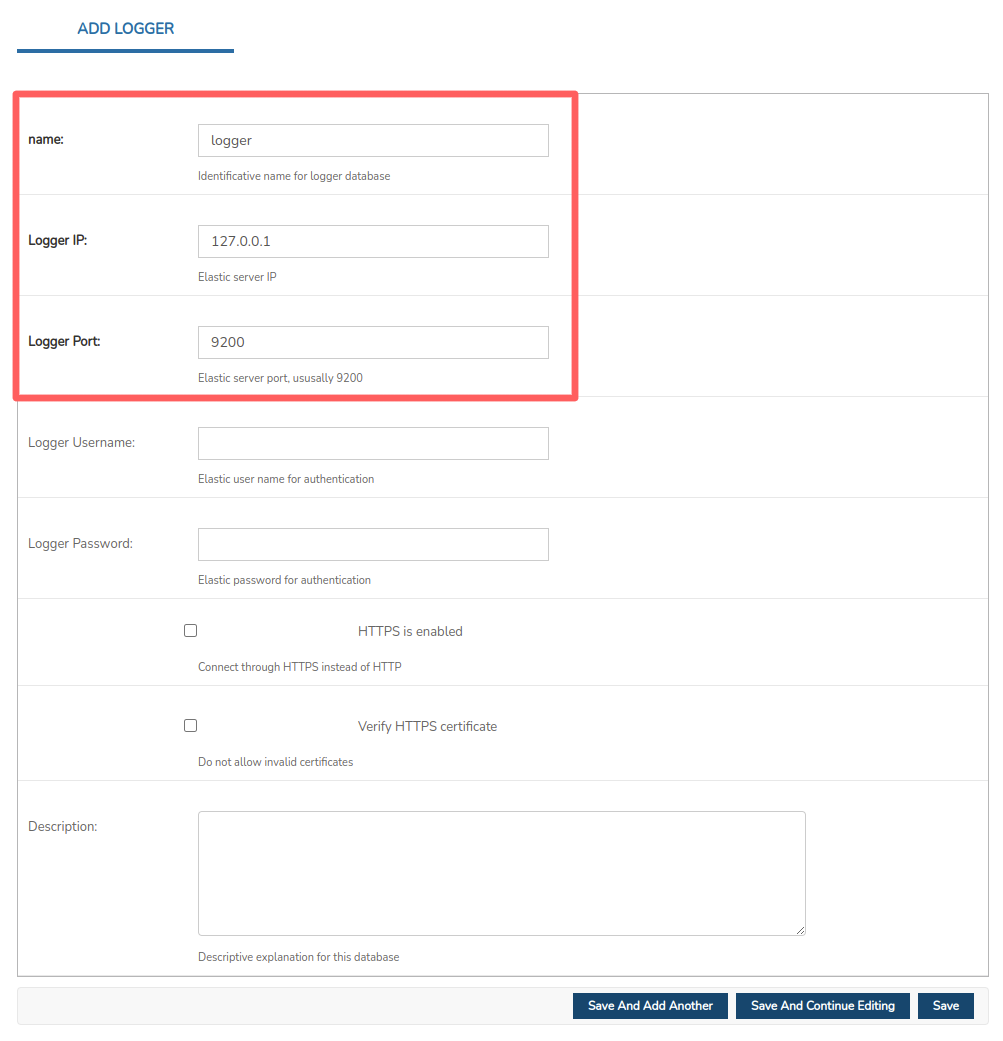
Confirm the changes made via the Save button.
2. Creating a Logger Resource
Registration of two new data sources for the recording and storage of audit logs:
aggregator-user-audit: intended for the collection and management oflogs of the: Audit within the Events section of arealm.aggregator-user-db-audit: intended for collection and administration of logs from the: Audit.
Access to Advanced Configuration.

At the level of Administration the first step will be to create two Loggers Resource, using the + Add:
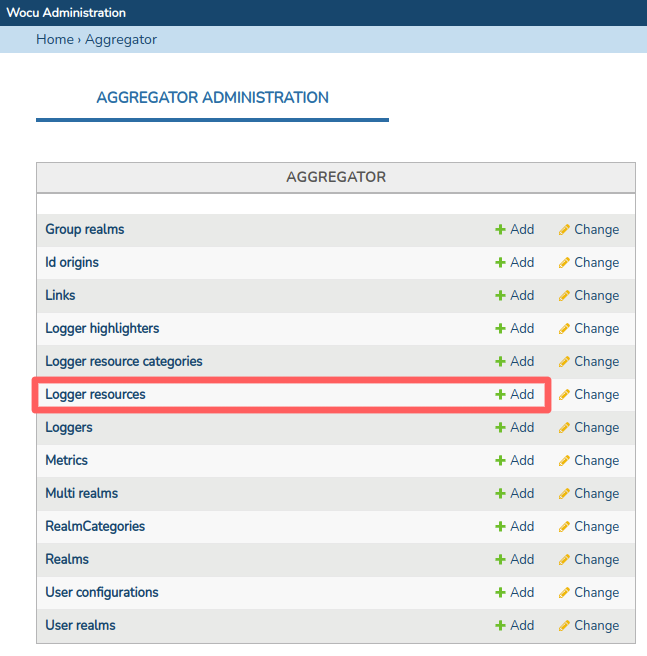
Then complete the following fields:
Name: add
aggregator-user-audit.Display name: add
aggregator-user-audit.Logger server: select
logger. Corresponds to the logger created in step 1.Logger resource type: select
user-audit.It is important to keep the name of the indexes (Logger index), as these are the ones used in the td-agent configuration files.
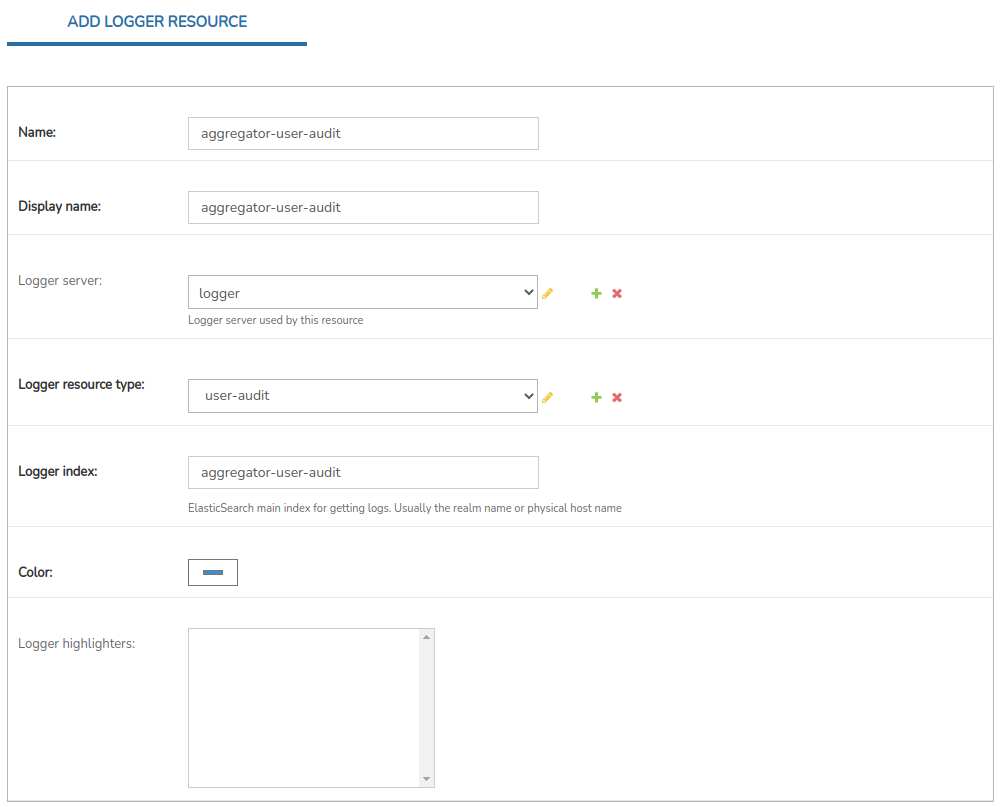
Confirm the changes you have made by clicking on the Save and Add Another.
Then complete the following fields:
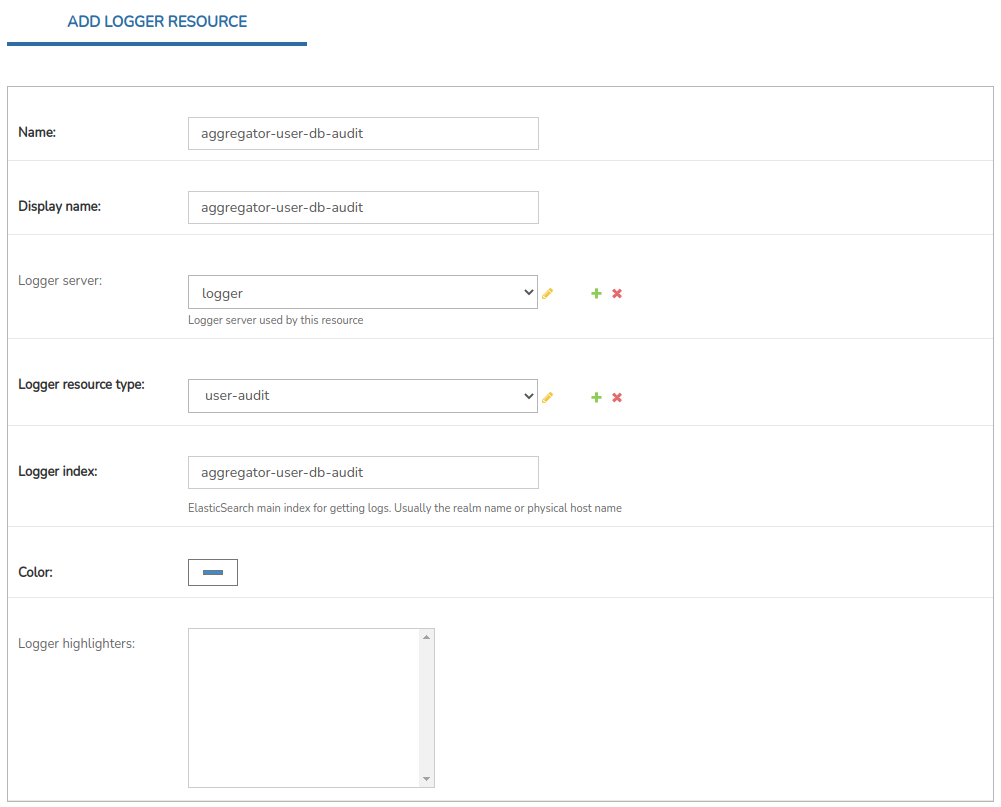
Name: add
aggregator-user-db-audit.Display name: add
aggregator-user-db-audit.Logger server: select
logger. Corresponds to the logger created in step 1.Logger resource type: select
user-audit.It is important to keep the name of the indexes (Logger index), as these are the ones used in the td-agent configuration files.
Confirm the changes made via the Save button.
At the end of the above, the Audit module is configured and enabled for use in the application.