Creation of Realms
A Realm represents a completely independent, logical monitoring environment, organized and managed by the system. Each Realm will have its own monitored assets, over which the tool will maintain, in isolation: inventories, alarms, event logs, metric calculations, reports, and configurations under a single context; facilitating segmentation by user, environment, or purpose.
In WOCU-Monitoring there are three types of Realms depending on how they are constituted:
A descriptive table of each of them is presented below.
Typology |
Icono |
Description |
|---|---|---|
Standard Realm |
These types of Realms are made up of Assets manually configured by the WOCU Administrator. The elements are manually selected and become part of one of these monitoring systems. The absence of a specific type icon informs the user that this is a standard Realm. |
|
Hostgroups |
A quick and easy way to create a Realm and provide it with Assets is to associate it to one or more Host Groups. On this occasion, the WOCU Administrator will include in the created Realm the elements that already constitute one or more Host Groups (Hostgroups), which are logical sets of elements that group together different Assets. |
|
Multirealm |
Realm resulting from including other existing Realms within it, i.e. an aggregation of Realms is created. In this instance, the WOCU Administrator instead of individual Assets or groups of Assets can directly include entire monitoring systems by aggregating their members to create a larger Realm. |
The creation process is described below, along with the correspondingfields and parameters to be configured by the user for each of the types.
Standard Realm
To register a new standard monitoring Realm, you must firstclick on the + New Realm button, located in the Settings menu, as shown in the following image:
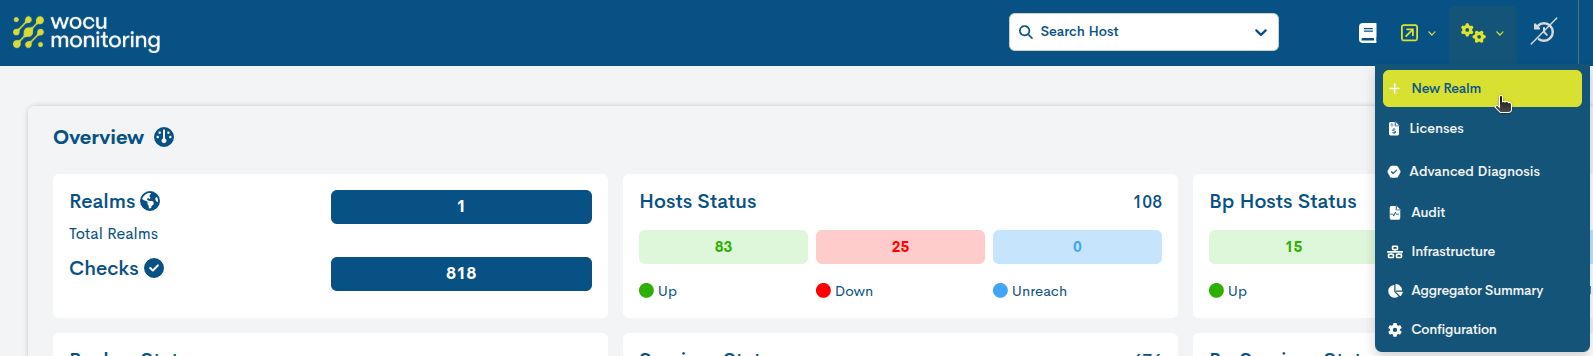
Selecting this action will open a new window with a form whose fields must be completed manually by the user.
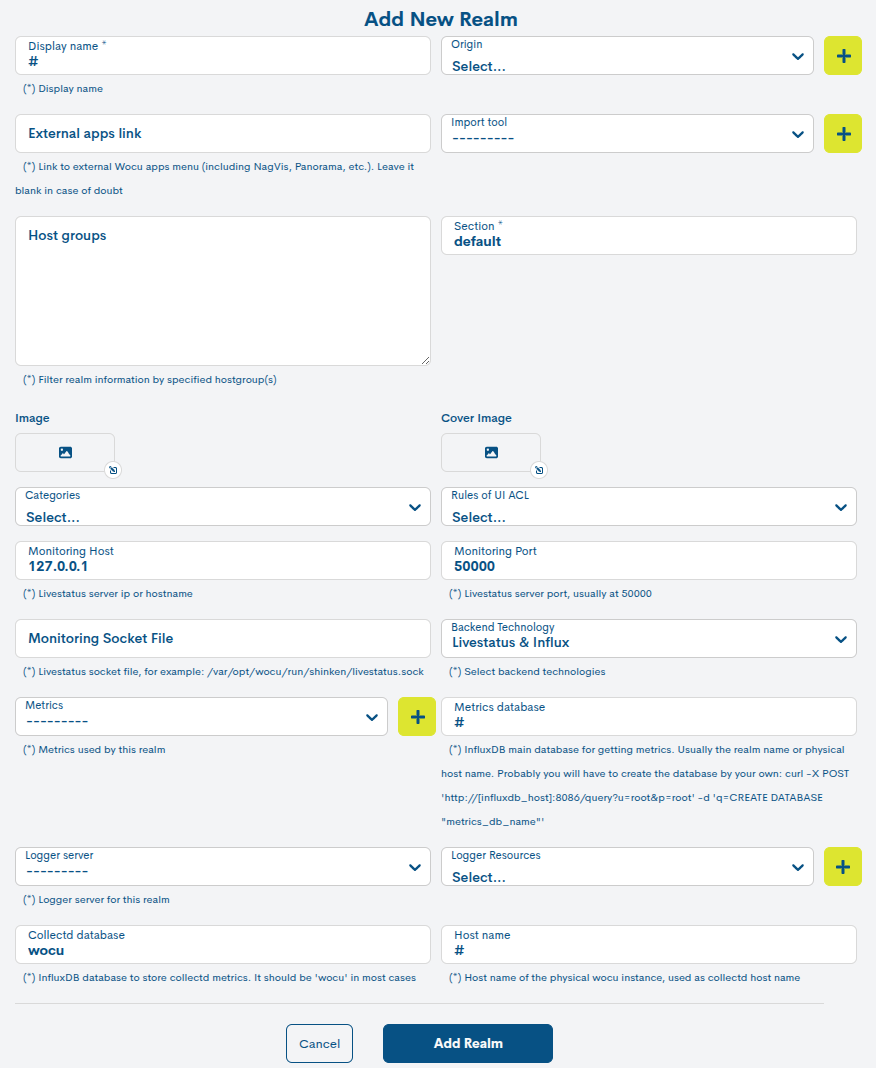
Display name
Mandatory field where to add a Realm identification term, which will be displayed in the WOCU-Monitoring interface. It must be differentiated from the rest of the Realms registered in the system.
External Apps Link
Field to add a valid URL to the WOCU-Monitoring external applications menu, where a number of additional tools (NagVis, Panorama, etc.) are collected that can be useful in the various routine monitoring tasks in WOCU-Monitoring.
Regarding the construction of the address, it is generally the result of
HTTPprotocol access to the monitoring IP, with the addition of the suffix /wocu (see example:http://<monitoring_IP>/wocu ⇨ http://172.12.345.67/wocu).Note
If in doubt, leave the field blank so that the address is auto-detected by WOCU-Monitoring.
Import Tool
This selector associates an Import-Tool with the Realm in question.In other words, here the user will decide which Import-Tool this new Realm will connect to in order to perform tasks of adding and configuring elements to be monitored from the WOCU-Monitoring Configuration Module.
By activating the + function, an additional form for the registration of a new Import-Tool will pop up:
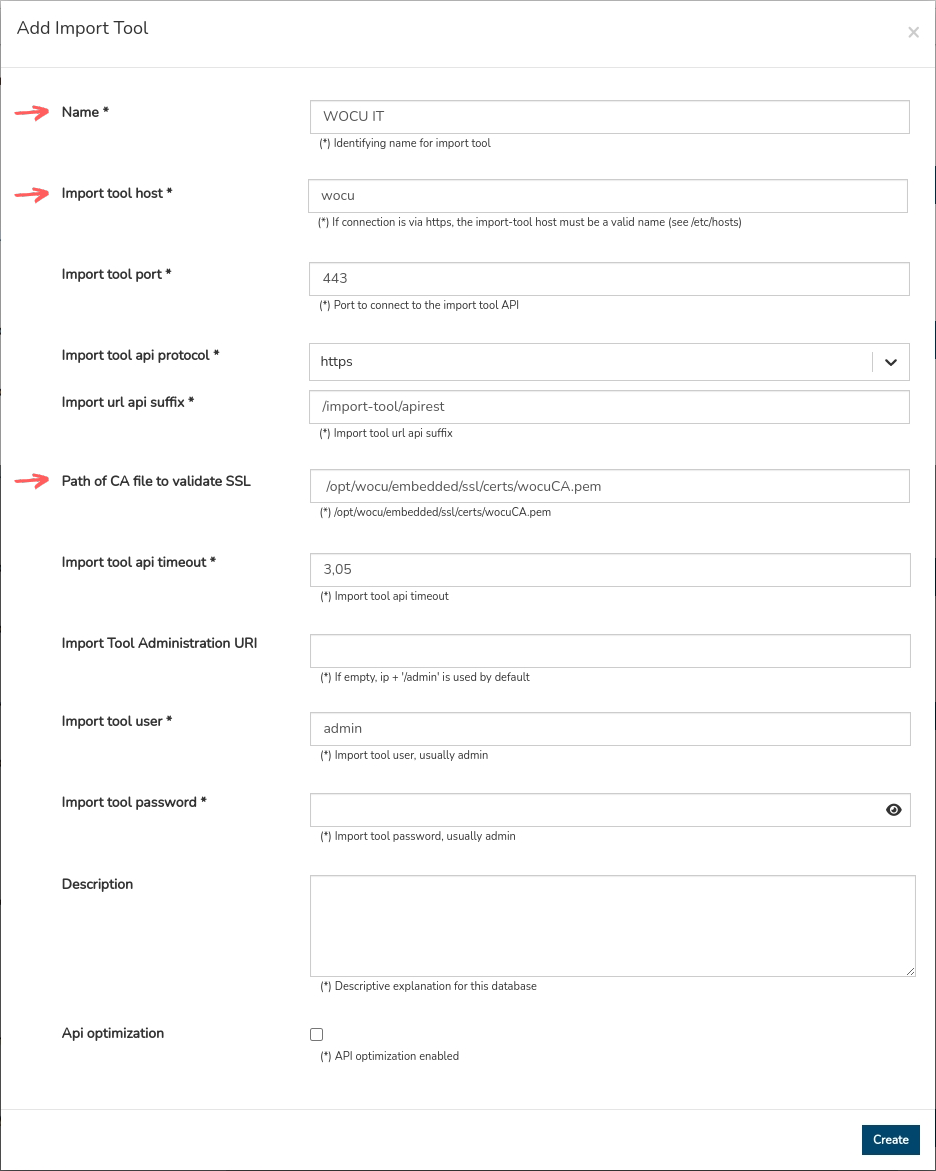
The minimum fields to be modified for the registration of a new Import-Tool are described below, the rest of the fields maintain their default configuration:
Name: Mandatory field where to add an identification term of the new Import-Tool (e.g.
WOCU).Import tool host: Mandatory field that corresponds to the IP address or Host name where the Import-Tool is hosted. As it is a HTTPS connection, it must match the domain name (e.g.
localhost).Path of CA file to validate SSL: refers to the path of the Certificate Authority (CA) file used to validate the SSL connection between the client and the server.
Finally, confirm and save the changes made via the Create button. And select the new Import-Tool in the selector to continue.
Host Groups
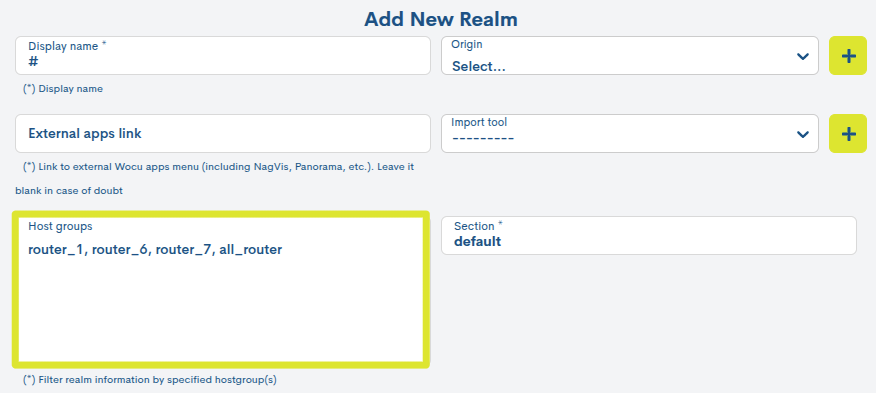
Field to record the identifiers or names of the different Host Groups to be associated to this new Realm. They must be entered separated by commas. Example:
HG1, HG2, HG3.Remember
A Hostgroup is a logical grouping of specific Hosts to make it easier to extract statistics and availability data from the set in WOCU.
As soon as the Administrator registers a Host Group in this field, this standard Realm is considered as Hostgroups-based Realm.
Image
Field to configure the profile image of the Realm visible on different screens and summary panels. This visual attribute is useful for adding logos or corporate images to personalise the working environment in WOCU-Monitoring.
In the absence of configuration, the WOCU-Monitoring logo shall be assigned by default.
Cover image
Field to configure the cover image of the different Reports exported in PDF format and launched in the Realm in question. This visual attribute is useful to add logos or corporate images, which personalise in this case the Reports generated in WOCU-Monitoring.
In the absence of configuration, only the WOCU-Monitoring logo will be displayed on the front page.
Categories
A category is a user-assigned label that classifies and identifies Realms with a similar trait. Each category is assigned a Colour and Weight (Weigth). This last variable is linked to the Impact, since by calculating the Impact of an Alarm (Problems) and the Weight assigned to a Realm (through a category), the Alarms generated in Multi-Realms are ordered and prioritised.
Additional categories can be added to those shown in the drop-down. Categories are represented by visible labels in each Realm panel.

Rules of UI ACL
From this selector, it is possible to associate one or more access control rules, previously configured by the Administrator, to the realm.
Each rule acts as a permissions profile, defining the permitted access and applicable restrictions within the WOCU-monitoring interface for a specific user or group of users.
By selecting a rule, Realm administrators can apply the permissions defined in that rule to other basic users, facilitating controlled and consistent access management within the Realm.
Monitoring Host
In this mandatory field the IP address or the name of the machine where the Livestatus database is hosted must be added.
Monitoring Port
In this mandatory field, the network port of the Livestatus server must be added. It is set to
50000by default and can be freely modified by the user.
Monitoring Socket File
Only when the monitoring engine and the WOCU-Monitoring aggregator module are hosted on the same machine, it will be possible to add a Socket file that will act as a communication port between both parties.
This field is optional, but in case it is configured (with the path to the Socket file), it will be the chosen way to query Livestatus for performance reasons.
Backend technology
Allows you to specify which backend technology the new realm will use to query and store information associated with the monitored hosts. The selection made will affect the other configuration fields of the form.
1. Livestatus & Influx
This option corresponds to the classic WOCU-Monitoring model. In this mode, the system uses Livestatus to query the operational status of the monitored hosts and services, and InfluxDB to store and query historical metrics. It is the appropriate option for realms that maintain a traditional monitoring architecture, where status data and metrics are managed in separate systems.
The fields to configure are:
1.1 Metrics
This selector is used to define the InfluxDB metric database server, which will be used by the Realm in question to store the compiled data.
Additional database servers can be added to those shown in the drop-down by triggering the + function.
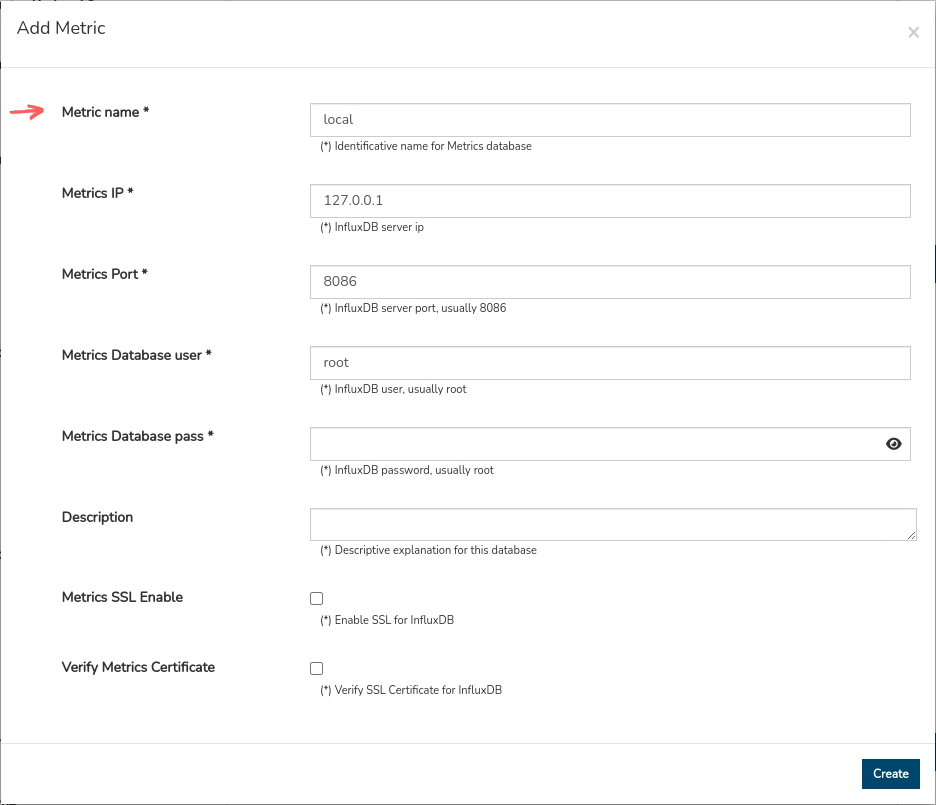
The minimum fields to be modified for the registration of a new server are those described below, the rest of the fields maintain their default configuration:
Metric name: Mandatory field to add a term identifying the new InfluxDB server (e.g.
local).Finally, confirm and save the changes made via the Create button. And select the new server in the selector to continue.
1.2 Metrics Database
Mandatory field to specify the main InfluxDB database for metrics collection in this Realm. Normally the term to add matches the name of the Realm or the machine where the server is hosted.
You will probably have to create the database yourself.
See example:
curl -X POST 'http://:8086/db?u=root&p=root' -d '{"name": "metric_name_db"}1.3 Logger Resources
Field to indicate which Logger Source will be in charge of collecting and storing the Event logs generated in this new Realm. Logger resources are different sources of data and Event logs that report on the status of the monitored Hosts in the Realm in question.
It is possible to select several of the listed sources.
Additional fonts can also be added by triggering the + function.
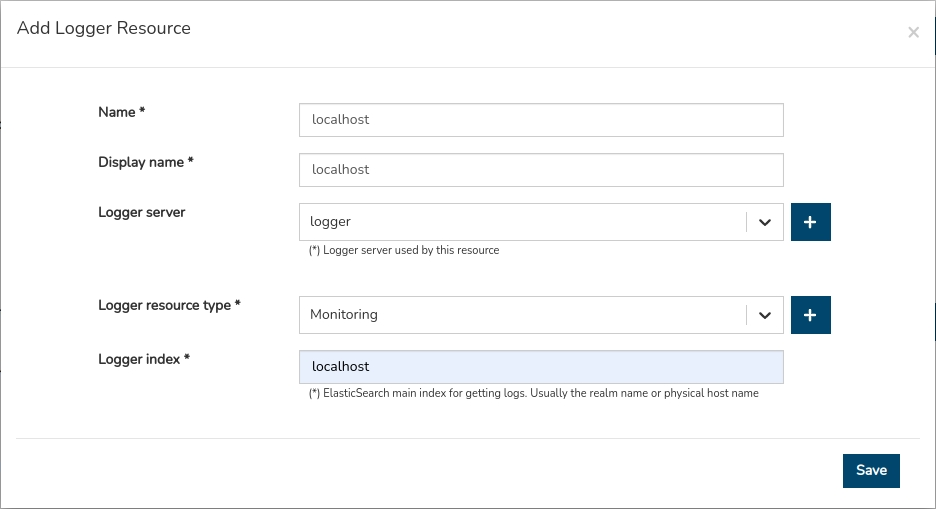
The minimum fields to be modified are described below:
Name: Mandatory field to add an identifying term for the new log source (e.g.
localhost).Display Name: Mandatory field where to add the identifying term that will be displayed in the WOCU-Monitoring interface (e.g.
localhost).Logger Server: Field to specify the server used to collect and store events. Additional servers can also be added by re-triggering the + function. The minimum fields to be modified are described below:
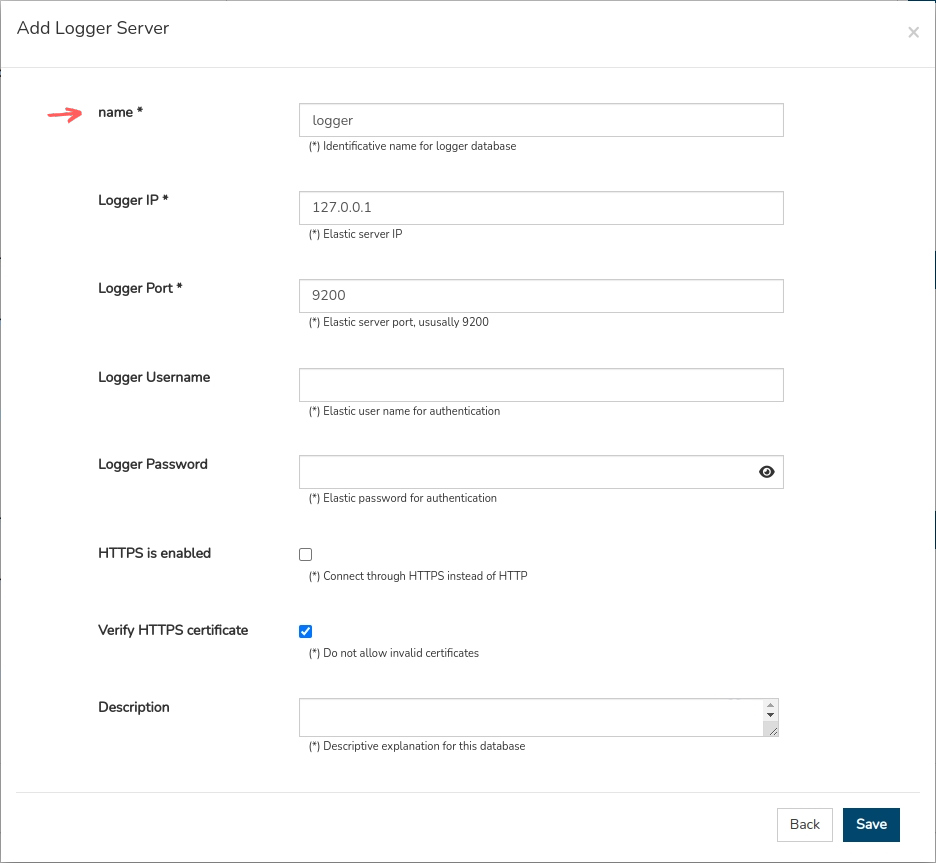
Name: Mandatory field to add an identifying term for the new log source (ej.
logger).Next, select the new Logger Server named
loggerfrom the drop-down.Logger resource type: Mandatory field for the selection of the type of resource used to record and store logs.
Logger index: Mandatory field where the Host Name of the machine previously defined is included.
Consolidate the new configuration using the Save button and then select the new Logger Resource from the drop-down.
1.4 Host Name
Field to add the Host (Host) name of the physical instance (server) of WOCU-Monitoring.
1.5 Collectd Database
Mandatory field where to add the database that collects, queries and sends the metrics of the WOCU-Monitoring tool itself and makes them available to InfluxDB.
These collected metrics are independent of those collected by other servers.
2. Elasticsearch
This option allows you to configure the realm to work with a backendbased on Elasticsearch 9. In this mode, Elasticsearch acts as a unified backendfor realm information, including metrics, monitoring events, and, if applicable, observability-related data. This option is especially useful in deployments where you want to centralize information in Elastic, facilitate the exploitation of historical data, enable observability capabilities, or integrate metrics and events into a single analytics platform.
Important
Currently, this option only supports Elasticsearch 9. Therefore, it should be selected only when the realm will be integrated with an instance compatible with this version.
The fields to configure are:
2.1 Elasticsearch backend:
Allows you to select or create the Elasticsearch 9 backend that will use the realm.
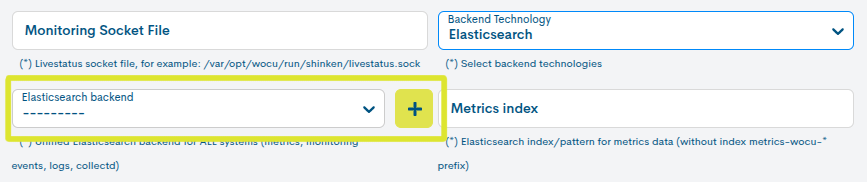
If a backend is not already configured, a new one can be createdusing the + button located next to the field. Clicking it opens the Add Elasticsearch Backend form, from which the following fields must be completed:
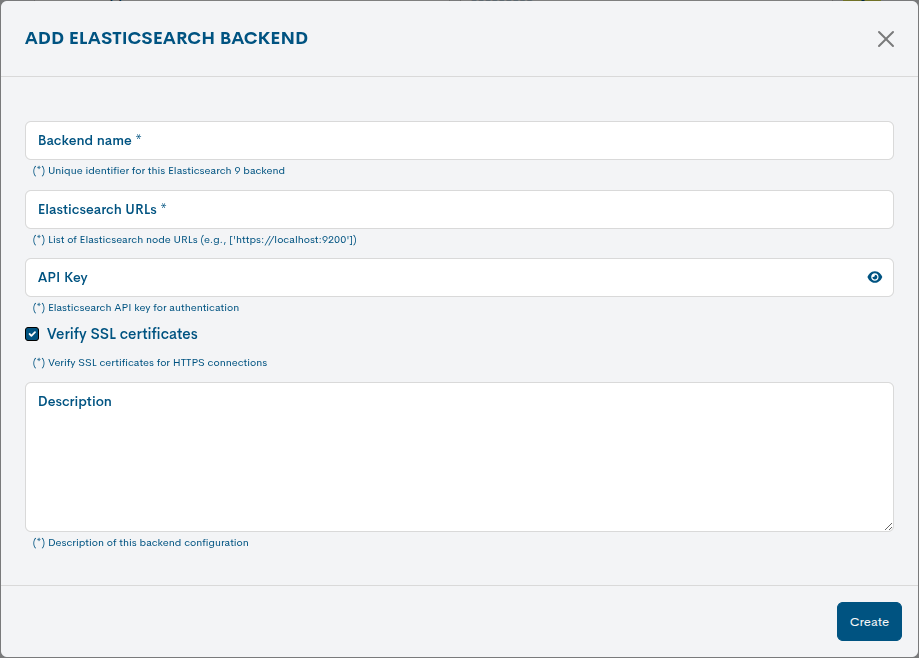
Backend name: The identifying name of the Elasticsearch backend. It must be a unique value and easily recognizable by the user. (e.g.,
elasticsearch9-production)Elastic URL: URL of the Elasticsearch 9 nodes to which WOCU-Monitoring will connect. In environments managed by a custom Elasticsearch, this URL must be provided by the Elastic administrator. In on-premises Elasticsearch 9 installations, it is sufficient to specify the host URL and the port on which Elasticsearch is listening. For example:
https://localhost:9200API KEY: API key used to authenticate the connection with Elasticsearch. This field should only be completed if the Elasticsearch 9 instance has API key authentication configured. The API key is generated from the Elastic tool itself. Once generated, the resulting value must be entered in this field.
Verify SSL certificates: Allows you to enable or disable the verification of SSL certificates on HTTPS connections. It is recommended to keep this option enabled in production environments.
Description: Optional field to add a description of the backend configuration.
2.2 Metrics Index:
Allows you to specify the suffix of the index or index pattern where the realm metrics will be stored in Elasticsearch. This value is configured in the corresponding Shinken module. Typically, the realm name can be used as the value. In that case, the system will internally add the corresponding prefix to the metrics index.
2.3 Monitoring events index:
Allows you to specify the suffix of the index or index pattern where the realm monitoring events will be stored in Elasticsearch. This value is configured in the corresponding Shinken module. Typically, the realm name can be used as the value. In that case, the system will internally add the prefix corresponding to the monitoring event index.
2.4 Elastic Logger Resources:
Field to indicate which Logger Source (Logger resources) will be responsible for collecting and storing the Event logs generated in this new Realm. These sources are different data and historical Event sources that report on the status of the monitored Devices in the Realm in question.
Additional fonts can also be added by triggering the + function.
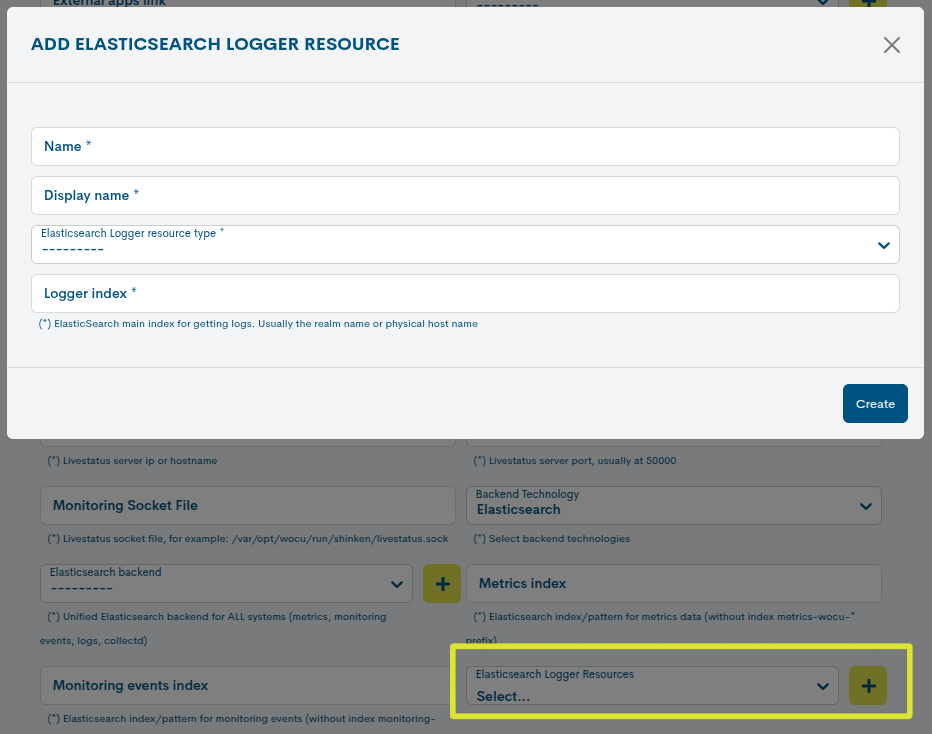
The minimum fields to be modified are described below:
Name: Mandatory field to add an identifying term for the new log source (e.g.
localhost).Display Name: Mandatory field where to add the identifying term that will be displayed in the WOCU-Monitoring interface (e.g.
localhost).Elastic Logger resource type: Required field for selecting the type of resource used to record and store logs.
Logger index: Mandatory field where the Host Name of the machine previously defined is included.
Consolidate the new configuration using the Save button and then select the new Logger Resource from the drop-down.
2.5 Observability:
This checkbox enables observability capabilities for the Realm. This option is only available when the Elasticsearch option is selected in the Backend Technology field, as the observability module requires an Elastic-based backend to query and exploit the information associated with the Realm.
2.6 Hostname:
Field to add the Host (Host) name of the physical instance (server) of WOCU-Monitoring.
Once you have completed entering the data, review the final configuration and confirm the creation of the Realm by clicking the Add Realm button.

Hostgroups-based Realm
A quick and easy way to create a Realm and provide it with Assets is to associate it to one or more Host Groups. On this occasion, the WOCU Administrator will include in the created Realm the elements that already constitute one or more Host Groups (Hostgroups).
Remember
A Hostgroup is a logical grouping of certain Hosts that is created to more easily extract statistics and availability data from the set in WOCU monitoring.
The process of creating this typology is similar to that of an Standard Realm, in that as soon as the Administrator enters one or more elements in the Host groups field, this Realm will be considered as a Realm based on Hostgroups.
Multirealm
Finally, another alternative when creating a Realm is to include other existing Realms within it, that is, to create an aggregation. In this case, the WOCU-Monitoring Administrator, instead of grouping individual assets (standard Realm type) or groups of assets (Realms based on Hostgroup), can directly include complete monitoring systems by adding their members to create a larger and more complete Realm.
To do this, access the WOCU-Monitoring Administration Module from the advanced_configuration option located in the :ref:`settings menu, as shown in the following image:
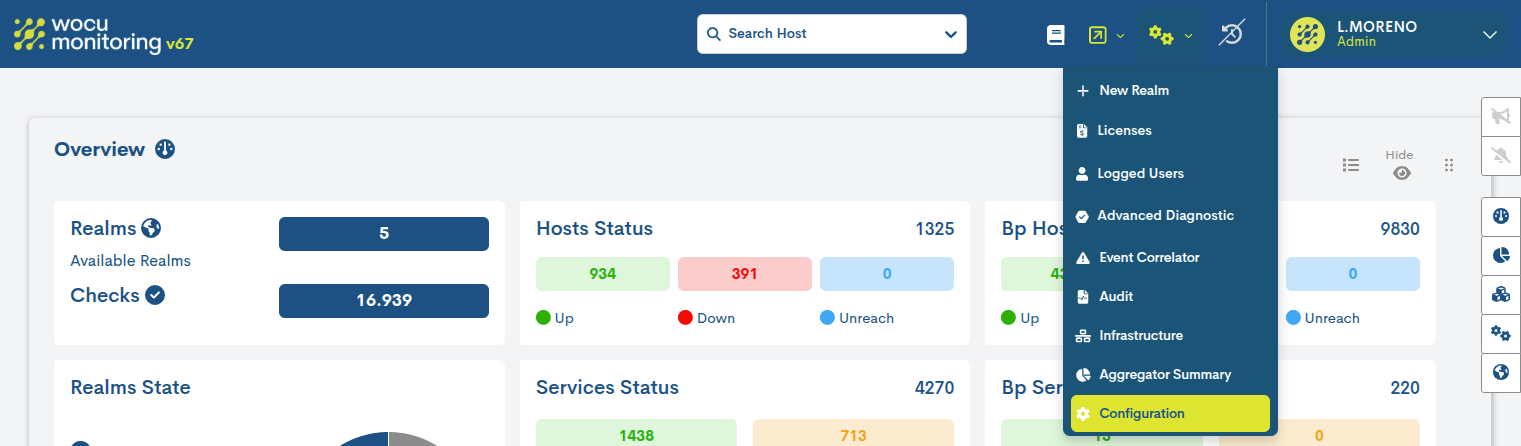
Once inside the Administration Module, select the + button located in the Multi realms row to begin the registration process:

Selecting this action will open a new window with a registration form, the fields of which must be filled in manually. Each of the configuration parameters is described below:
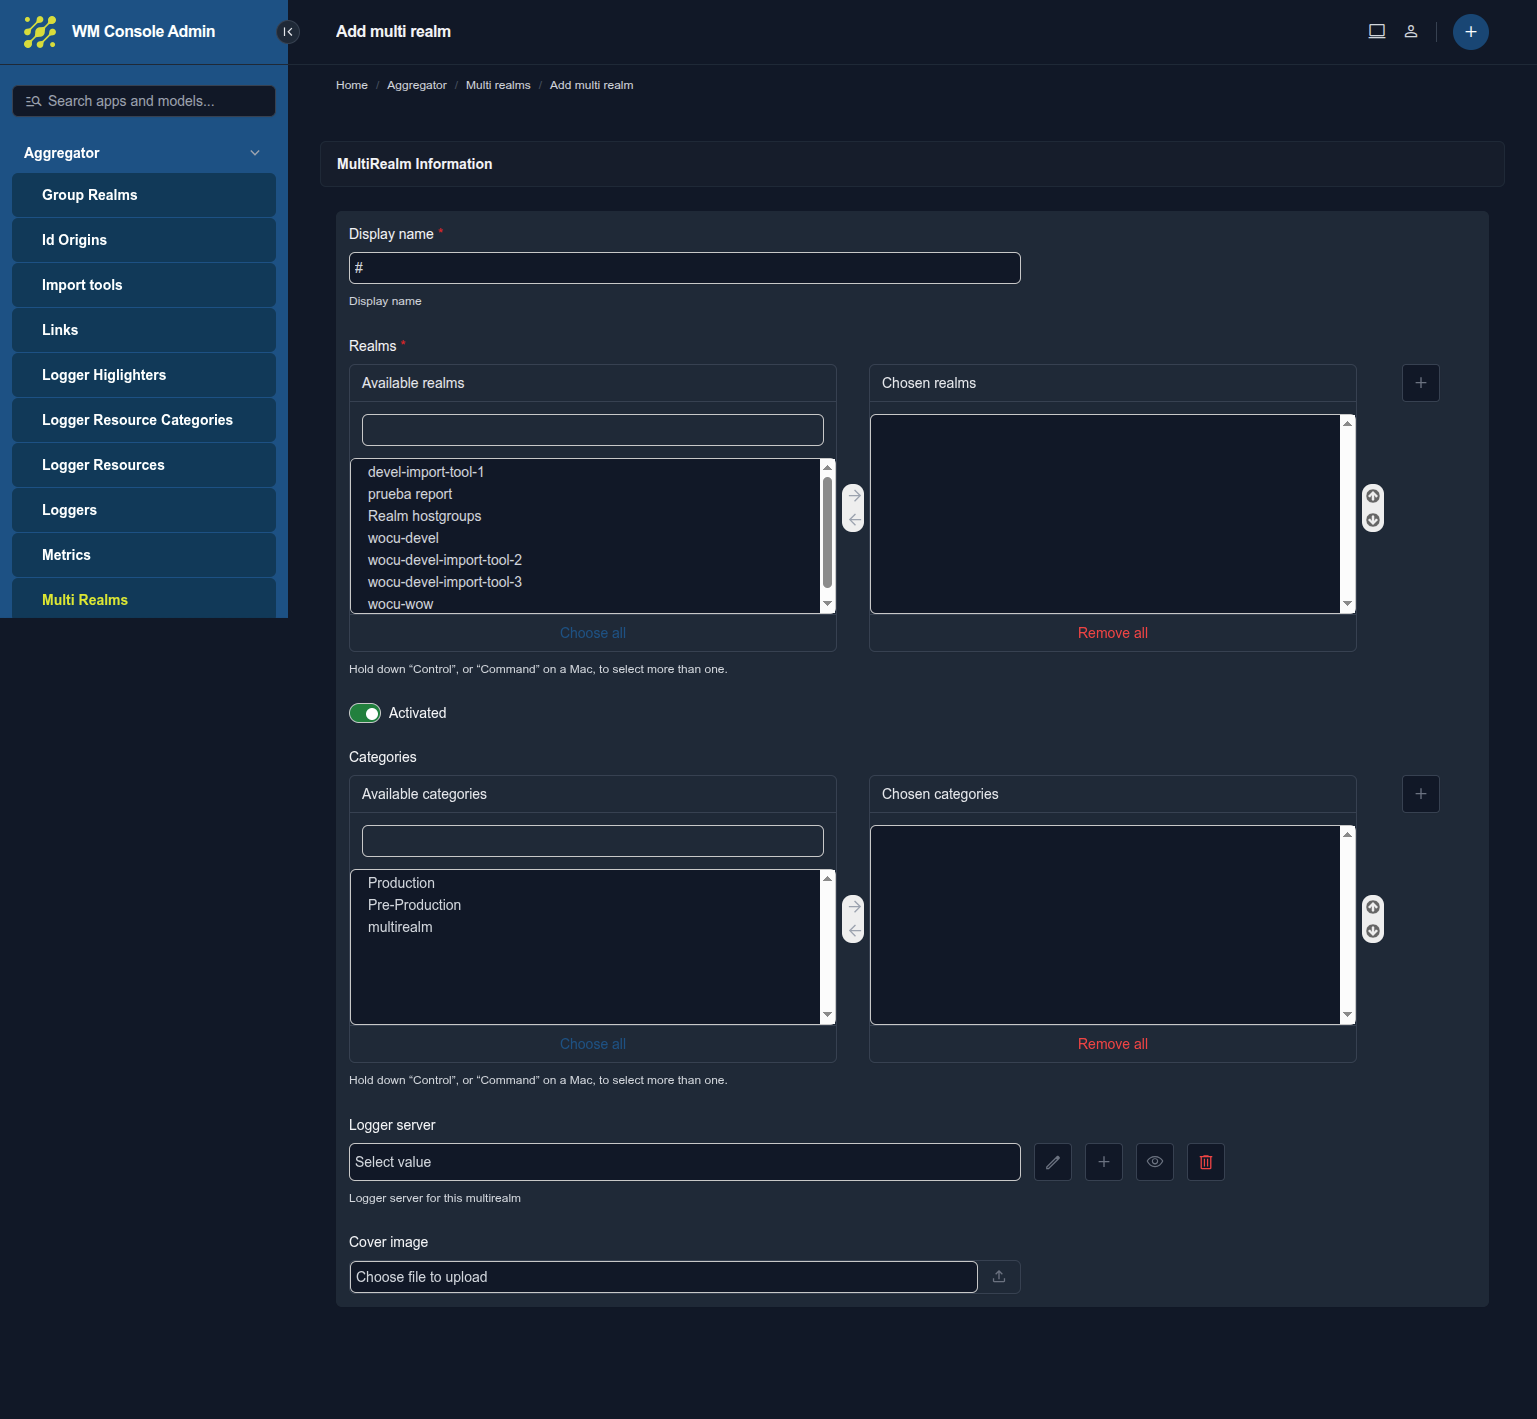
Display name
Mandatory field where to add an identification term of the Multi-Realm, with which it will be displayed in the WOCU-Monitoring interface. The assigned identifier must be differentiated from the rest of the Realms.
Realms
List of operational Realms in WOCU-Monitoring. From the list, select the Realms that will make up the Multi-Realm in question.
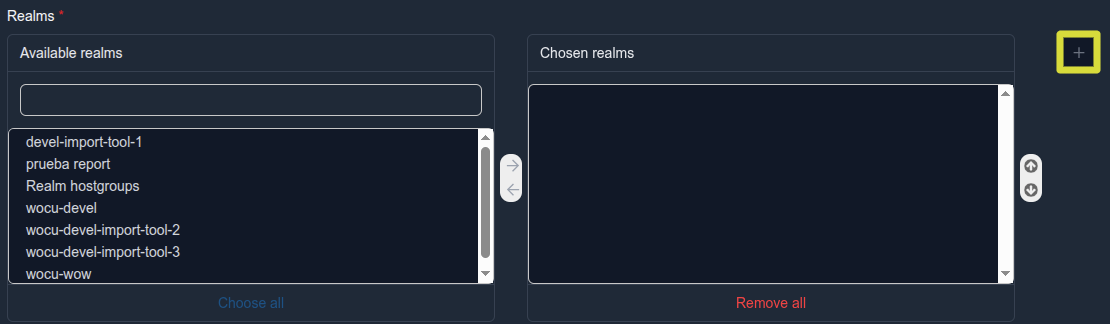
Attention
At this point it is possible to register a new Realm (+) to be part of the Multi-realm. For more information on this procedure, see the following link: Creation of Realms.
Activation of the Multi-Realm
Checking the Activated checkbox will activate the new Multireino and it will become part of the WOCU-Monitoring infrastructure. Afterwards, the Multireino will be available in the Home with the other monitored elements.
By default this option is enabled. By unchecking the box, the Multi-Realm will be configured but will not be monitored until it is re-enabled.
Cover image
Field to configure the cover image of the different Reports (Reports) that will be generated and exported in PDF format in the Multi-Realm in question. This visual attribute is useful for adding logos or corporate images that personalise our work environment.
Attention
If this field is not configured, only the WOCU-Monitoring logo will appear on the front page.
Once you have completed entering the data, review the final configuration and confirm the creation of the Realm by clicking the Add Realm button.