Informative banner settings
WOCU-Monitoring incorporates a fully customizable information banner, also known as the Login Disclaimer.
This component allows administrators to configure messages that will be automatically displayed immediately after a user successfully logs in. It is particularly useful for disseminating relevant information such as legal notices, security policies, operational notifications, or important announcements related to the platform.
Setting up a new banner involves several steps, explained below:
Access to the advanced WM Console Admin module
Go to the Settings menu and click on the option Configuration.
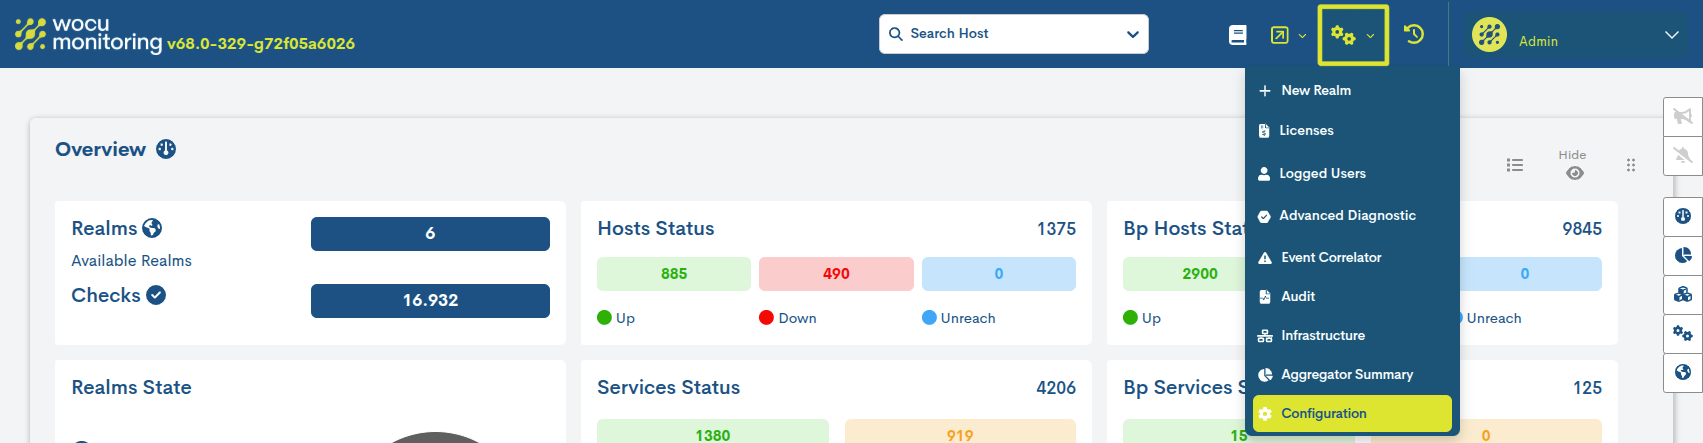
Next, you will access the advanced WM Console Admin module, the epicenter of many advanced WOCU-Monitoring functions.
To access this configuration module, you must enter access credentials authorized by your Administrator.
Once the option is selected, a new browser window will open, granting access to the advanced module.access to the advanced module.
Banner settings
Within the advanced WM Console Admin module, access the section Login Disclaimer > Disclaimer.
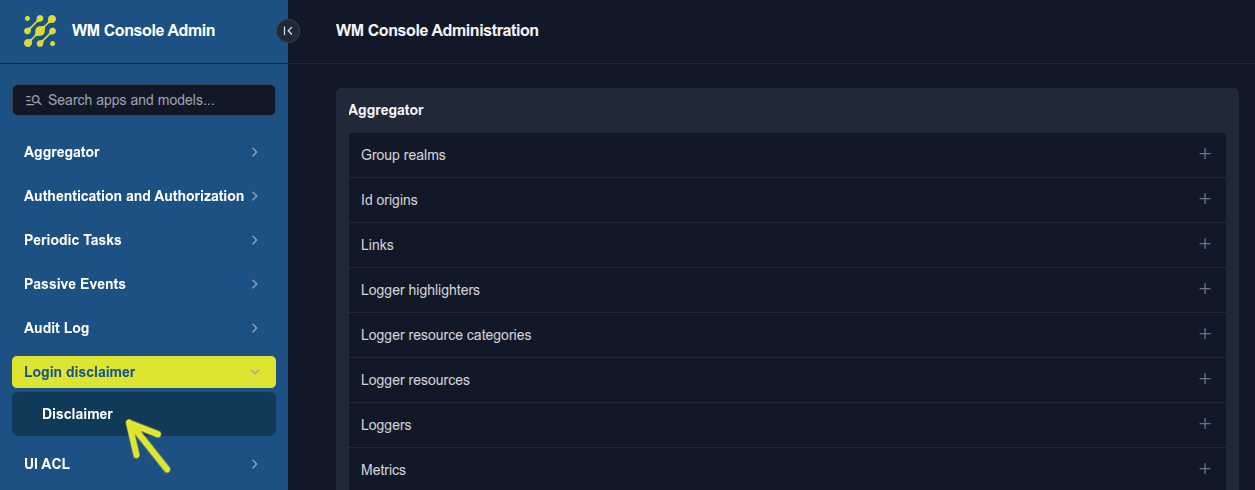
To create a new banner, press the + button located in the upper right corner.

Next, the configuration form will be displayed with the following fields:
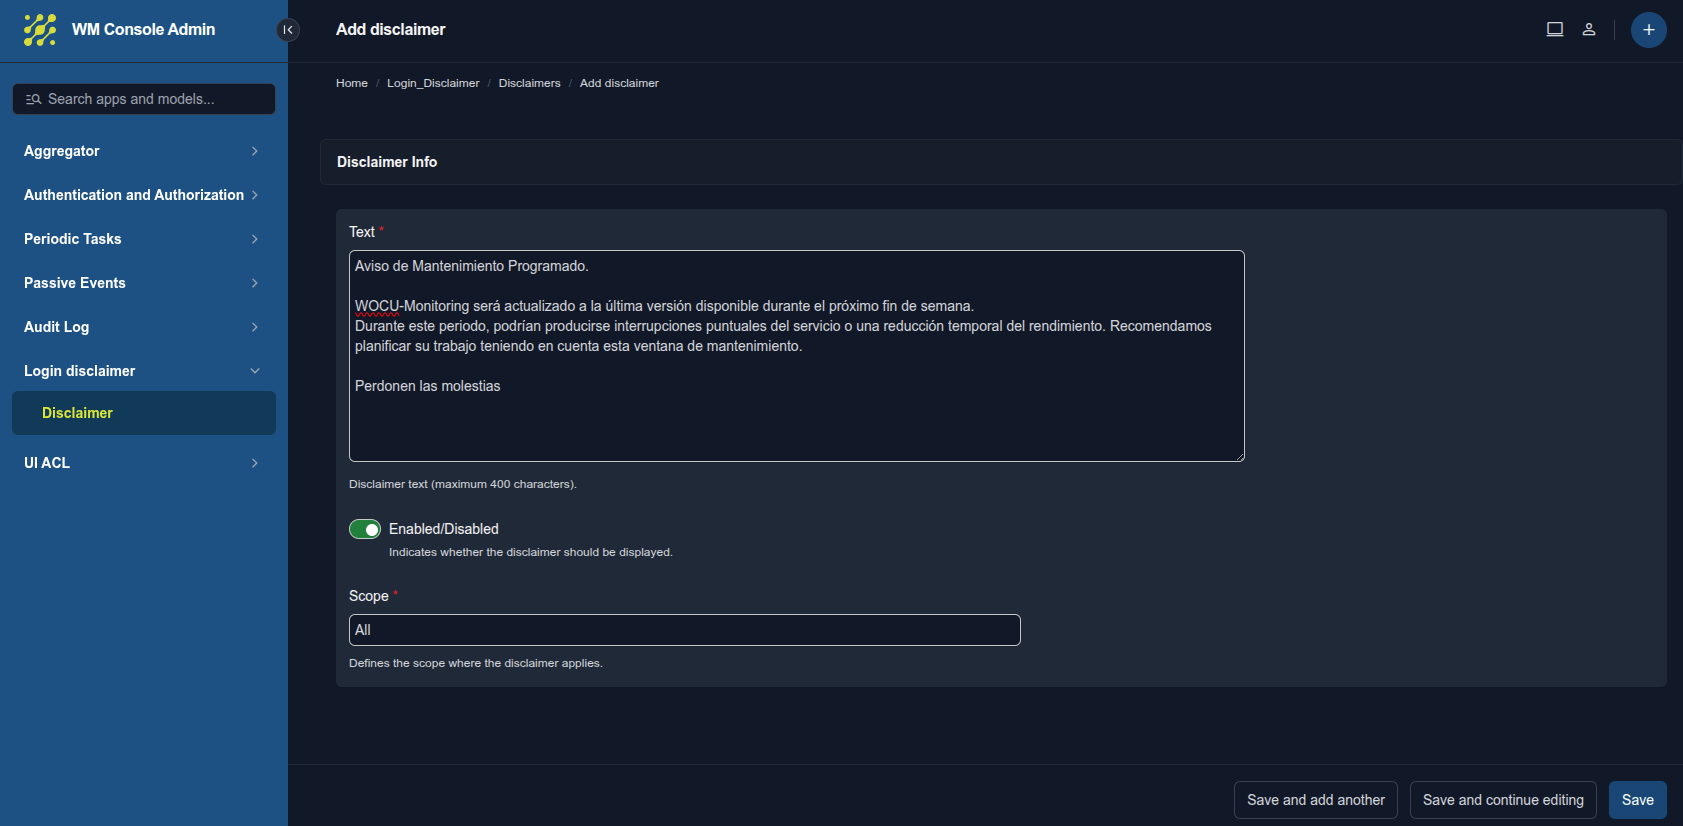
Text: This is the body of the message that users will see when accessing the application. This field has a maximum limit of 400 characters.
Enabled/Disabled: is a switch that determines the visibility of the banner.
Activated: the banner will be displayed immediately according to the defined scope defined.
Disabled: The banner is saved in the system but is not displayed to users.users.
Scope: defines at what level of the application the notice will be displayed. There are three options:
All: the banner will be visible in all enabled realms without any exclusion.
Realm: The banner is restricted to a specific Realm. Selecting this option will display the new, mandatory Realm selector.
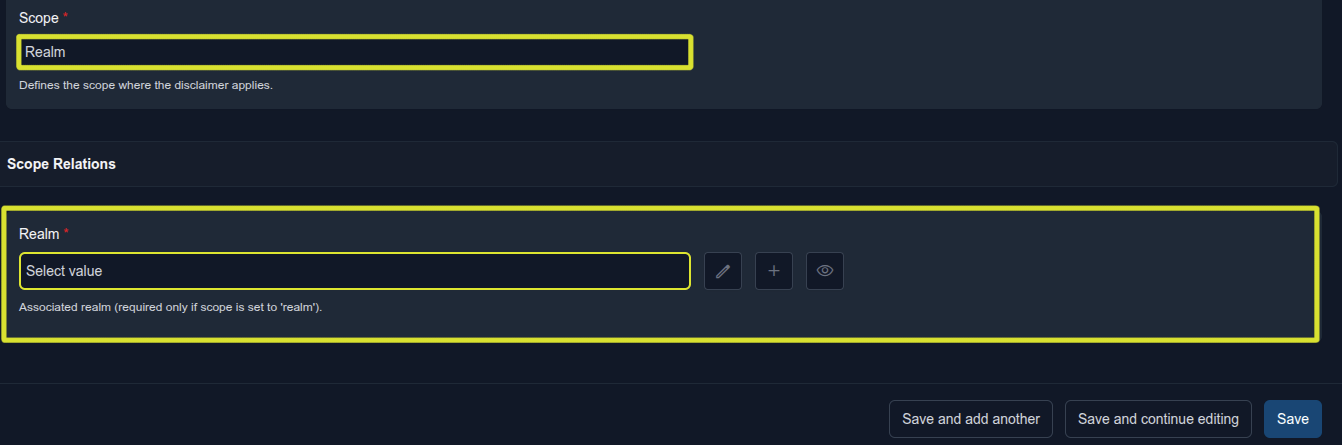
This selector allows you to link the banner to a specific Realm on the platform. Unlike the All option, here the banner will only be visible to users who have access to or are viewing the selected Realm.
To the right of the selector, quick actions are displayed for:
✏️ Edit: To modify the selected Realm. Access the configuration profile of that Realm.
➕ Add: This accesses the registration form for a new Realm, if it does not exist in the list.
👁️ Visualize: to see the details of the chosen Realm.
Note
This field is conditional. It will only appear and be required if the Scope is set to Realm. If you change the scope to All, this section will automatically disappear.
Multi-Realm: The banner is restricted to a specific multi-realm. Selecting this option displays the new selector Multirealm required.
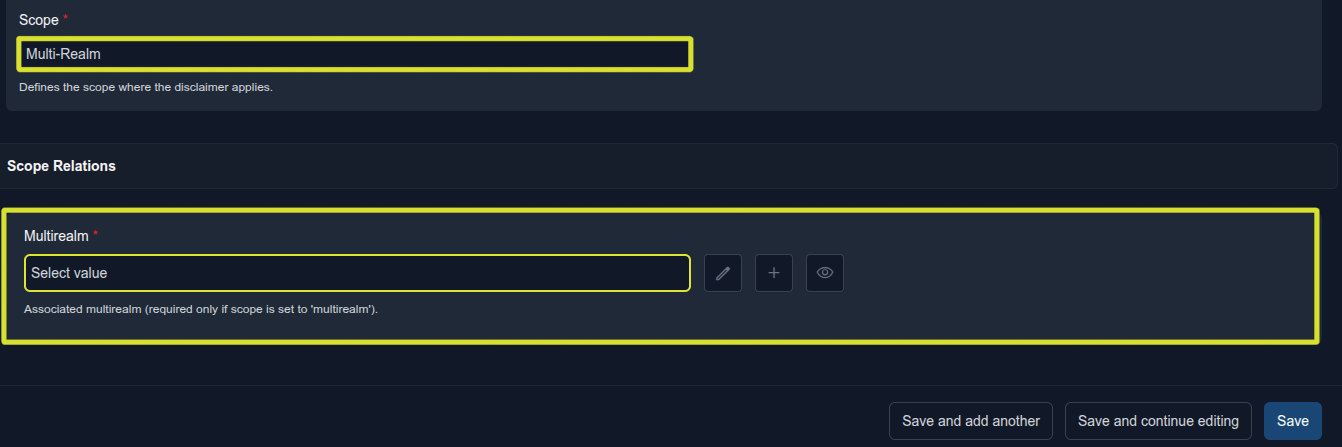
This selector allows you to link the banner to a specific Multirealm on the platform. Unlike the All option, here the banner will only be visible to users who have access to or are viewing the selected Multirealm.
To the right of the selector, quick actions are displayed for:
✏️ Edit: To modify the selected Multirealm. Access the configuration profile of that Multirealm.
➕ Add: This accesses the registration form for a new Multirealm, if it does not exist in the list.
👁️ View: to see the details of the chosen Multirealm.
Note
This field is conditional. It will only appear and be required if the Scope is set to Multirealm. If you change the scope to All, this section will automatically disappear.
After completing the setup, you will find three actions in the bottom right cornerthree actions:
Save and add another: Saves the current banner and clears the form to create a new one immediately.
Save and continue editing: Saves the changes made, but keeps the screen open for further adjustments.
Save: saves the banner and ends editing, returning normally to the main list.
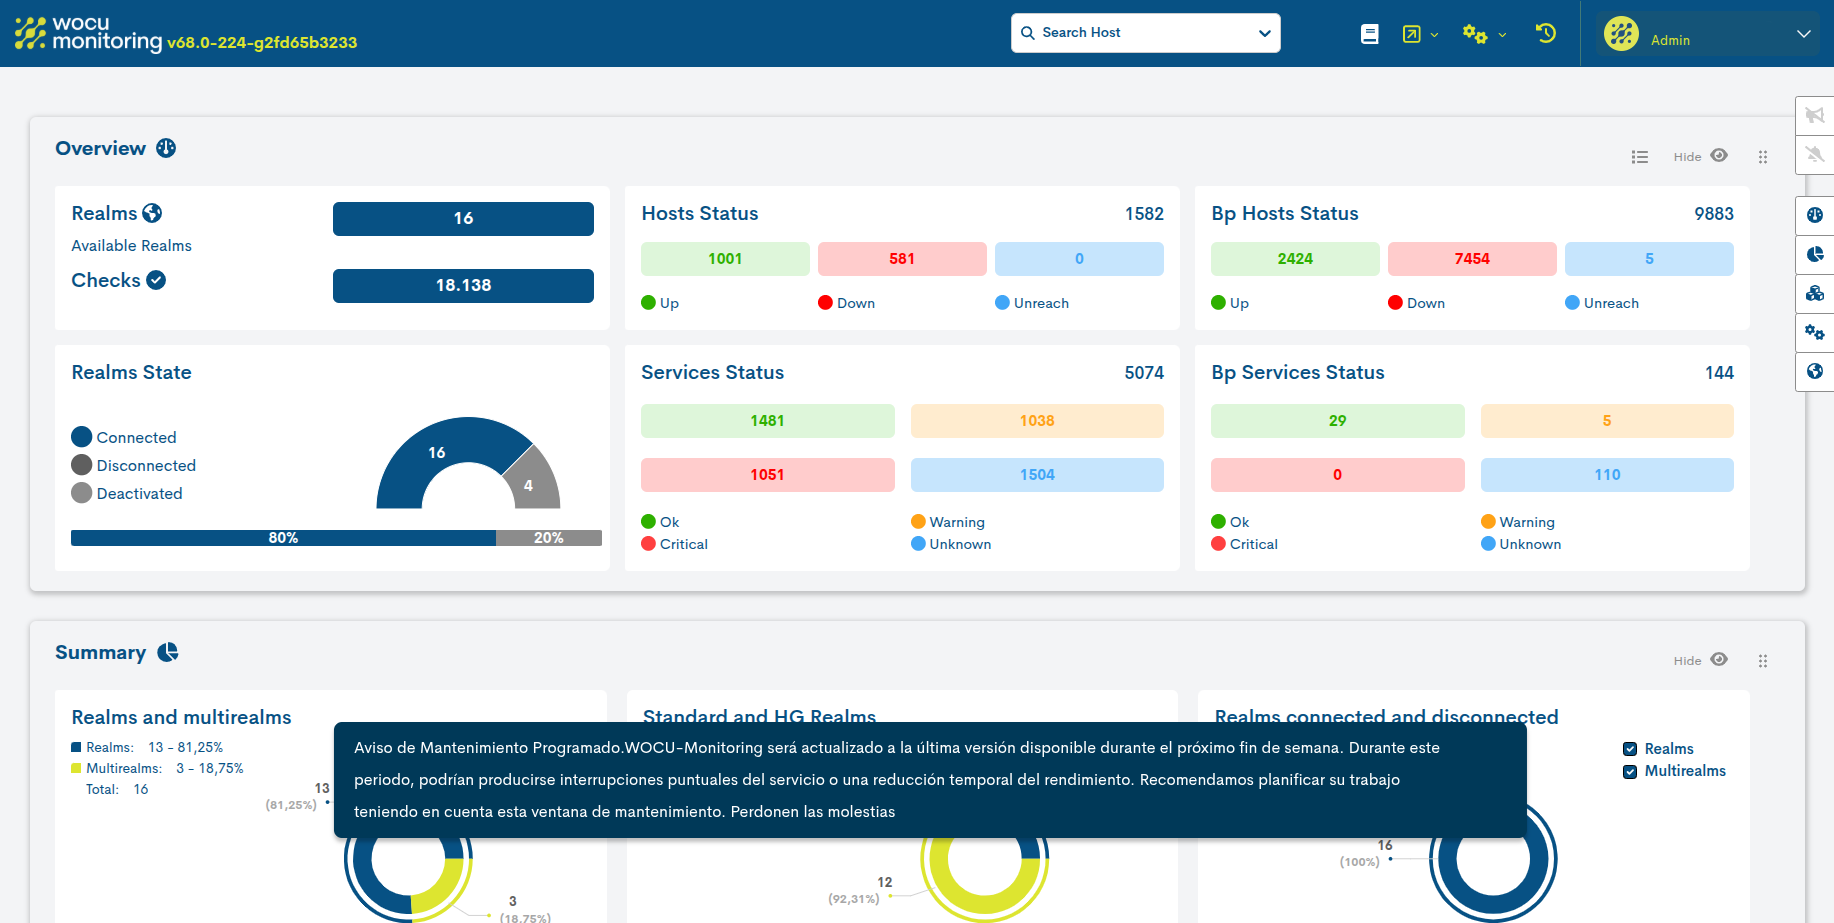
Banner display and acceptance
Once the banner content is configured and confirmed, you must log in again to view it. Upon logging in, the banner will appear as a new pop-up window overlaid on the main view.
This message is presented clearly and visibly, ensuring that the information does not go unnoticed.
To continue using the platform normally, the user simply needs to click anywhere on the blue area surrounding the message (outside the main box), which will close the notification quickly and easily.